Wednesday, December 21, 2011

Peppermint Oreos

Christmas Decorations 2011 065

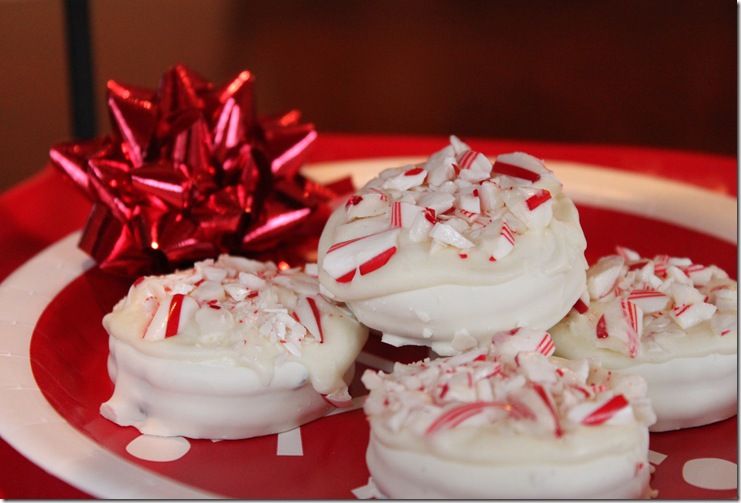
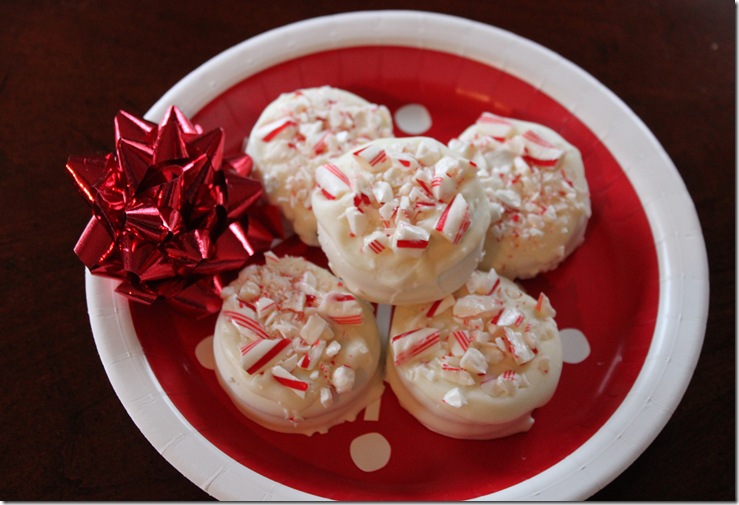
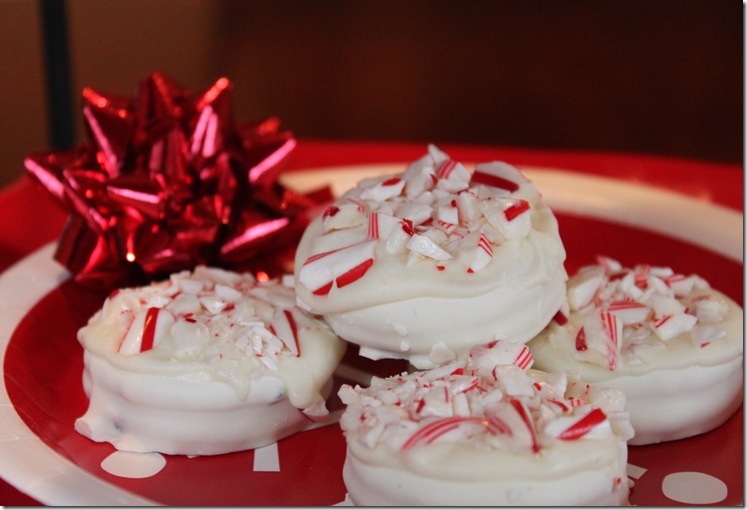
Another quick and easy holiday cookie and with Christmas less than a week away I need all the quick and easy I can get!

Christmas Decorations 2011 057

My daughter made these and is going to give them to some of her friends all dressed up in some cute candy cane bags. 

Christmas Decorations 2011 075

  Here is all you need to make them:

1.  A box of White Oreo Fudge Covered Cookies

2.  Some white chocolate chips ( you don’t need a whole bag, we used about 1/3 of a cup

3.  A couple of fresh candy canes. 

Melt your white chocolate chips in a heat proof dish and microwave for 30 seconds.  Stir, and then microwave them again in 20 second increments being sure to stir in between each time you heat them until they are smooth and melted. 

Unwrap your candy canes and put them in a zip-loc bag sandwich bag and crush them.  We used a rolling pin.

Spoon a small amount of the melted chocolate on top of a cookie and spread it evenly around.  Then immediately sprinkle with the crushed candy canes.  Turn any of the candy cane pieces over to show the color red.  Set aside to cool.   I suggest you do one cookie at a time so that your chocolate does not harden before you have a chance to add the candy canes.    That’s it!

Christmas Decorations 2011 064

Enjoy and Merry Christmas!!

Sunday, December 11, 2011

Tour of Trees

Christmas Decorations 2011 079

   On Friday night,  it was our turn to host part of the Tour of Trees.  Every year about 24 of our neighbors get together and do a progressive Christmas tour of 3 houses.  We started with appetizers and drinks at the first house, dinner this year was at our house, and the night ended at house number 3 for dessert and after dinner drinks.  It was a very fun night and I am glad my turn is done!  We don’t have to host again for 3 more years. :)

I served a lasagna and was biting my fingernails worrying if it was going to be enough to feed 24 people but in the end it was big enough and we even had some leftovers.   That lasagna was in the oven for two and a half hours and thankfully it was perfect when it was time to serve.  I had visions of  it being cold in the middle but it was nice and hot and I didn’t burn it!   Alongside the lasagna I served a big Caesar salad, lots of bread with olive oil for dipping or garlic butter, a big bowl of my Cranberry Pecan Orzo Salad, and a tray of Rosemary Ham with some salami and mozzarella pinwheels.  Beer, wine, and Pellegrino sparkling water and all was good.

    Christmas Decorations 2011 023 Christmas Decorations 2011 009 Christmas Decorations 2011 003

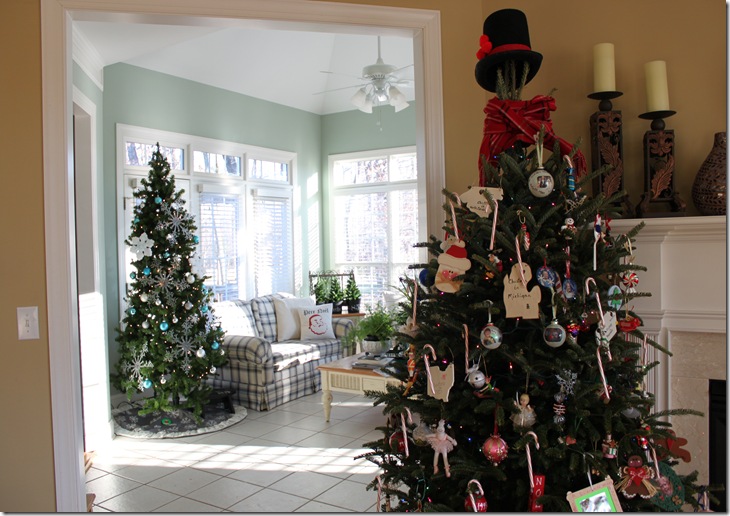
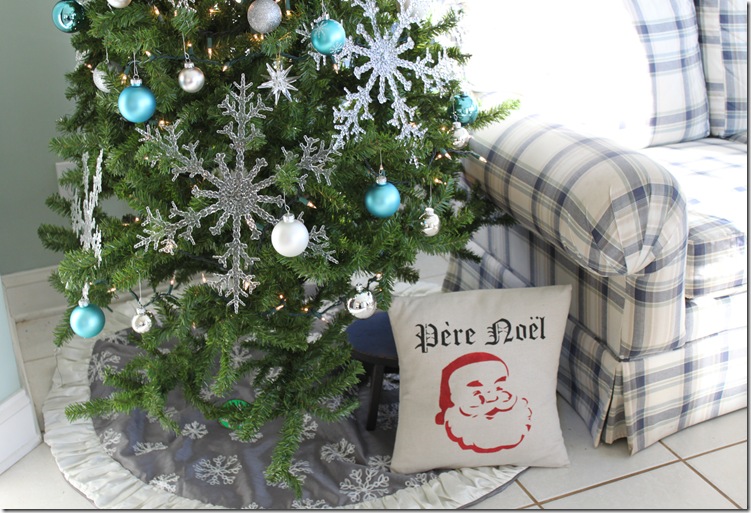
I decorated three trees.  Too much!!  Anyway, the tree in the sunroom was fun to do.  I had picked up a bunch of aqua blue and silver Christmas bulbs at Good will last year and saved them not sure what to do with them.  When I saw the giant snowflakes at the dollar store the idea came to me to do the sunroom tree in aqua and silver with the icy snowflakes.  It turned out cuter than I expected and was VERY inexpensive to do. 

The next tree was in my dining room.  Not a great photo but that is my favorite tree.  It’s a skinny tree and I collect ornaments that look like food and candy and that is what I decorate that tree with.  And then we got a real tree from our friends who have a Christmas tree farm.  If you live in the Greensboro area the real trees you can get from Bruce Wagoner’s Nursery are beautiful and fresh.  They run the tree lot at The Friendly Center outside of the Sears and soon to open Whole Foods and they have a new location at the corner of Church Street and Highway 150 in the Summerfield/Brown’s Summit area across from the new Lowe’s Foods.    They sell Fraser Firs and the smell of their fresh trees will put you right  in the Christmas spirit.

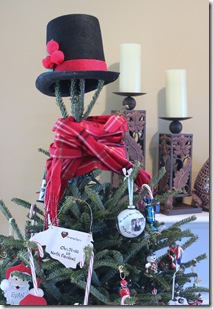
Now for that tree I needed a topper.  I decided to make a snowman hat topper for it and added an old red plaid scarf.  The hat was easy to do.  For Halloween this year, I dressed as Mr. Peanut and decided to give my Mr. Peanut hat a new life as a snowman hat. If you want to make one for yourself, I found the plain black hat at Party City.   I cut out a red band out of a sparkly red felt and glued it around the base.  Then I cut out two holly leaves out of green felt and glued them on along with three bright red pom poms.  Easy and cute.

Christmas Decorations 2011 026

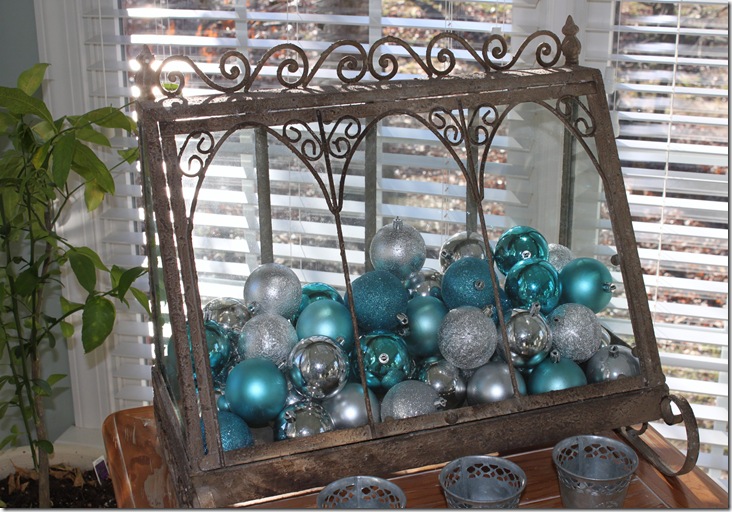
And this is one of my favorite new decorations that I did this year.  I told you I had a lot of aqua and silver bulbs compliments of the Goodwill.  I added them to my terrarium and I love it.

Christmas Decorations 2011 016

More silver bulbs added to a tray in the dining room.  You can’t get any easier than that. 

Christmas Decorations 2011 014

And finally, my very small Santa collection.  My Dad carved out four of the Santa’s and I love to put them out grouped together each year.  C’est tout!  It was a wee bit stressful getting decorated and entertaining so early in the season this year especially since I did something weird to my back and I have been trying to clean and cook and work  and not feeling all that great.  Back trouble is new to me and not much fun.  Anyway, whoa is me…it’s nice now to have it all done!

Sunday, December 4, 2011

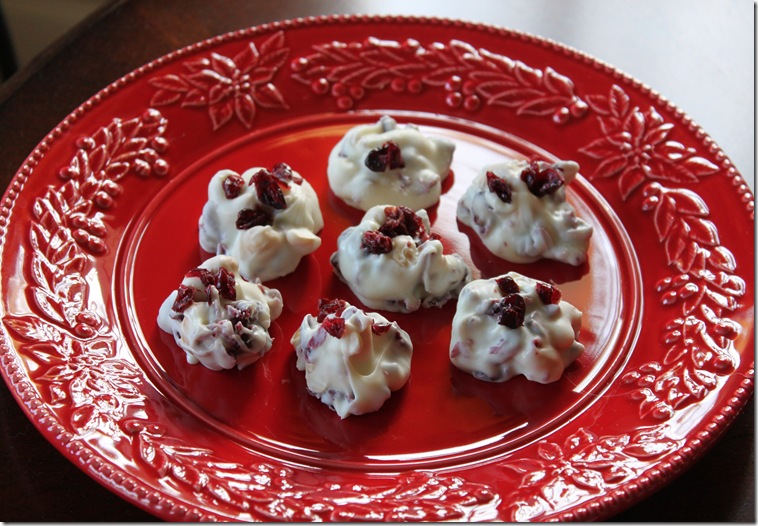
Cranberry Cashew Clusters

 Christmas Decorations 2011 033

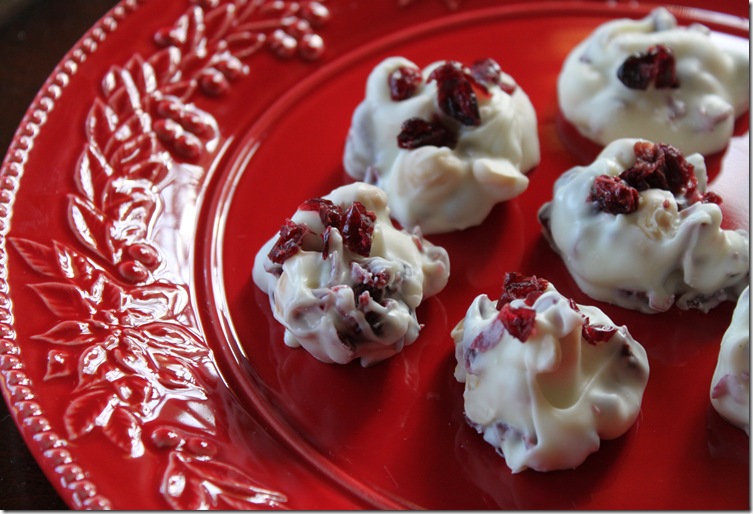
Tis the season for all things cranberry.  These might be the ticket if you are looking for something quick, sweet, easy, crunchy, and chewy.  And they were very easy to make.

Cranberry Cashew Clusters

12 oz. bag of white chocolate chips or vanilla-flavor candy coating, chopped.

3/4 cup dry-roasted cashews

3/4 cup dried cranberries

You can either melt your chips or candy coating in a double boiler or in the microwave like I did.   I placed 1 bag of white chocolate chip in a heat proof bowl and micro-waved them in 30 second intervals being sure to stir them in between each interval until they melted.  Then mix in your chopped cranberries and cashews.  You can either chop your cashews or leave them in big pieces.  I left mine in big pieces.  And I also saved a few chopped cranberries to add to the top for more color while the clusters were still wet.  Drop them on a cookie sheet lined with either wax paper or I used a silcone non-stick mat.  Let them cool.  Store at room temperature for up to 1 week, or freeze up to 3 months.

Christmas Decorations 2011 028

These are very sweet and great to make ahead of time.  If you freeze them, pull them out about 30 minutes before you want to serve them. 

Thursday, December 1, 2011

Quick and Easy Snowflake Pillow

Christmas Decorations 2011 009

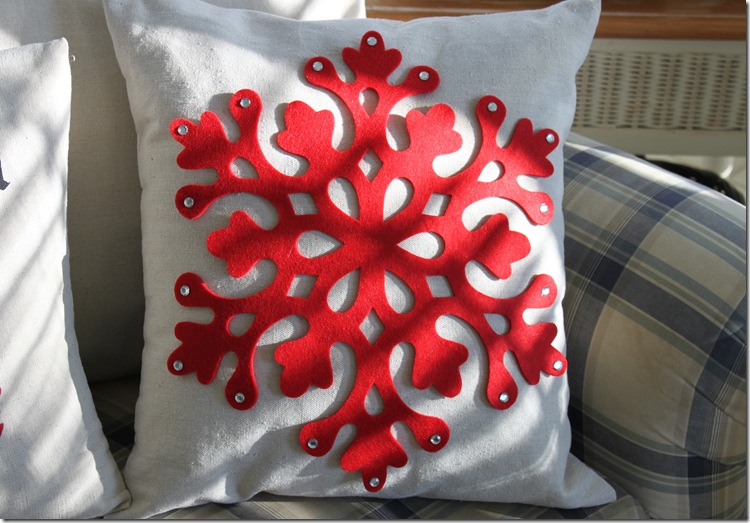
This Christmas Snowflake Pillow was a happy accident. Yesterday, I posted my Père Noël Pillow so I must have Christmas pillows on the brain but anyway, I was shopping in Pier One Imports today, (and wow did they have a lot of cute things for the holidays!) and I came across this felt snowflake cutout placemat. Pier One is selling them for $2.95 each. I was looking at it and I thought that I might take it home and try to use it as a stencil. My plan was to take some red spray paint and lay it on a pillow cover and then paint it. Well, of course, I could still do that but after I got it home and I placed it on my pillow, I thought it looked beautiful just the way it was and thought why not just glue it on???????

Christmas Decorations 2011 006

A little bit of fabric glue is all it took and WOW! I think it looks great. YOU can do this! You can either make your own cover for a pillow out of Painter’s Cloth like I did or simply add it to any other decorative pillow you might have. I like the simplicity of the red on the plain canvas background. And the red felt placemat already had the sparkly rhinestone embellishments on them. This could not have been any easier!!

I am linking this post up to Funky Junk Interiors. Lot's to see over there!!

Wednesday, November 30, 2011

Père Noël Stenciled Pillow

 Christmas Decorations 2011 054

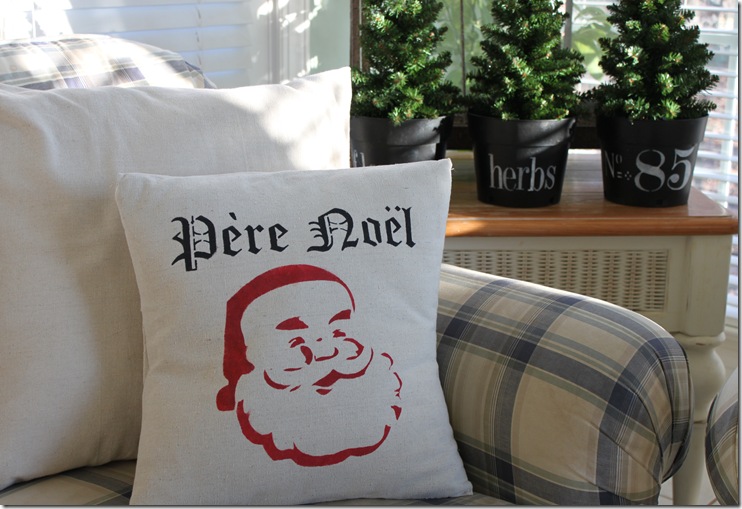
I have started decorating for Christmas and I almost forgot to put this pillow out.  I made it this past summer and it’s been sitting on the top shelf of my closet ever since and almost missed it’s début.    I made it from a stencil that I ordered from my favorite stencil source, Maison de Stencils.  I made a quick cover for an old pillow that I had out of some painter’s cloth.  You can check out one of my past posts called Stenciled French Pillow to see how I did it.   Then it was just a matter of stenciling the image on to the pillow cover.  I am really happy with it!

 Christmas Decorations 2011 057 

And earlier today I found a great tree skirt at TJ Maxx for the snowflake tree I am working on in the sunroom.   You’ve got to love the dollar store for those giant snowflakes.  I am almost done with that tree.  I am working on three trees this year.   Yes, three and it’s about to kill me!   And it’s only because I am hosting part of the progressive dinner for the annual “Tour of Trees” party.  I have until December 9th to get them done.   Otherwise, I would have left half of the decorations boxes in the attic!  I’ll be back soon with more  Christmas tree photos as I get them done.  Have you started decorating yet???

Monday, November 28, 2011

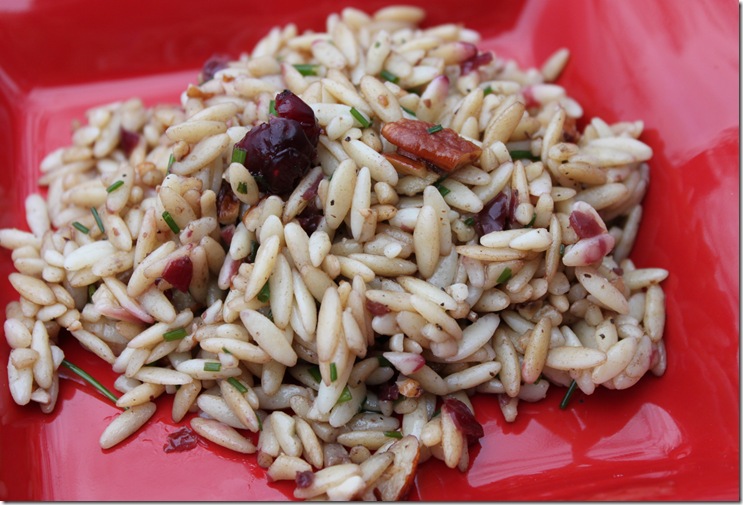
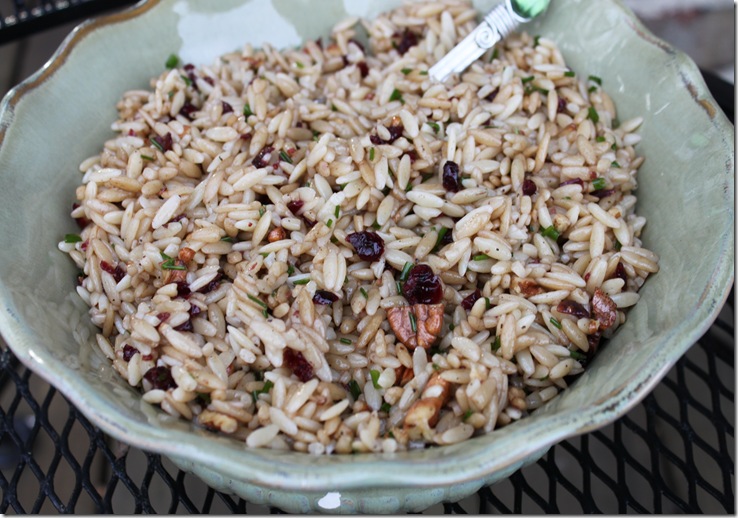
Cranberry Pecan Orzo Salad with Chives

 Cranberry Pecan Orzo Salad 007

This is my new winter salad.  It’s just the thing to make this time of year.  It’s easy, delicious and pretty to look at especially for the holidays.  The deep red cranberries and the green chives make it perfect to serve at a party this time of year and that’s exactly what I am planning to do.

We are hosting the dinner part of a 3 part holiday progressive dinner party.  The idea of the party is a great one.  Especially since may of us in our neighborhood are not from here and most do not have family around to share the holidays with.  I think the idea originally started so that we could all take turns stopping by each other’s house and see the Christmas decorations and Christmas trees.  The dinner is called the Tree Parade and everybody gets to host one part of the dinner every three years.  I can’t believe it’s our turn again

Cranberry Pecan Orzo Salad 006

We will start out at someone else’s house for appetizer’s and drinks.  Then proceed to our house for the main course.  Then we will finish the night up at a third house for desserts and after dinner drinks.   I have decided that for our part, I am going to serve lasagna, a couple of salads, and an assortment of breads and rolls. 

One of the salads I am going to serve is this Cranberry Pecan Orzo Salad with Chives.    I made a batch as a trial run and got the thumb’s up from everyone including my daughter who I will be send a large portion back with her when she heads back to finish up the semester at school. 

Here’s the recipe:

Cranberry Pecan Orzo Salad with Chives

1 16 oz. package of orzo pasta.

1/2 cup olive oil

2 Tbsp. Balsamic Vinegar

1/2 cup of dried cranberries, chopped into small pieces

1/2 cup of toasted pecans, chopped into small pieces

1 bunch of chives.

t tsp.Salt

1/2 tsp pepper

Prepare the orzo according to the directions on the package.  I added some salt to the water to help add some extra flavor.  While the orzo is cooking, chop up the dried cranberries and pecans.  I toasted my pecans in the oven at 350 on a foil lined cookie sheet for about 12 minutes for extra crunch and flavor.  Be careful not too burn them.

Drain your orzo pasta and move to a large mixing bowl.  Add the cranberries and pecans.  Add the olive oil and mix well.  Then add the Balsamic Vinegar and mix well.  Take your chives and with a pair of kitchen shears, snip the chives into small pieces and add to the salad.  Sprinkle with salt and pepper.  Taste and adjust the salt and pepper if needed. 

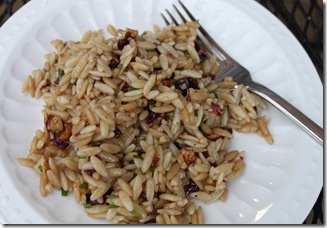
Cranberry Pecan Orzo Salad 012 Cranberry Pecan Orzo Salad 015

And serve with,                         or without Feta cheese.  Delicious. 

Saturday, November 26, 2011

Simply Truffles, A new Cookbook by Patricia Wells and a Class Luncheon at Southern Seasons

image

I took another class at Southern Season’s in Chapel Hill the day after Thanksgiving.  Talk about a food filled weekend!    The lunch classes at Southern Seasons are great.  Not only do you get to watch the dishes being prepared, you get a copy of the recipes and best of all you get to enjoy eating them as your lunch.  This time I was excited to hear Patricia Wells talk about her new cookbook called Simply Truffles and have a wonderfully prepared lunch paired with two new wines to try.  Our lunch started with a Watercress, Endive and Beet Salad and was then followed up by a Creamy Polenta with Truffles and a Poached Egg.  So delicious!  It’s one of the recipes in Patricia Well’s new cookbook called Simply Truffles.  See the two generous slices of a black truffle sitting on top the poached egg?  Adding the black pepper was my idea.  :)  We finished with La Maison Du Chocolat’s Bittersweet Chocolate Mousse from Patricia’s book called The Paris Cookbook.  Rich and extremely chocolaty.

imageWine and Cheese class 034

Patricia’s new cookbook Simply Truffles is full of beautiful photos, delicious recipes, and interesting facts and wonderful stories about truffles. 

Wine and Cheese class 037

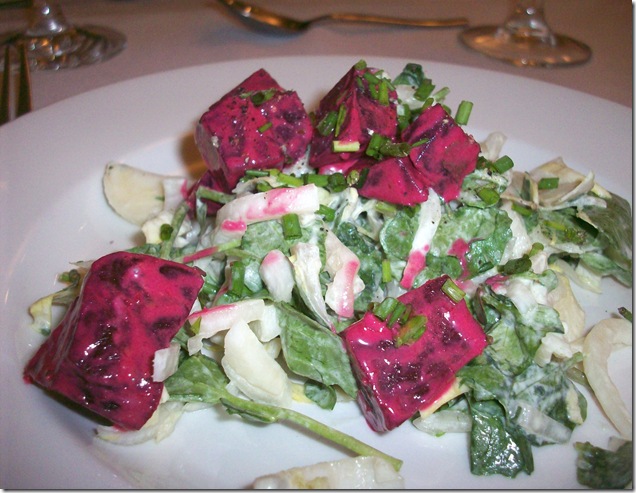
Watercress, Endive, and Beet Salad from the cookbook Salad As A Meal by Patricia Wells.

This salad was very good.  Unexpectedly so.  I really don’t eat a lot of beets although with color like that I am sure they must be loaded with antioxidants and be good for you.  The dressing was Creamy Lemon-Mustard Dressing and it was light and the lemon was subtle and not overwhelming.  I really liked it. 

       image image

The white truffles are highly prized with a price tag to match.  The more affordable black truffles are what we were able to taste and they have an aromatic quality and of course are delicious. 

My favorite tip that Patricia gave when she was speaking was that she like to place her truffles in a glass jar with 6 fresh in the shell raw eggs and store them in the refrigerator for a few days.  The egg shells are porous and absorb the aroma of the truffles and flavors the eggs.  Then she prepares the eggs anyway she wants as a meal and has truffle flavored eggs.  Great idea for helping to justify the price of splurging on truffles!

Wine and Cheese class 043

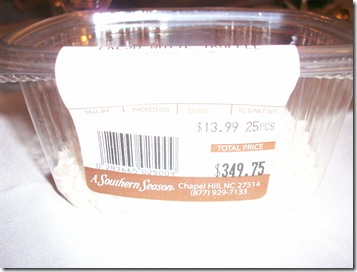
I had to take a photo of the container holding two golf ball sized white truffles.  Yes, that price tag does say $349.75.  Unbelievable!!  I knew truffles were expensive but I had no idea!  The black truffles however, are a lot less.

Someday, I hope to attend one of her week long classes in either Paris or Provence.  I love her books and truly enjoyed listening to her talk about truffles and her life in France.  Visit Patricia Well’s website and you can take a peek at her other books and get more information about here cooking schools.  Who would want to go to Paris and take a cooking class?!

Friday, November 25, 2011

Thanksgiving, Boursin Stuffed Mushrooms, and Roasting the Turkey at High Heat

Wine and Cheese class 030

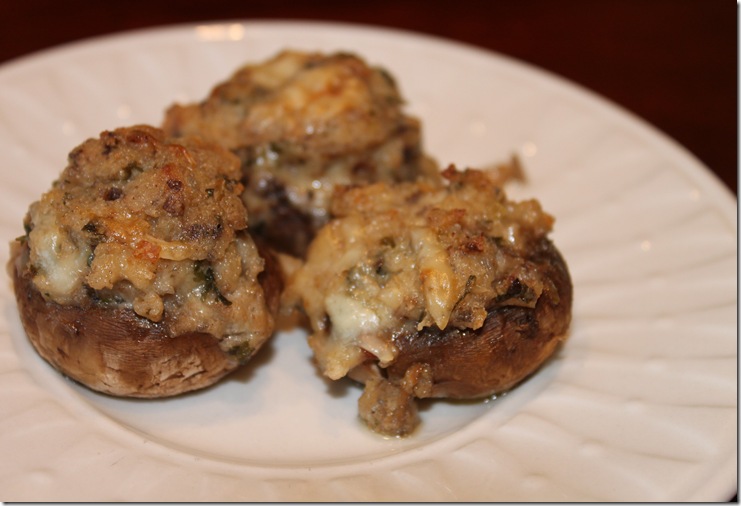
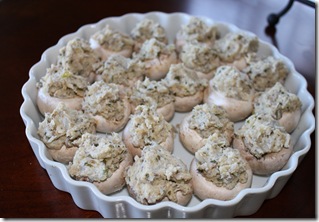
Another Thanksgiving has come and gone.  We feasted all day long and with sunny skies and temperatures in the low 70’s, it could not have been more perfect.  Well, maybe if the Detroit Lions had won…but other than that…perfect!  My daughter insisted on making the Boursin Stuffed Mushrooms and who was I to argue?  It is such a pleasure to have her happily helping me in the kitchen these days. 
Wine and Cheese class 020  Wine and Cheese class 033

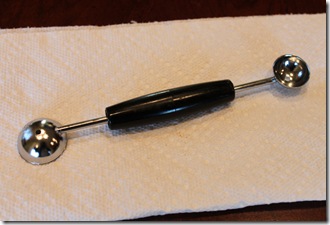
These mushrooms are one of our favorite things to eat and people actually fight over the last one when I take them to a party.  They fit perfectly in the quiche plate and we used a new tool…a melon baller… this time to remove the mushroom stems and “hollow” out the mushrooms.  It worked perfectly.  We had nice and neat and perfectly shaped cavities to stuff the mushrooms. 

In case you missed it, here is the recipe for :

Boursin Stuffed Mushrooms

Boursin Stuffed Mushrooms Makes about 16 Preparation Time: 10

minutes Cooking Time: 25 minutes

Ingredients:

1 package (10 oz.) mushrooms

2 tablespoons unsalted butter

1/4 cup finely chopped onion

1/4 cup unseasoned dry bread crumbs

1 package (5.2 oz.) Boursin® Garlic & Fine Herbs

1 tablespoon chopped fresh parsley

1/4 teaspoon salt

1/8 teaspoon ground black pepper

2 tablespoons grated Parmesan cheese (optional)

Instructions:Preheat oven to 400°F. Remove and chop mushroom stems. In 12-inch skillet, melt butter over medium-high heat and cook mushroom stems and onion, stirring occasionally, 5 minutes or until tender. In medium bowl, pour mushroom mixture over bread crumbs. Stir in Boursin, parsley, salt and pepper. Evenly spoon mushroom mixture into mushroom caps; arrange on baking sheet. Bake 20 minutes or until mushrooms are tender and golden. Sprinkle with cheese.

The Stuffing

Another pleasant discovery yesterday was the corn bread stuffing.  Yes, the Southerness is starting to soak it’s way into my bones!  It was by far much better than the stuffing I have have been making all these years.  And I used the Pepperidge Farms Cornbread stuffing mix.  Imagine how much better if next year I make my own corn bread.  :)

THE TURKEY

Now for  the turkey.  In the past I have been know to toss my turkey in a Reynolds Cooking bag and call it a day.  The bags work great and there is no way to mess us your turkey.  I was going for ease and convenience.  Well, this year I decided to make some changes.  Instead, I made a rub that I have used on my oven roasted chicken and it was delicious.  I roasted the turkey at high heat the entire time with a foil tent over it.  I roasted a 12 pound turkey at 400 degrees and that bird was done and gorgeously brown in 2 and 3/4 hours!  And it was Delicious!   And don’t get me started on how delicious the gravy was made with the drippings that was for the most part already seasoned with dry rub that was part of the drippings.  So good!  This will be my new turkey roasting method going forward.  Sorry, no photos…forgot to pull the camera out when it came out of the oven.  Take my word for it, she was beauty!

Here is a link to the roasting times if you want to give the High Roasting Heat Method a try. 

And lastly, here is the recipe for the rub that I used.  I rubbed the entire turkey with olive oil, cut up a lemon and inserted it into the cavity, and then I rubbed the entire turkey with this dry rub.  It gave it a beautiful color and delicious flavor.

Dry Rub

This was used on a 12 lb. turkey

Olive Oil

2 tsp. kosher salt

2 tsp. black pepper

2tsp dried oregano

2 tsp dried basil

2 tsp. paprika

1/8 to 1/4 tsp. cayenne pepper

So, all in all it was a very nice Thanksgiving holiday.  I hope your’s was as well.  I know I don’t say it enough, but THANK YOU to all of you who stop by here to visit and for all the lovely comments.

Now, it’s time to wrap my head around the fact that Christmas is just a few weeks away.  I’m so not ready!

Thursday, November 17, 2011

Remember These???

image           image

Spotting these in the Vermont Country Store Catalog took me on a mini trip down memory lane. 

I ordered one of each.

I love buying my own stocking stuffers. 

Thursday, November 3, 2011

Wine and Cheese Class at Southern Seasons


Wine and Cheese class 021

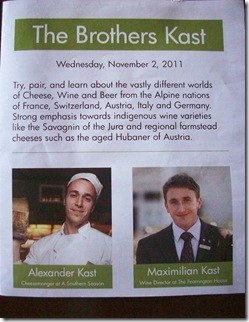
I attended a wine and cheese tasting class last night at Southern Seasons in Chapel Hill with a friend.  We had a great time and got to taste wine and eat cheese while learning all about wine and cheese from the Alpine nations of France, Switzerland, Austria, Italy and Germany.   The tasting was given by The Brothers Kast who I found out have ties to Michigan.  Their father was one of the founders of American Spoon Foods in Traverse City!   

Wine and Cheese class 025 Wine and Cheese class 029

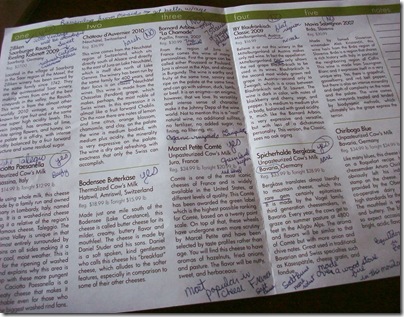
Alexander Kast is the Cheesemonger at Southern Seasons and his brother Maximilian Kast is the Wine Director at The Fearrington House.   They were both so personable and interesting to listen too.  They both spent a lot of time travelling in the Alpine region when they were growing up and had first hand experience with some of the wines and cheeses we were tasting and with the people who made them.  I scribbled lots of notes on my class program to help me remember what I liked and why.

Wine and Cheese class 014  Wine and Cheese class 008

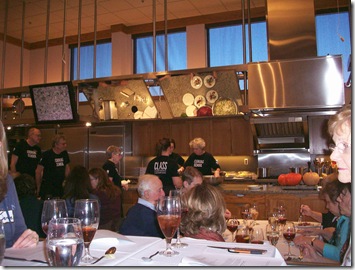
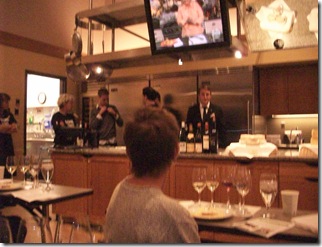
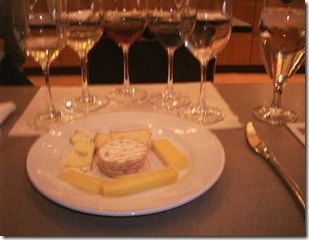
The classroom at Southern Seasons is wonderful.  A long granite counter in the front of the classroom had overhead mirrors and large video screens.    Each seat had a plate of five different cheeses with  glasses of the five different wines that they were paired with.  My kind of dinner.   I enjoyed all five of the cheeses and most of the wines.  I volunteered to be the designated driver so I only indulged in a few sips here and there.  I will mention the wines but my focus here today is on the cheeses since I really didn’t participate fully in the wine tasting part of the class.

Wine and Cheese class 018

We tasted five cheeses:

1.  Caciotta Paesanella, Valsassina, Italy.  This one reminded me a lot of Taleggio but with a slightly stronger taste.  It’s a washed rind cheese which  typically has a strong  aroma but actually the cheese tasted much milder than it smelled.  Very good.  This was paired with Zilliken Saarburger Rausch Rieslin Kabinett 2009, Saarburg, Germany (which was my personal favorite of the night.)

2.  Bodensee Butterkase, Amriswill, Switzerland.  I really liked this one.  I thought it was a nice snacking cheese.  It’s called a butter cheese for it’s milder, creamy, buttery flavor and mouth feel.  It is made by Daniel Studer and his sons and Alex Kast told us the story about meeting him and that the maker liked to call this one his “breakfast cheese”.  This was paired with Chateau d”Auvernier  2010 Neuchatel, Switzerland

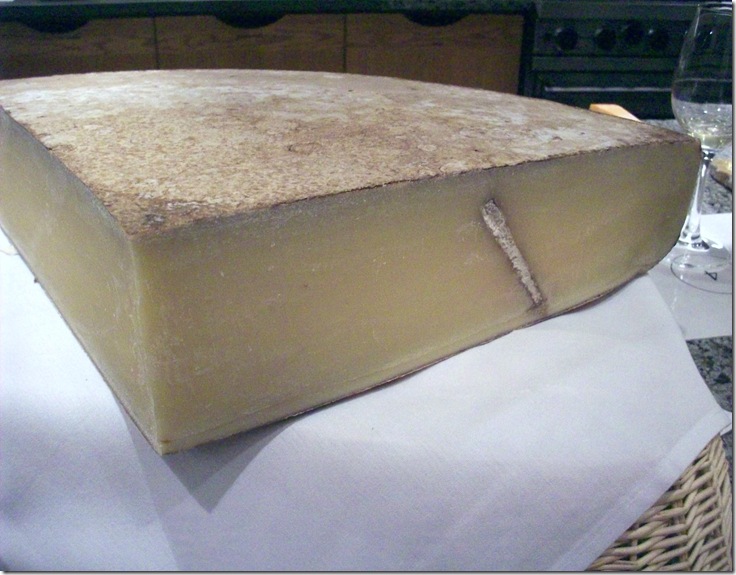
3.  Marcel Petite Comte, Jura, France.  This one was my favorite cheese of the night and it was a very good one at $24.99 a pound.  It  had been awarded the green label which is the highest possible ranking for Comte based on a twenty point scale.  This one had aromas of hazelnuts, fried onions, and pasture,  The flavor was nutty, sweet and herbaceous.    The photo above shows where a plug of the cheese had been pulled as it was aging and being tested for taste.  This one was paired with Bornard Arbois “La Chamade”, Pupillin, France, 2007

4.  Spicherhalde Bergkase, Bavaria, Germany.  This one was also very nice.  It has been made by the Vogel family for the last three generations in Bavaria.  The cows graze at 4800 feet in the Allgau Alps.  It reminded me of the Comte we tried but had more onion and chive to it.  This one was paired with IBY Blaufrankish Classic 2009,  Mittleburgenland, Austria.  (For the record, my friend liked this wine the best and purchased a couple of bottles to take home.)

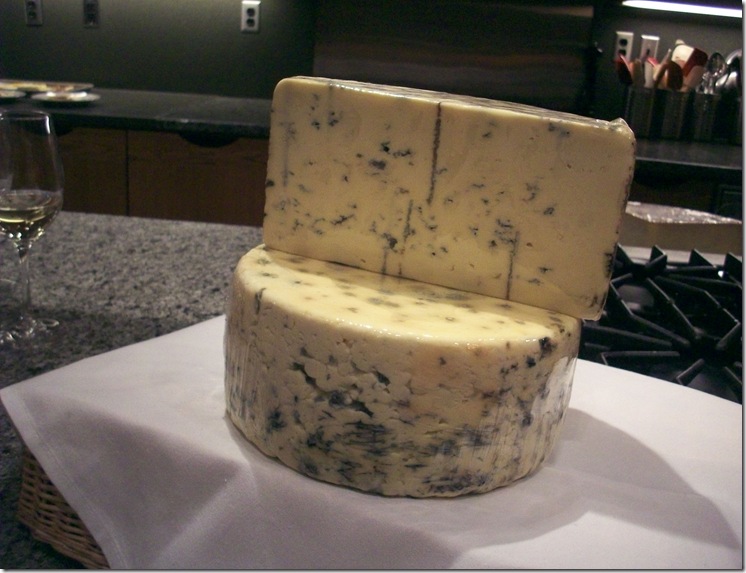
5.  Chiriboga Blue, Bavaria, Germany.  And finally we tasted this beauty.  It’s a very creamy (triple creme) blue with minimal bluing.  It was made by Arturo Chiriboga who surprisingly is from Equador in South America but lives and makes his wonderful cheese in Bavaria, Germany.  The mouth feel on this was was very rich, dense, and buttery.  This one was paired with Movia Sauvignon 2007, Brda, Slovenia.

Wine and Cheese class 022

The class was fun and entertaining and it let me experience a variety of wine and cheeses that I would have never picked out on my own.  I love learning about new cheeses and wines and especially the stories behind the people who make them.  The Brothers Kast was a great class and I am looking forward to their next class which they think will be offered in the Spring.  Sign me up.

Friday, October 28, 2011

End of October Randomness

I am really going to miss Regis.  What a curmudgeon but so loveable!  And although I am sure he feels it is his time to go, I will miss him.

I miss Oprah only a tiny bit.  She was a good filler in my day right before I had to get serious about making something for dinner.    I thought she got a little bit too preachy for a while but I was able to take her with a grain of salt on those days.  Dr. Oz is great, but I think the format of his show is already starting to get old.  I mean just how many days of the week can we watch someone  from the audience don the the rubber gloves and  pick up and peel away the towel on the table  to reveal more human organs plagued with disease?  The grossed out factor is starting to wear thin and now it’s just plain weird.

I haven’t had a cold in 3 years!  Honestly and I’ve been keeping track.  BUT, I have a whopper today, compliments of my teenage son.  I am miserable.   I have been using Zicam for the last week and I honestly thought I beat it but last night it  hit me like a ton of bricks.  I don’t just get your average cold.  I get the knock you on your butt kind.  You know the ones where your eyes don’t stop tearing for days so mascara is worthless and you can’t wear your contacts so you have to wear your glasses all day and you are virtually guaranteed of having an extremely bad hair day for a minimum of  three days in a row.    I have also been known to walk around with a tissue hanging out of one or the other nostril.  Oh, look, I have one tucked in there now.  It’s a good look.

I am hoping I feel better for the BIG Halloween party tomorrow night.  Our friends go all out and have a band  and a bartender who makes spooky themed  drinks that you select off of a menu.    They host it every other year.  And this is an “on” year.  Still working on our costumes.  I can’t reveal just yet what we are going to be.  It’s still a secret.  Let’s just say for now that  feather boa’s are required for one and a top hat for the other.

I can tell you that we made a cupcake costume for my daughter last weekend that turned out cute.  She took it back to school with her for the big street party on Franklin Street in Chapel Hill where she goes to school.  We took some shiny/silvery fabric and backed it with some iron on interfacing to help make it stiff and then we folded it accordion style so that when it wrapped around her it looked like a cup cake liner.  We then took a piece of cardboard that we cut to look like the icing on top, wrapped quilt batting around that and glued it down, then wrapped that with a pink satin fabric and glued that down.  Glued on some colored mini pom poms to look like sprinkles.  Then we took a bright pink puffy shower sponge thingy, glued some twisted green pipe cleaners to make a stem and then attached that to a head band to be the cherry on top.  It turned out cute!  No pictures yet but I hope to have some next week after the big party.

I am taking a wine and cheese class next week at Southern Season’s in Chapel Hill next week with a friend.  Wish we didn’t have to drive so far to do fun things like this but that’s just the way it is. 

I am amazed every time I vacuum and see just how much dog hair and dirt gets sucked out of my carpets. It’s repulsive really.

Oh, I am getting a cleaning lady!  We are in the early stages of negotiation (with my husband).  My sad little wrists were thrown into carpel tunnel braces two weeks ago from the combination of scrubbing the shower, carrying too many grocery bags at one time, and playing tug of war with the dog.  This is going to be such a luxury to me.  I think I want the kind that sends a “team” in and gets in done in a few hours.  The company I am looking at  has someone with a vacuum strapped to their back! 
I still haven’t bought any Halloween candy.  If I wait much longer I’ll be forced to pass out little boxes of raisins.  I always thought that was the worst treat you could get when I was a kid.  Raisins!  Who gives out raisins?  That and pennies.  I hated getting pennies too. 

Wednesday, October 26, 2011

Marinated Pork Tenderloin

New Camera Photos 007

It felt good to be cooking something that everyone in my house likes.  And lately I have been in the mood for grilling.  We are having some beautiful Fall weather these past few days.  The days are bright and sunny with Carolina blue skies, temperatures in the 70’s, and the leaves are beautiful right now.  Last night was a nice night to light up the barbeque. 

I marinated a pork tenderloin yesterday and thankfully it was a “protein” day for my body building son although I tried to cover my bases by offering up both a pan of roasted potatoes and a pot of jasmine rice in case it was a “carb-loading” day.   Typically, I only barbeque a tenderloin on the weekends or  when I have a crowd to serve so this was a nice change for a Tuesday night dinner.

New Camera Photos 011

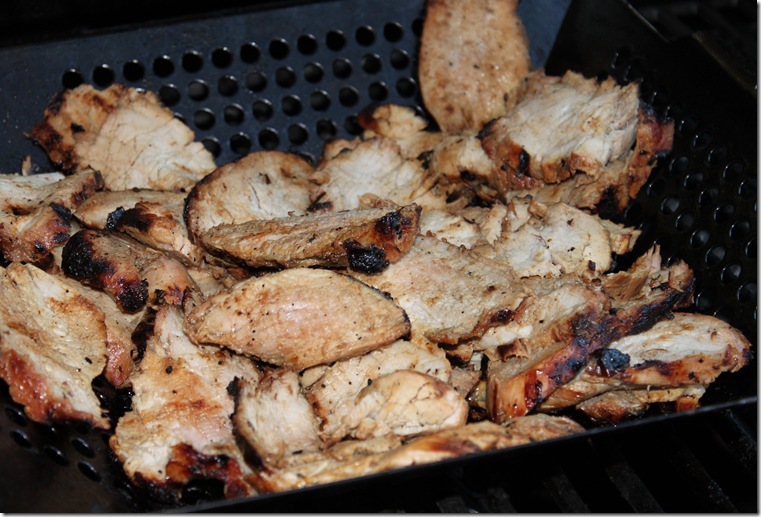
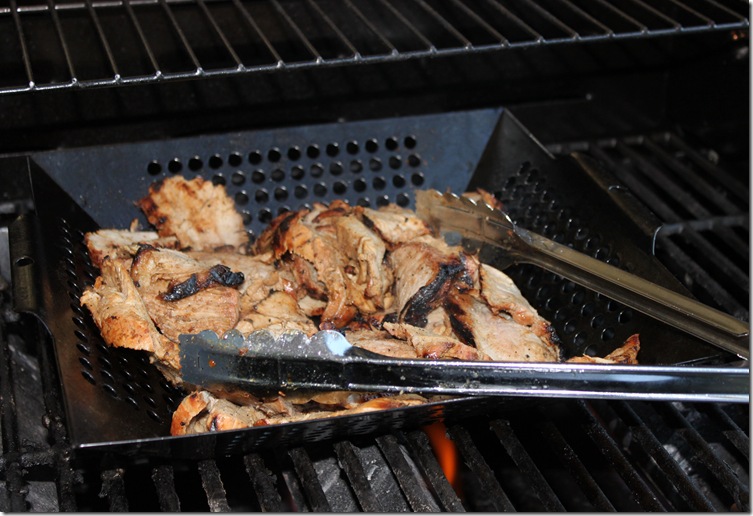
I LOVE my grill basket.  Do you have one?  They are great for grilling vegetables and I like to use it for grilling shrimp too.  I also use it when I make pork tenderloin.  I don’t know about you but it was ingrained in me to never eat undercooked pork.  The threat of trichinosis looms large in my memory.

Now I know that really nice restaurants serve their pork tenderloin slightly pink in the center but I don’t!    After cooking the tenderloin on the grill, I bring it in and let it rest for about 10 minutes.  I then will place my grill basket on the grill to get nice and hot while the pork tenderloin rests and I slice it.    I like to slice it on a diagonal and then  take any of the pieces that are still pink in the center and place them in my grill basket and finish them off.  Usually it only takes an additional two or three minutes on the hot grill. Another one of my many cooking quirks but safe and delicious and no pink pork.


Marinated Pork Tenderloin

1/4 cup lemon juice

1/4 cup soy sauce

1/4 cup olive oil

1/4 cup honey

2 garlic cloves, pressed

1/4 tsp. Kosher salt

1/4 tsp. pepper

Place all of the ingredients in a large gallon size zip-loc bag.  Mix well and the pork tenderloin and marinate in the refrigerator for several hours.  The longer you marinate the better.  Place on a hot grill.   I usually will grill them for about 8 minutes and then flip them for another 8-10 minutes. 

Enjoy!
Tuesday, October 25, 2011

Back In The Saddle Again, (Or At Least Trying To Be)

It’s been a rough couple of weeks.  Nothing too terrible but it just seemed like it was one thing after another.  My husband travels a lot on business and was in China for the last two weeks.  Naturally two days after he left the cable (which now is our umbilical cord to the mother ship of Time Warner Cable and basically runs our whole house), decided to check out for a few minutes and when it did it took out our phone, our TV, and most importantly to my sense of security, my well being, and my overall general happiness…access to the internet.

The wireless router blew when the cable came back on line and for some silly reason it defaulted back to factory settings.  Yep, factory settings.  I am clueless when it comes to hardware.   A  husband in China isn’t much help  at resetting a wireless router and with the 12 hour time difference  my 3:00 in the afternoon crisis does not equate to an emergency at his 3:00 in the morning to his Chinese hotel sleeping self who has a big presentation to give when he does wake up.  My internet access troubles don’t even register in his world right now.  The only saving grace was that my son had an extra cable from his old Xbox that he was able to use to hard wire me directly to the router.  But that required me to move my laptop upstairs to where the router was.  I don’t want to use my computer upstairs!  I want to use it in my kitchen as nature intended!  So, long story short, two weeks with limited computer access  revealed to me just how much of a major stressor not having “access” is in my life.  That, and the fact that I was basically forced to confront my internet addiction cold turkey.
  Add to that a son sick with a major cold who then passed it on to me  and who “forgot”  that he had a major project due in two days in his AP Government class and needs help along with a tri-fold poster board and it’s 11:00 at night and the printer isn’t working,   a daughter home for a couple of days on fall break from school who wants help making a Halloween cup cake costume so she can dress up for the big Halloween party on Franklin Street in Chapel Hill and take it back to school with her, Furniture Market in High Point and many wheels of cheese begging to be cut and wrapped and attractively displayed, my car leaking something and making a funny noise, and the same son who I found out has been tardy to school so many times that his parking pass was suspended for two weeks and I now have to drive him in the mornings and pick him up again in the afternoons, toss in a painful case of Carpel Tunnel and braces on not one but both of my wrists, and the house keeps getting dimmer because every time I turn on a light switch another light bulb blows, and I have Halloween costumes to make for a fabulous party that we are invited to and I haven’t even started making them, and the same son who is now body building and I can’t keep straight which days he is “carb loading” or doing “protein” and I keep serving the wrong thing for dinner each night, and the phone call from my Dad saying that he is only 2 hours away driving on I-40 near Asheville and could they come over and visit for the weekend, the lawnmower that won’t start and we skipped mowing it the week before and the grass is getting knee deep and looks terrible and we are in the middle of college application season… shall I go on?  (Because I could!)

I am exhausted.  :)

Check back with me tomorrow though, I am currently marinating a pork tenderloin to throw on the grill for dinner tonight and planning to post the recipe tomorrow.  Husband is home safe and sound, my laptop is back in the kitchen where it belongs and I am keeping my fingers crossed that tonight isn’t “Carb-Loading”.  If it is , I’m in big trouble.

Saturday, October 8, 2011

The Burning Mandarin Martini

New Camera Photos 035

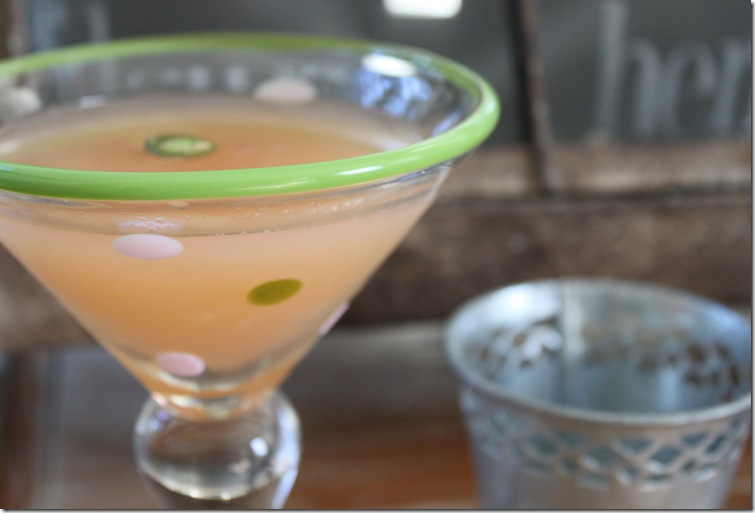
Found a new cocktail just in time for your Saturday night.  Love these!   Have you ever heard of a Burning Mandarin Martini?? I found the recipe recently when I was browsing the Petitechef.com.  It’s fresh and a bit more citrusy tasting than a Cosmopolitan.   The Serrano Chili adds a bit of an “after burn” and I loved it.  I added an extra slice of the chili to amp it up a bit.  Using just one like the recipe calls for is very subtle.  If you like a lot of “heat” I would add the second slice.  And then see how you like it and if you need more “after burn”, live large and add a third. 

  New Camera Photos 046

The Burning Mandarin Martini


Yield: 1 martini

2 slices of Serrano Chile
1 1/2 ounces Absolute Mandarin
3/4 ounce fresh lemon juice
1/2 ounce simple syrup*
1/2 ounce orange juice
1/2 ounce cranberry juice

*Simple syrup can be made by mixing equal parts of water and sugar.  Heat them till the sugar is fully dissolved.  I made a small batch by mixing 1/4 cup of water and sugar in a Pyrex Heat Proof mixing cup and heated it up in the microwave in 30 second increments until the sugar was dissolved.)

Muddle one slice of  Serrano Chile in the bottom of a cocktail shaker. Add vodka, lemon juice, simple syrup, orange juice, and cranberry juice, along with one large handful of ice.

New Camera Photos 031

Shake vigorously until well-chilled.  Strain into a sugar-rimmed martini glass. Garnish with remaining chili slice.  (I didn’t sugar the rim of my glass as I don’t like my drinks too sweet.  But I do think sugaring the rims do make them a tad more festive.)

Thursday, October 6, 2011

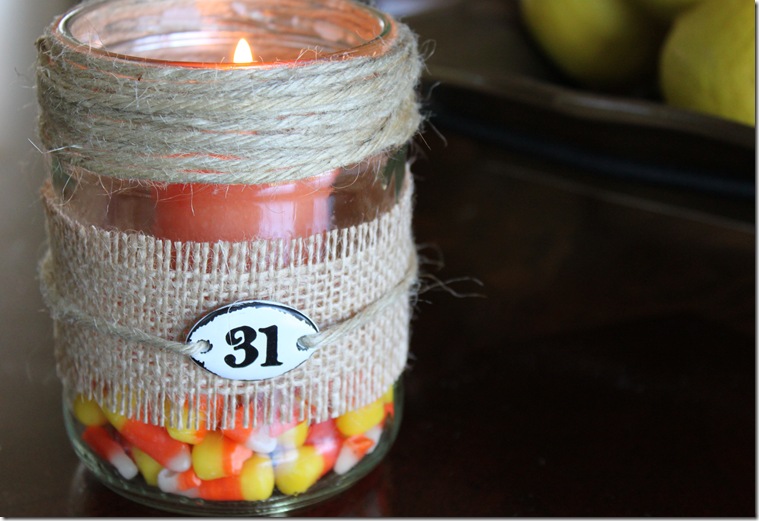
Recycled Halloween Votive Candle Holder


New Camera Photos 024

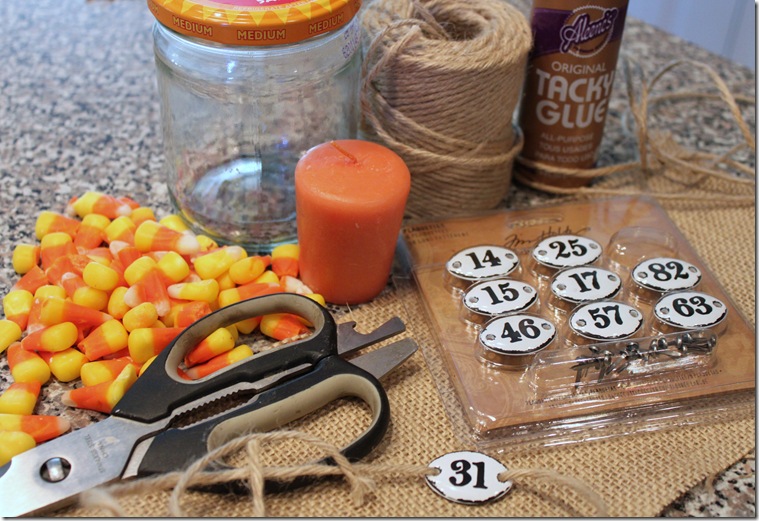
  Today I made a quick project and recycled an empty salsa jar and turned it into a Halloween candle votive holderNew Camera Photos 001

  A strip of burlap, some twine, some cute number plates that I found in the scrapbooking section at Michaels, a votive candle, an empty jar, a pair of scissors, some Tacky Glue, and a handful of candy corn and I was in business.  This is so quick and easy to do.

Here’s how I did it:

  I took a piece of twin about 60 inches long and dabbed a dot of Tacky Glue on one end and attached it to the jar.  I held my finger on it as I wound the twine around the top of the jar.  Then I did the same with the second piece to fill in any gaps left by the first piece.  The twine covers up the top of the jar where the grooves are for the lid.  Then I cut a scrap of burlap and glued it around the center of the jar.  I threaded my number plate with a piece of twine and tied it around the jar on top of the burlap.  I got lucky with the numbers and there was a “31” for Halloween.  Although a lucky “13”would have been nice too. 

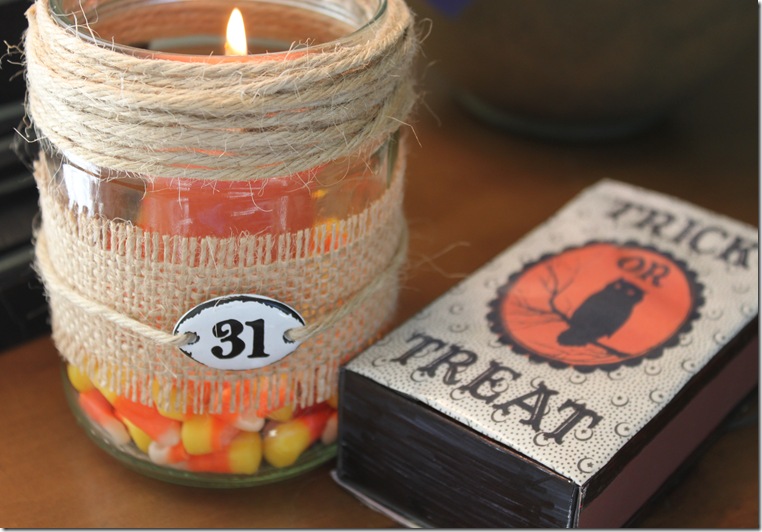
 New Camera Photos 013

   I filled the bottom of the jar with some candy corn and added a votive candle.  Then I scratched a match stick across the Trick or Treat Matchbox and lit the candle.  That’s it!   Easy!

Monday, October 3, 2011

French Breakfast Muffins

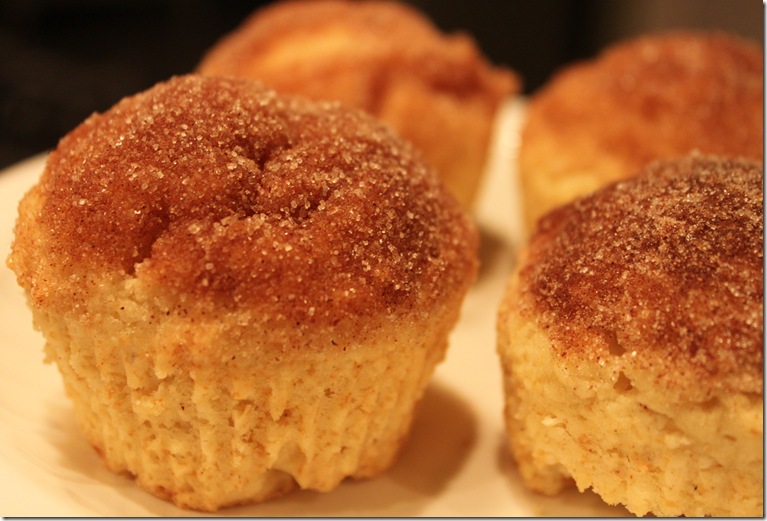
French Breakfast Muffins 014

I made these last night on a whim thinking that they would be good the next morning with a cup of coffee on top of being portable.  It’s my son who could benefit from the portable part.  I just want to drink coffee.  He cuts it  way too close in the mornings time wise if you ask me.   And  he is usually hungry in the morning but runs out of time to eat breakfast.  Now I am not saying these are the healthiest muffins you could eat but it just might be one of the tastiest.  Even better hot out of the oven. 

I found the recipe over on the blog Velvet Lava Cafe after first spotting it on Pinterest where it is getting a lot of attention right now.    And besides, with a name like  French Breakfast Muffins, how could I not give them a try? 

Here is the recipe:

French Breakfast Muffins

1/3 c. butter, melted
1 egg

1/2 cup milk

1/2 c. sugar

1 1/2 c. all purpose  flour
1 1/2 tsp. baking powder
1/2 tsp. salt
1/4 tsp. nutmeg


Topping
1/4 c. sugar
1/2 stick of  butter, melted
1/2 tsp. cinnamon

Pre heat your oven to 350 degrees.  In a medium-large sized bowl, sift together all dry ingredients. Add wet ingredients and stir until combined.  Batter will be lumpy. Do not over mix. Scoop batter into muffin tins that have sprayed with cooking spray or line with cupcake paper liners.  I used a large ice cream scoop to get them into the muffin cups and I got 10 medium sized muffins out of this batter; Bake for 20-25 muffins, or until they just start to turn a bit golden at the edges.


For the topping, mix sugar and cinnamon in a small bowl. Place melted butter in another small bowl. Dip the warm muffins in melted butter, then in cinnamon sugar.  ( The original recipe called for 1/2 cup of sugar and a whole stick of butter.  That seemed like a lot to me so I cut it in half and used 1/4 cup of sugar and 1/2 of a stick of butter and was glad I did.  It was the perfect amount.)

Sunday, October 2, 2011

Basil Pesto

New Camera Photos 070

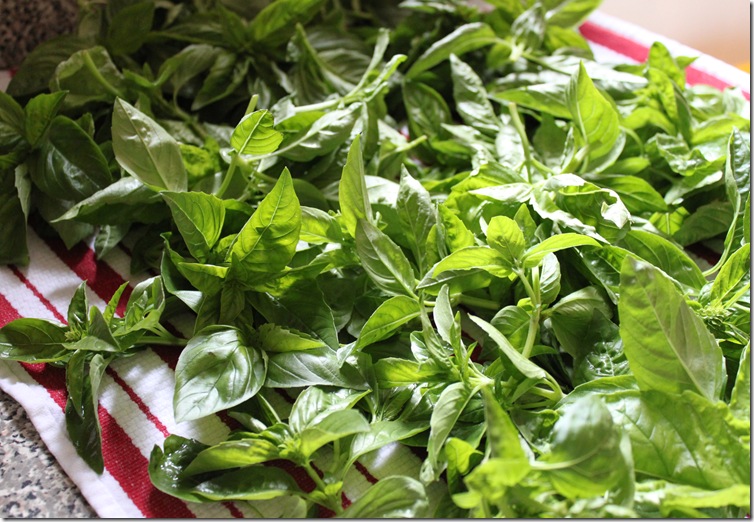
The basil in my garden has gone crazy.  I suddenly have tons of it.  I thought it was all pretty much dead and burned out from the heat and lack of rain.   But in the last few weeks we have had a lot of rain and the temperatures have dropped.  The evil Bermuda invaded and pretty much choked out my tomatoes and peppers, and radishes.  And the deer ate every bit of my Swiss chard down to the nub.  The view from my kitchen window told me the basil was all dead but once I actually walked out there and took a closer look, the basil was anything but dead.  It regenerated itself  and it’s the lone survivor of summer.  And there is lots.New Camera Photos 023

Lots and lots.  I went out and picked a big bowl full and brought it into the house and washed it and laid it out on a fresh kitchen towel to dry.

New Camera Photos 041

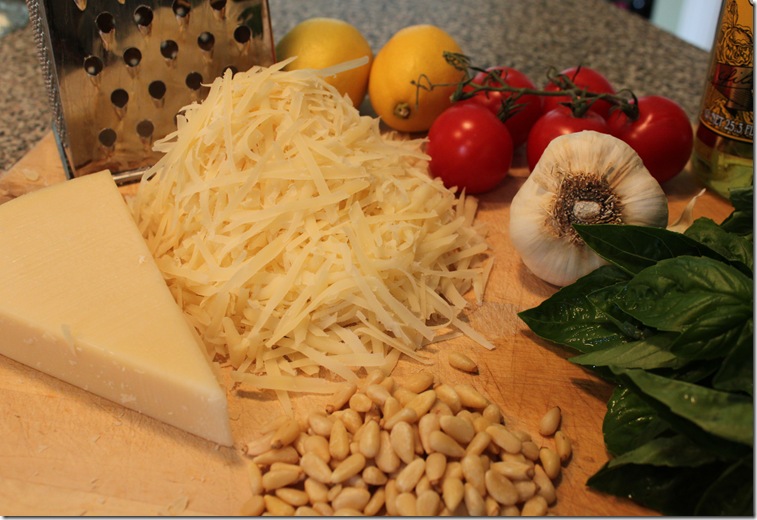
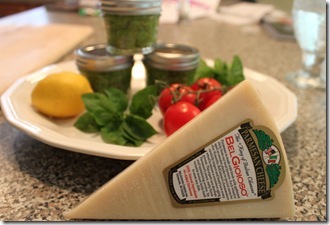
 I decided to make Basil Pesto with all of it and got to work shredding a wedge of Parmesan cheese.  Basil Pesto is one of those things that I kind of just put together in my food processor.  But today I took some notes so that I could write down some measurements.    The big bowl of basil that I picked ended up making two batches. 

New Camera Photos 043  New Camera Photos 071

I took about half of the basil leaves and put them in a 4 cup measuring cup.  I packed it in.  I used a whole grated  wedge of Parmesan cheese per batch.  I used the juice of 1/2 of a lemon, 1/4 cup of pine nuts and about 5 peeled cloves of garlic with about 1/2 cup of olive oil. 

I did not add salt which I usually do but the Parmesan cheese was salty enough and so I left it out.  I would taste your pesto and if needed add the salt in then.

Here is the recipe:

Basil Pesto

4 cups of basil, washed, dried, and packed into the measuring cup.

5 cloves of garlic, peeled

1/4 cup of pine nuts

1 wedge (about 8oz or half a pound) of Parmesan cheese, grated

1/2 lemon, juiced and seeded

1/2 cup olive oil

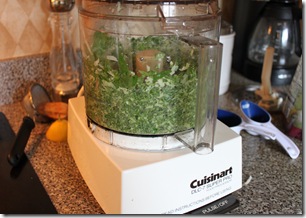
Add the basil leaves to the bowl of your food processor.  Add the garlic, pine nuts, grated Parmesan cheese, and the lemon juice.  Turn on machine and slowly add the olive oil through the top in a slow stream as the machine is running.  Scrape the bowl down a few times in between processing.  Process until you have a nice spreadable consistency.  Add more olive oil to thin it out if you need to. 

 New Camera Photos 048 New Camera Photos 067

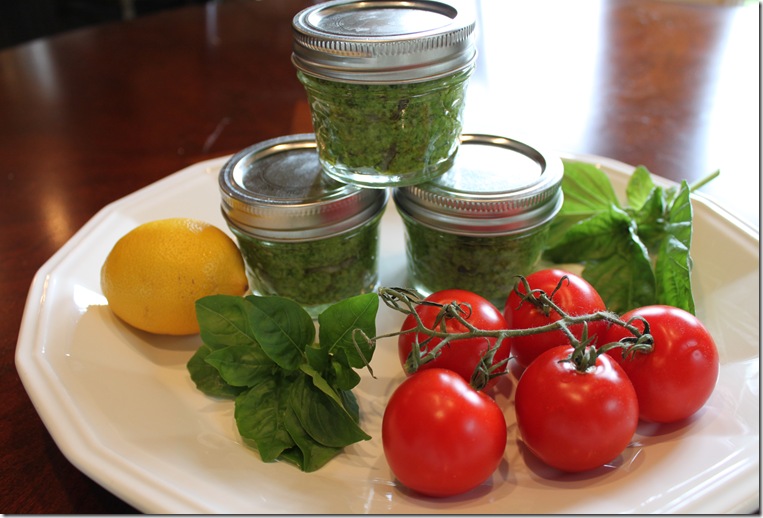
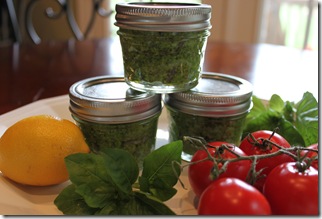
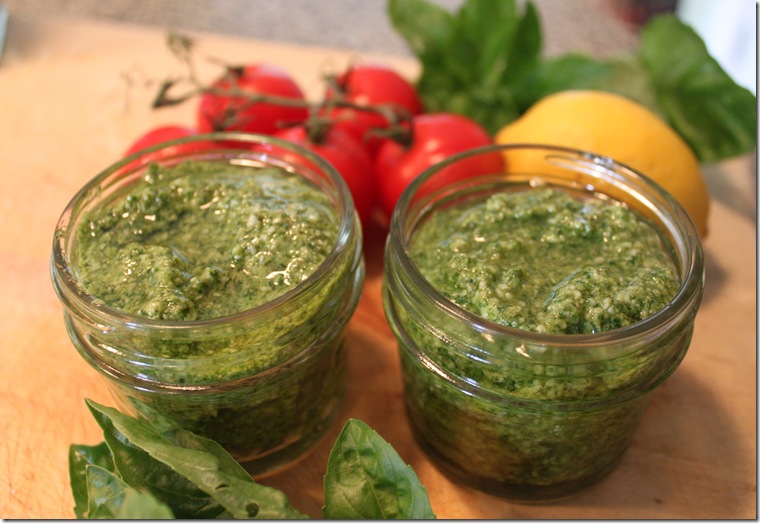
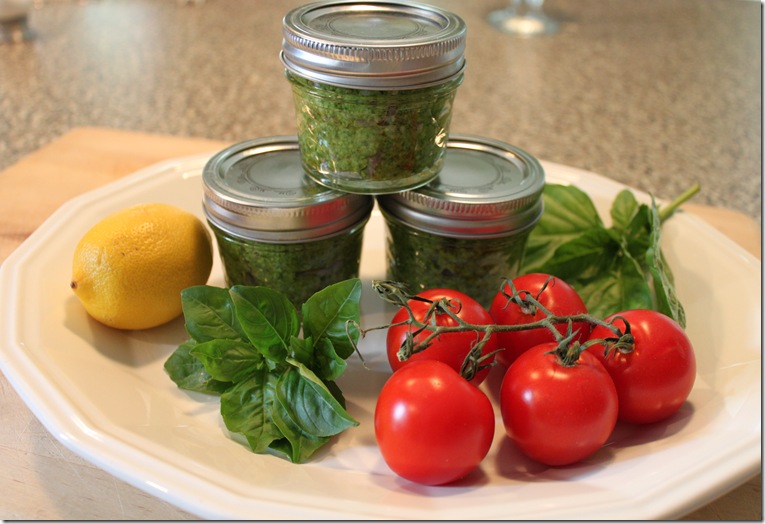
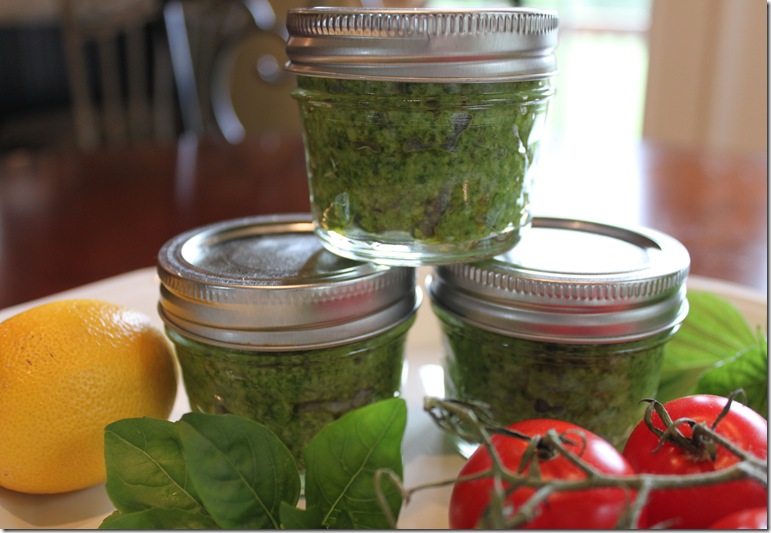
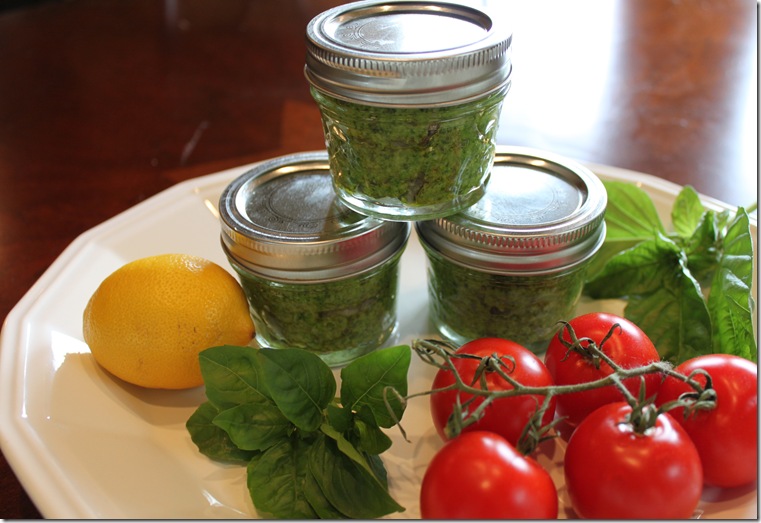
For each batch that I made I was able to get about 5 mini jelly jars of pesto. 

New Camera Photos 054

I filled each jar with the Basil Pesto and then I drizzled some olive oil on top to help keep the pesto a bright green.  (basil pesto will oxidize and turn brown and the olive oil helps keep the air out.)  Then I put the lids and bands on them.  Store it in the refrigerator and I would use it up within a week or two.  Freeze the rest.

New Camera Photos 055

Basil Pesto is great on pasta and chicken.  I have added it to the top of soups like Minnestrone, spread it on hot Italian bread and of course its fabulous on bruschetta.  You can either spread some on your bread slice and then add the bruschetta topping or prepare your bruschetta and then add a dollop of pesto on top.  The bruschetta at The Village Tavern is made this way with a dollop on top and shards of Parmesan cheese with capers scattered on top. I LOVE their bruschetta. 

New Camera Photos 060

  I still have a bunch of basil still out in the garden waiting to be picked.  I’ll probably be making Basil Pesto all week long now.  As long as we don’t get an early frost, I still have lots of time to get to it.  

New Camera Photos 069

Basil Pesto freezes well and so this winter we should be well stocked.  And I have more than enough for friends and neighbors.  How about you?  Do you like Basil Pesto?  Ever made it?  And how to you like to serve it?  I would love to hear your ideas.