Monday, August 31, 2009

Floating Umbrellas

It is raining here and it is a dreary day. So this photo seemed quite appropriate. The photo is from the Artist Trey Ratcliff who takes amazing photographs using a method called HDR. I have no idea what that is but expect to find that out very soon. (My guess is that it would be"High, Definition, Resolution" ....I let you know when I find out.) Amazingly, Trey Ratcliff is blind in one eye and he is the first to have a HDR photograph hanging in the Smithsonian. I love his blog site where he says he strives to post a photo a day. His photographs are amazing and I just love this one of the floating umbrellas. It was taken in Las Vegas at the Venetian Hotel.

Edit: Okay, I am back later in the day to add an edit with some more information on this incredible photographer and his work. First off, I found out that HDR Photography means "High Dynamic Range Photography". And here is a quote from Trey explaining how it works:


"The way it works is you take multiple pictures of the same scene; let's say five photos, all at different shutter speeds,” said Ratcliff. "The quick shutter speed only lets in a little bit of light; the long shutter speed lets in a lot of light; so that you end up with these five photos at various light levels. The software stacks them all on top of each other, takes out the extreme brights and the extreme darks, and leaves you with this impressionistic hinterland that's somewhere betwixt."

For the complete news story about Trey and to see an interview with this amazingly talentend, kind and generous photographer visit: http://www.kxan.com/dpp/news/local/Unique_type_of_photography_hits_Austin

His pictures are just incredible!

Saturday, August 29, 2009

My Complete Bunco and the Boursin Stuffed Mushrooms

It was my turn to host Bunco so that pretty much ruled my week. All Bunco groups seem to be different. In our group, there are 12 of us and each person has to host just once during the year. When it is your turn, you do EVERYTHING. Drinks, appetizers, dinner, dessert, coffee, and 2 snacks at each table.....a salty and a sweet. On top of that I have to clean my house which is great because it actually forces me to do a better than average cleaning. But it about kills me every time. I seriously need a cleaning lady! Also, my apologies go out to anyone who used my Powder Room that evening. I took the towel and washed it that day so that there would be a fresh towel to dry hands on. Well, I forgot to place it back on the towel ring and so to anyone who had to dry their hands by wiping them on their pants....I am very sorry!!


More Flowers from Ellen at Ellen's Flowers! I picked up this gorgeous bouquet just in time for my Bunco Party.

This was especially a bad week for me to have to host. It was back to school week for both the first year college student daughter and back to high school for our son. The dog is "BLOWING HER COAT"....which is the perfect way to describe it.....the dog hair is constant, endless, and everywhere! Anybody with a Golden Retriever knows what I am talking about. So I fought the dog hair and put together a menu which had some tried and true recipes and a couple of new ones. Some of these recipes I have already posted here on my blog. Here is what I served:

BUNCO MENU

Pomegranate Martinis (Fabulous!) (Recipe to be posted soon I promise!)


Bruschetta ( not as good as usual.....always use fresh bread toasts :))
Marinated Flank Steak (don't grill in advance and then refrigerate unless you are partial to shoe leather.)
Orzo, Corn, and Chive Salad (great as always)


Pine Nut Noodle Salad (loved this....it was a hit.)


Boursin Stuffed Mushrooms (OMG!)

These were to die for and of course I have no photo! Sorry! But believe me when I say...these are awesomely good!

Slice French Bread from Special Kneads Bakery
Dessert:
Berry Cake and Cherry
Crumb Pie from Ganache Bakery
Coffee


Snacks at the tables: Fiddle Faddle, Bugles, popcorn, red licorice, Chipolte Almonds covered in Dark Chocolate, Cheddar Chex Mix, and Sour Cream Onion Chex Mix (which is new and not very good.), sour gummy worms.

WINNERS AND LOSERS:
It was the first time making Pomegranate Martinis and they were very good. I made 2 pitchers in advance and had them in the refrigerator chilled for when everyone arrive. They were almost all gone by the end of the night. I take that as a positive. The Bruchetta was not as good as usual and I think that is because the Asiago bread toast I used were past their prime. They were in my pantry and next time I need to purchase fresh. The Marinated Flank Steak which is normally very dependable was not great. I grilled them earlier in the day and then refrigerated them. BAD DECISION! They toughened up on me! I served them cold and really now realize I should have pulled them off the grill sooner so that they were very rare, then sliced them, and then finished them off under the broiler to heat them back up right before serving. Right off the grill they are perfect.

The Orzo salad was good as always and the Pine Nut Noodle Salad was delicious! That is a keeper recipe. I got lots of requests for that. The big WINNER and STAR for the night has to be the Bousin Stuffed Mushrooms. OMG! They were that good. They smelled good while they were in the oven and there was almost a fight for the last one. I will be making these over and over again.


Boursin Stuffed Mushrooms (OMG! :))
Boursin®-Stuffed Mushrooms Makes about 16 Preparation Time: 10
minutes Cooking Time: 25 minutes
Ingredients:
1 package (10 oz.) mushrooms
2 tablespoons unsalted butter
1/4 cup finely chopped onion
1/4 cup unseasoned dry bread crumbs
1 package (5.2 oz.) Boursin® Garlic & Fine Herbs
1 tablespoon chopped fresh parsley
1/4 teaspoon salt
1/8 teaspoon ground black pepper
2 tablespoons grated Parmesan cheese (optional)
Instructions:Preheat oven to 400°F. Remove and chop mushroom stems. In 12-inch skillet, melt butter over medium-high heat and cook mushroom stems and onion, stirring occasionally, 5 minutes or until tender. In medium bowl, pour mushroom mixture over bread crumbs. Stir in Boursin, parsley, salt and pepper. Evenly spoon mushroom mixture into mushroom caps; arrange on baking sheet. Bake 20 minutes or until mushrooms are tender and golden. Sprinkle with cheese.

Tuesday, August 25, 2009

TV Tray Tables


I am already trolling the local Goodwill in search of the pieces I will need to construct Halloween Costumes. I know it is a couple of months away but sometimes you have to start early. Especially if you haven't a clue what you want to be. Anyway, I have popped into the Goodwill a couple of times in the past week starting the hunt. Of course while I was in there I had to stop back in the Housewares Department to see what I could find. Well, I came across a set of wood TV Tables complete with stand for a mere $10.00. That is just $2.50 per table! I have been amazed at some of the beautiful things other bloggers have created out of thrift store and garage sale finds. And I wanted in on the fun. So, I bought the set, took it home, gave all the pieces a bath and got to work.


At first I was thinking that I would paint and then decoupage the tops of each table. And then I decided that I wanted something that would blend in a bit more and be more timeless. So, I decided to paint them black. That's it. Just plain black. The first thing I needed to do after cleaning them was to prime them. A few of them had some water rings on their tops and they were just plain grubby. I used 1 can of Kilz to prime the four tables and the stand. I let them dry completely. A few of the tables has some drip marks from the Kilz to I gave the drips a quick sanding and used a dry cloth to wipe away the dust. Now for the fun part. I ended up using 2 cans of Rustoleum Black Satin Spray Paint and I gave them all a coat of paint. Then I gave them all a second coat to cover any spots that I had missed.


I am half tempted to put a Monogram initial letter in the middle of each top but will hold off for now. I really like the simplicity of the the plain black tables. The whole set looks so neat and clean. These will be so handy to pull out when we have people over. It will be nice to have a table to set a drink down on when we are out by the fire pit or sitting on the deck with friends. I am hosting Bunco this week and they might just make their debut then and there.


Now it is time to relax and enjoy my handi-work! These are going to be so nice and convenient when we need some extra table space. Our daughter in college wants one for her dorm room because they fold flat for storage. She can pull it out when she needs it. Our son wants one for his "man cave" where he plays his X-Box games. You know, to hold his pretzels and Gatorade. I am just happy to know I'll have them for when we need them.


Ahh, now it is time to enjoy the fruits of my labor. Cheers!


Monday, August 24, 2009

Playing with Photographs


A big Thanks to Susan at Between Naps on the Porch for her blog post today that among other things introduced me to photobucket.com where you can take your favorite photos and upload them and then play around with the finish and look of them. You can select to have your photos "aged", and "painted" and the application used in my photos here was "fresco".


If you have a few minutes, check out Susan's Blog by clicking on her name highlighted above and take a look at her gorgeous blog. She is quite a talented photographer too. She explains in detail how to play around with your photos on the Photobucket website. Have fun while visiting her site. Her home is beautiful and she puts together beautiful tablescapes. Lots of eye candy!

Sunday, August 23, 2009

Pine Nut Noodle Salad


What a weekend. It is our daughter's first year of college and she officially a student at the University of North Carolina. And we moved her into her minuscule dorm room yesterday. Of course it rained most of the way there and the parking lot in front of the dorm was crazy busy with kids and their parents unloading all of their stuff. But we got lucky because we got most of her stuff out of the van before the sky opened up. Somehow all of her stuff fit and once we got unpacking and found a home for everything her little dorm room started to brighten up. She has a great roommate that she met online on a roommate finding board. I predict they will have a great year together and probably become life long friends. I hope she is lucky in that way as I was. I am still friends with many of my college friends and former roommates.

After all the unpacking, we decided to get some lunch. So we walked over to Franklin Street to a cute restaurant called Spanky's. My husband had a great burger, the new college student ordered a club sandwich, our high school student son had chicken fingers and french fries, and I had one of the best salads that I have had in a long time. It was called a Pine Nut Noodle Salad. It was a winner! I am hosting Bunco at my house this week and I am planning on recreating it for the party. Here is the recipe I am going to use:


Pine Nut Noodle Salad


1 large container of Spring Mix Greens from Costco
1/2 cup pine nuts, toasted
3 Tbsp. sun dried tomatoes, chopped
4 Roma tomatoes, diced
1 Cup Feta cheese crumbles
8 oz. linguine, cooked, cooled
4 grilled chicken breast, chopped (marinate in olive oil and lemon juice for more flavor)


Lemon Basil Vinaigrette Dressing
1/2 cup olive oil
2 Tbsp. lemon juice
1/2 tsp. sugar
1/4 tsp. dried basil
salt and pepper


In a dry pan on the stove top, toast the pine nuts till golden brown but be careful not to burn them. Assemble the Spring Mix Greens on a big platter. Top with the sun dried tomatoes, and the Roma tomatoes. Roughly chop the linguine noodles and add to the salad. Pour the dressing over the salad and toss. Top with the Feta Cheese and sprinkle with the pine nuts. (Optional: add the grilled chicken breasts.)


I will let you know how it turns out and if I have to tweak the recipe in any way I will let you know later this week. I will also post a photo after I make it. So, hosting Bunco this week will make my week hectic but will also take my mind off of the fact that our family foursome is now down to a threesome if you don't count the dog. :)

Friday, August 21, 2009

My Next Project?


I cannot take credit for this collage. And I am not sure who the artist is but I believe it was done by the owner of A Fine Mess Art Studio in Ottawa, Canada. There were several finished pieces in the studio the day we were there working on our own works of art and I just loved this one. Because we were there on a "spur of the moment", I was not prepared as to what I wanted to make. But this piece really struck me as something I would like to make for myself with a photo of each of my own kids from when they were babies. I think this would make such a special gift. It could be for a new Mom, Grandmom, or even as a birthday gift. And once the wheels start turning.......a wedding photo would be nice for an anniversary or a graduation....Hmmmm. I have a some decisions to make but I think I am looking at one of my next projects!!

Thursday, August 20, 2009

Orzo, Corn, and Chive Salad


This salad is from one of my favorite cookbooks called "The Beach House Cookbook" by Barbara Scott-Goodman. (It is filled with great recipes for fresh food and the photographs are wonderful.) I make this all the time and all year round. I added a diced red pepper to the recipe and like how the colors of the yellow corn, green chives, and red pepper all mix to make for a colorful salad. I usually serve this with Marinated Grilled Flank Steak. (Click for the recipe.) It is even better if you top it off with some feta cheese. Enjoy!
Orzo, Corn, and Chive Salad

1 pound of Orzo
2 Tbsp fresh lemon juice
1 1/2 to 2 cups corn kernels
1 red pepper, diced
1/2 cup minced fresh chives (take a bunch and start snipping with your kitchen shears.)
2 Tbsp Balsamic Vinegar
1/2 cup extra-virgin olive oil
Kosher salt and freshly ground black pepper
optional: feta cheese

1. Bring a large pot of salted water to a boil and cook the orzo until al dente, 10 to 12 minutes. Drain well.

2. Transfer the orzo to a large bowl, drizzle the lemon juice over it, and toss well. Add the corn and red pepper to the orzo and toss again. Add the balsamic vinegar, olive oil and salt and pepper to taste and toss well to combine. Taste and adjust the seasonings, if necessary.

3. Using kitchen shears, finely snip the chives over the salad then mix well.

4. Serve cold or at room temperature. Refresh the salad with a dash of lemon juice and olive oil just before serving.

Wednesday, August 19, 2009

Powder Room Project "Before"


Powder room Before....Stay tuned for the After. It might be a while!


I am juggling this week. I have lots of projects in the works. The biggest is that our daughter is busy packing for her first year in college and so there are lots of last minute things to pick up. We are moving her in to her dorm room on Saturday. I am handling this quite well I think! I am sure it will hit me as we drive away. She has been busy with saying goodbye to all her friends this week as they all leave for various colleges and universities. She was a sweetheart yesterday and took her younger brother who starts his second year of high school next week out shopping for school supplies while I was at work. It is going to be quiet around here after she is gone.


I have plans to re-do my downstairs powder room. I still like the room but it is about 8 years old, has wall paper, and is just starting to look dated to me. You can click on the photo to see the wall paper up close. I have to decide what exactly I want to do in there. Let me show you some "Before" photos. The mirror, towel ring, and tissue roll were all gold colored and brass. A can of metallic black spray paint started the re-do process and what a big change already! They now look like the oiled bronze accessories you see everywhere. The mirror needs some touch up on the inner ring. I will do that by hand with a small brush. The towel ring and tissue holder look amazingly different. Both of them needed two coats of spray paint for full coverage. I did not prime them. I just did the two coats of the metallic black.

This will be a long project but I feel good that I at least got started. So here are some photos of what the room looks like now....wish I would have remembered to take pictures before I painted the mirror and and accessories but I think you can guess what the gold tones and brass looked like in there. The black metallic paint worked great. I really had my doubts that it would stick to the shiny brass tissue holder but it did and looks fabulous! Now the big decisions need to be made. Like what color to paint the walls! Any ideas???


Tuesday, August 18, 2009

Black and White Decoupage Box

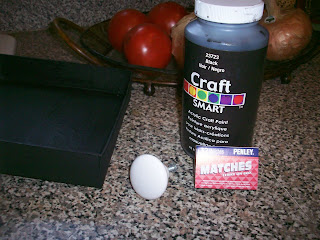
I finished my Black and White Decoupage Box today! I had lots of scraps left over from the Mini Collage Trio I did and so I decided to cover a cardboard box with them. I found the box and lid at Hobby Lobby a few weeks ago at 50% off so I paid $2.50 for it. Sorry but I forgot to photograph it before I started painting but I think you know what I am talking about.


First thing I did was to paint the entire box inside and out with black acrylic craft paint. Then I let it dry. While it was drying I cut out my scraps of paper and placed them how I wanted them for each of the sides of the box. Then I started to decoupage the paper pieces on to the box.


After all the sides were decoupaged, I let the glue dry. This box has a lid so I I chose only one piece of paper for the top. I also had some leftover white porcelain knobs that we removed from the cabinet doors in the laundry room. I replaced the ones in the laundry room with a set of oiled bronze knobs but the white knobs I removed are still fine and perfect for the top of my box.
Because the screw that bolts the knob onto the box was a little longer than necessary to fit my box, I had to improvise with something to help take up the extra space on the screw. That is what I used the matchbox for. I painted it black and used it as a "washer" to help secure the knob on the inside of the box.


(Top of the box before the knob was added.)

(Matchbox waiting for black paint to help secure the knob from the inside of the box)

(The matchbox is in place. This is how it looks from the inside of the box lid.)
I used a drill to make a clean hole on the top of my box and through the matchbox. I secured the white knob to the top and VOILA, my box is complete!
Now, I have just have to decide what I will keep in it and where I will put it. I don't think it will fit in my laundry room although it would look good in there! It might end up on the dresser in my bedroom. I'll let you know!


Monday, August 17, 2009

My "Household Words" Arrived Today


My Household Words arrived today! It went up easy and looks great hanging over top the chalkboard in our kitchen.
I have Kate at Centsational Girl to thank for introducing me to Mandie's Etsy Shop where I found the saying I attached to my wall today. It makes me laugh every time I look at it. :)


Laundry Room is Really Done Again


I really mean it this time. I am really, really, really done with my Laundry Room. I don't think I could cram another thing into it! As I mentioned in a previous post, I found a wonderful hand painted floor cloth by Gwen Dumas at the store Mary Contrary here in Greensboro, NC. I brought it home and it is perfect for the you guessed it....Laundry Room.


The original room that inspired me at Southern Hospitality Blog had a black and white tiled floor. Putting new tile on our floor was on hold while I was looking for a source for the tiles and deciding on the more economical peel and stick or go with real tile and grout. Well, this gorgeous floor cloth has the black and white floor tiles built in! The colors in this floor cloth are perfect. The green in the border match my walls and the reds in the border match the red in the basket of geraniums I have on top of the cabinets and also matches some of the other accent reds I have in the room.


I also tried moving and setting the floor cloth out on my deck in front of the doors that lead into my kitchen. It looks great there as well. I think I will put it out there next time I have a party when we are using the deck. It looks great under the awning with a big black pot of geraniums on one side and a big bushy Boston fern on the other side. It won't live on the deck permanently because the weather would take it's toll so it will reside for the most part in my Laundry Room and will make an appearance on my deck only on special occasions. I am a happy girl! And the Laundry Room is pronounced.....finished! Really.