Friday, October 30, 2009

It’s a Halloween Party and Contest!

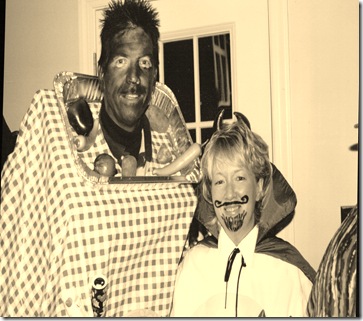
I love Halloween! I love to see what costumes people come up with. Although there is nothing wrong with a good Party City store bought costume, I have to say that I am partial to the Home Made versions. Here I am with my handsome husband in one of my favorite costumes from a few years ago in 2005. I was a Deviled Egg and can you guess what my HH was? He was a Roast Beef that year! We got a lot of laughs from his costume that year.

Halloween 001

I am so excited! Leigh over at Tales From Bloggeritaville is having a Halloween Costume Contest!!

I am also linking up to The DIY Showoff for a Halloween Party there!! Come take a peek at the other costumes.

If you visit Tales from Bloggeritaville starting on Monday, November 2nd – November 5th you will be able to see all of the contest entries, enter yourself and VOTE for your favorite costume!! Oooooo, Pick Me! Pick Me!

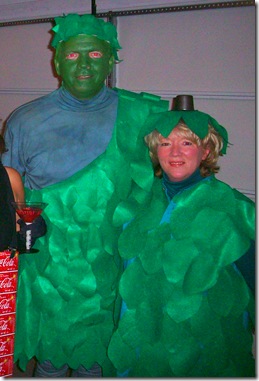
The green felt and fabric glue was flying at my house the last couple of weeks and here is what we dressed up as this year for our neighbor’s fabulous party.

In the Valley of the Jolly…HO, HO, HO, Green Giant!

Halloween 09 005

Here we are: The Jolly Green Giant and Little Sprout

So stop by Bloggeritaville and Vote starting on Monday, November 2nd – November 5th for your favorite costume. HAPPY HALLOWEEN! Or…send in your own photo and enter the contest yourself!! Go to Leigh’s blog and get all the details.

Wednesday, October 28, 2009

Vintage Typewriter Keys

Vintage Keys 012

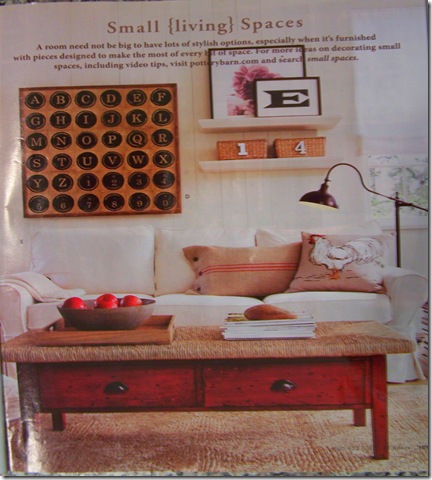
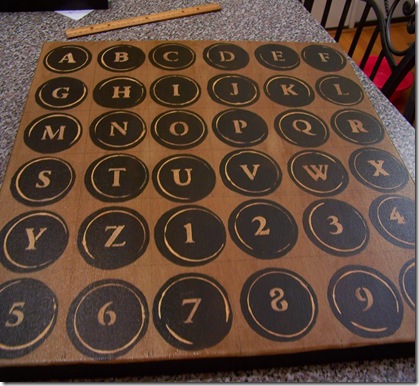
A few months ago when I first started blogging I came across a post at one of my favorite blogs BIENVENUE. Susie posted a how to on a Pottery Barn look alike of Vintage Typewriter Keys. I loved it when I saw it and she showed us all how she make it. She has an ETSY Shop site where she sells a lot of the great pieces that she makes and you can see her things by clicking on BIENVENUE and visiting her site. So the other day I was flipping through the Pottery Barn Catalog and there on page 103 was the piece that Susie had shown us how to make. I wanted to make one for myself especially since the Pottery Barn’s price tag was $349.00!!!
Vintage Type 2 003

With my 40% off coupon from Michael’s I purchased a 20 x 20 blank canvas. Your canvas needs to be a square but you can do make yours larger or smaller but a square with equal sides makes your job a lot easier. Paint your canvas front and sides with a neutral background color. You will be staining it later for that older vintage look. I used some leftover wall paint but craft paint is fine too. This would be a good time to paint your sides with black paint. It makes your finished piece look “framed”. I didn’t do this step until later but when I make another one of these I think this would be a better time to do it. When that dries, you will need a pencil and a long ruler or a yard stick.

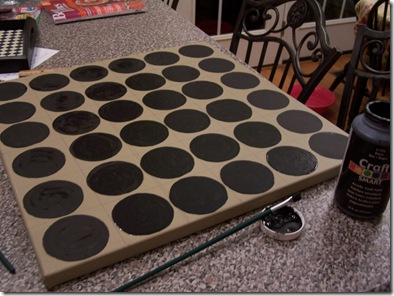
Since my canvas was 20 x 20, I measured off on all 4 sides at 10 inches and make a tick with my pencil. Then I drew a dividing line between the top and bottom down the exact center and did the same on the side. Your goal is to dived your canvas evenly into 36 cubes. There are 6 keys that run horizontally and 6 vertically for a total of 36. Use your pencil to mark this. Then I took a drinking glass that had a round base that would fit into each of my squares and I traced around it. After you have 36 circles outlined you are ready to paint.

Vintage Keys 003

Vintage Keys 005

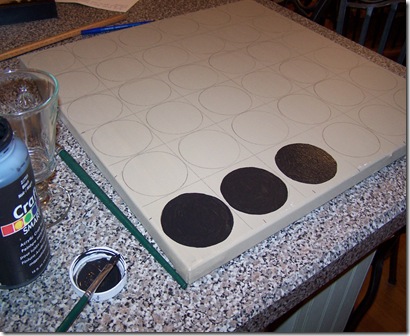
Using black acrylic craft paint I painted 36 circles. Using a slanted brush makes painting the curves much easier and neater.

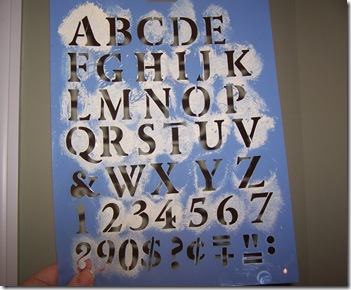
After your black circles dry the fun part starts! Take your alphabet stencil and with a cream colored craft paint stencil the letters and numbers on to your black circles. If some of your white paint smears anywhere on your black keys you can just touch up all those marks with black paint when you are finished. I did not include the punctuation marks over the number keys in this piece because I didn’t think I had enough room but plan to next time. If you include the punctuation, you might want to stencil on your numbers a little bit lower in the key so that you have room to add the punctuation marks above the numbers.

Vintage Keys 008

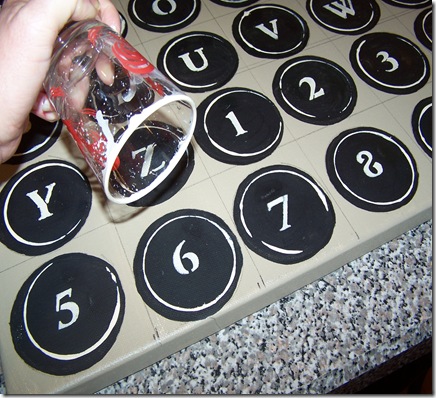
The next step was also a lot of fun. You will need another drinking glass with a smaller diameter so that you can “frame” you keys. I used a juice glass for this step. Dip the round edge of the juice glass in craft paint. You do not want it to be drippy. Carefully lower the the paint inside your key but not completely on all four sides….you want it to only “catch” in bits or on one side only to give it the right look. Look at my photo. See how this step is not “perfect” or “uniform”.

Vintage Keys 007

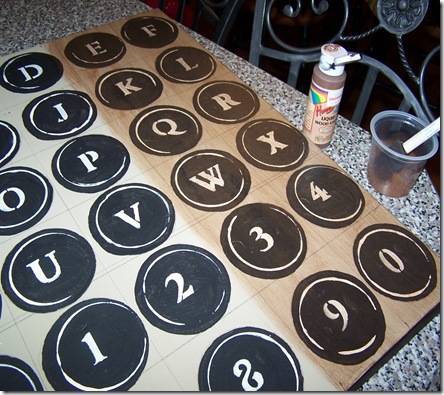
When your outlining paint has dried you are ready to stain it to give it that Vintage look. (If you do not want your pencil lines to show in your final piece, now is a good time to erase them. I did not and you can see the lines in my final piece. But I like it that way, it is faint and adds to the background I think.) Any leftover stain would be fine. I used a bottle of craft liquid stain and the color of it was “fruitwood”. Using a mini foam craft brush I gave the piece a coat of the stain working it in. It definitely need a second coat and after that it was perfect!

Vintage Keys 009

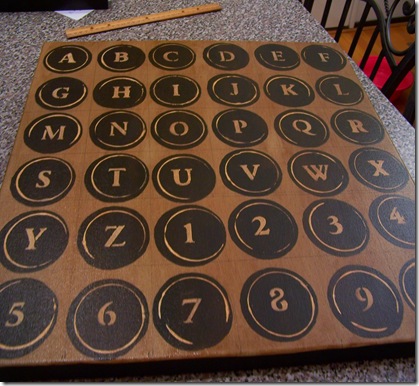
And here she is!!!! Adding the stain really brings it to life!

Vintage Keys 012

I am going to hang it in our office. Below is a photo of it on my dining room wall. The burgundy walls looked best for the photograph but it will be hanging in our more neutral colored office. This project was so fun! Thanks to Susie at Bienvenu and Pottery Barn for the inspiration!!

Vintage Keys 016

Stop by and visit Tales From Bloggeritaville for "Thrifty Thursday" and The Shabby Chic Cottage for "Transformation Thursday" to which I am linking this $$$ saving Pottery Barn Look Alike Art Project. :)

Thank You to Gina at The Shabby Chic Cottage for the DIY DIVA of the Week Award for this project!!!!


Tuesday, October 27, 2009

A Bunch of Burlap

Being the Baroness of Burlap that I am, I have had my radar keyed into finding more burlap projects. So far I have come across three other bloggers who have compiled a post of nothing but Burlap Projects. If you are looking for more burlap ideas take a look at the following blogs. All four of these have lots of Burlap projects to get you inspired!

1. Tales from Bloggaritaville Bloggers Rock! But Can They Rock Burlap?

2. Someday Crafts Build It With Burlap

3. DIY Show Off Jute and Burlap Do It Yourself Collection

4. Southern Hospitality Burap Party Highlights

Wine Bags 006

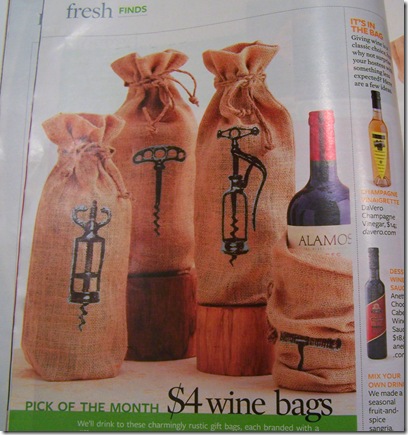
And look what I just found on page 24 in the November 2009 issue of Better Homes and Gardens! These cute BURLAP WINE BAGS are only $4.00 each when you buy a set of 4 for $16.00 from Wisteria.com. (I haven’t mastered the scanner yet so bear with my crude yet effective way of sharing these burlap wine bags with you!) :) These would make a great hostess gift for all those Holiday Parties you are going to be invited to this year!! Cheers!

Monday, October 26, 2009

Chocolate and Peanut Butter Streusel Cake

Peanut butter streusel bars 013

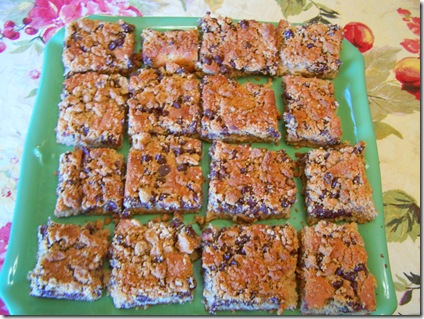
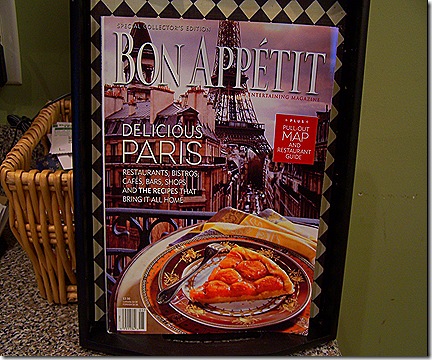
I have an older copy of Bon Appétit Magazine from May of 2001 and the whole issue is dedicated to living and eating in Paris, France. Each time I read this issue I find something new. Fifi Flowers recognized the magazine in my photograph of My Goodwill Magazine Rack because she kept that same copy too! This is a great issue. I am not sure if Bon Appétit is still doing this but for many years they would dedicate the whole May issue to one country or city and it’s cuisine. I kept several including the Italy and Greece issue. Of course my favorite is the Paris issue. Do you keep old magazines??? While browsing my copy (I feel like maybe I should store it in an archival bag and wear fine cotton gloves when I look at it now to help preserve it! :)) I found the following recipe for Chocolate and Peanut Butter Streusel Cake. Now this is a surprisingly AMERICAN cake recipe but there it was on page 226 of their “Too Busy to Cook” section. This is quick and easy and I would have to guess that it was put in the magazine for all those crazy expats who were missing a taste of “The States” while living in Paris. Oh, to have have such problems! Anyway, this is very good and I am beginning to think that I like anything with the word streusel in it. And the bonus for me is that 10th Grade Son who is very picky (even when it comes to cakes) loves peanut butter and chocolate. And I have some “real” French recipes from this magazine that I still want to try so I will post some of them at a later date.

Peanut butter streusel bars 007

Chocolate Peanut Butter Streusel Cake

2 1/4 cups all purpose flour

2 cups (packed) golden brown sugar

1 cup creamy peanut butter

1/2 cup (1 stick) unsalted butter, room temperature

3 large eggs

1 cup whole milk

1 tsp. vanilla extract

1 tsp. baking soda

1 12 ounce package semisweet chocolate chips (2 cups)

Preheat oven to 350 degrees. Butter a 13x9x2 inch metal baking pan. Combine first 4 ingredients in a a large bowl. Beat on low speed until streusel is blended and crumbly. Transfer 1 cup lightly packed streusel to small bowl and reserve. Add eggs, milk, vanilla, baking powder and baking soda to remaining streusel in large bowl. Beat at low speed until evenly moist. Increase speed to medium and beat until well blended, scraping bowl occasionally, about 3 minutes. Stir i 1 cups chips. Transfer batter to prepared pan. Sprinkle with reserved 1 cup streusel and remaining 1 cup chips. Bake cake until tester inserted into center comes out clean, about 35 minutes. Cool cake in pan on rack. Makes 12 servings.

Friday, October 23, 2009

20 Things I Never Saw Growing Up in Michigan

I am a North Carolina transplant by way of Michigan, Ohio, and and Tennessee. Some things are different here in the South.....overall, I am delighted to be living here. Here are just a few observations:

1. Convicts working on the side of the road. Sometimes dressed in black and white stripes. The Sheriff's Officers watching over them with shotguns resting on their shoulders. Actually, I kind of like this except when they are working near my neighborhood.

2. Schools here close at the mere mention of snow.

3. Supermarkets run out of bread and water at the same mere mention of snow.

4. Hush Puppies: Deep fried cornbread.

5. There are no Cider Mills here to visit in the Fall. I miss "real" Pumpkin Patches. Pumpkins are sold at the grocery store or out front of Baptist and Methodist Churches as fundraisers.

6. Banks and drug stores on every corner.

7. Banana Pudding: Just not my thing. It is very plentiful down here and it is not complete without lots of "Nilla Vanilla Wafers".

8. Pepper Jelly: Now I am not sure if this is a Southern creation or not but I discovered it while living here in the South so that is who I am giving credit to. It is usually a pretty red or green jelly that I have seen and served myself spread over cream cheese and you put it on a cracker. It is sweet and spicy at the same time and DELICIOUS! My daughter and I love to spread some cream cheese on a "Wheat Thin" Cracker, a dollop of pepper jelly and then top it off with a dill pickle chip. You get it all. Sweet, Salty, Creamy, Spicy. Try these.....they are addictive!

9. Pimento cheese: The look of it makes me gag. Sorry! I have a HUGE aversion to anything made with mayonnaise!

10. Hurricanes

11. Okra: Slimy!! Now I had it deep fried once and that was okay but I hate finding it elsewhere.

12. Bermuda Grass: This stuff is EVIL!!! If left alone it would devour your house. You cannot kill it. It can grow vertically and has creeped up the sides of my garden boxes and invaded my vegetable garden I can't tell you how many times. It never dies. It looks dead in the winter but when the warm weather comes back it comes back to life with a vengeance. Once you have it....you will wage a battle with it forever! Evil I tell you.

13. Kudzu Another green evil. However, it actually looks kind of nice the way it grows up telephone poles, climbs across fences and covers dead trees but it too will devour anything in its path. Thankfully, we don't have any Kudzu in our yard. (I recently heard that someone figured out a way to cook and eat it. I would turn down that dinner invitation.)

14. Boiled Peanuts: A Big Thumbs Up! I had them at a neighbor's house while watching a Georgia Bulldogs football game. How fitting is that?!

15. Magnolia trees: They can be humongous and gorgeous! The blossoms are white and creamy and gorgeous and the leaves are shiny green on one side and a fuzzy brown suede on the other.

16. Nobody honks their horns at you at the traffic light. If the light changes and you are daydreaming they just wait until you are finished! I love this

17. Sometimes traffic stops in both directions when a funeral procession drives by to pay respects.

18. People always hold the door for you. And they always stop to let you cross in front of their car in parking lots. Southerners are very polite.

19. Fields of Tobacco growing. No matter how you feel about cigarettes.....the fields of green tobacco are very pretty. I got very excited when I saw my first field of cotton too. (In Michigan it is corn fields that rule.)

20. North Carolina has beautiful flowers growing in the median areas of their highways. Absolutely gorgeous!!


Wednesday, October 21, 2009

Bad Day at the Goodwill

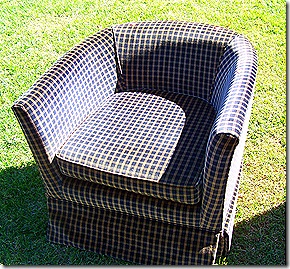
I was on such a roll too. I was feeling triumphant as I handed the guy at the loading dock my receipt as proof of my purchase. I found a great chair sitting on the floor of the house wares section of the local Goodwill that I have been haunting on a weekly basis. It wasn’t dirty or grubby…had no tears in the fabric and it was comfortable! The price tag said $25.00. I was thinking that was a pretty good deal. Sold. I wasn’t sure where I was going to put it but a deal is a deal and I was going to make room. The guy at the loading dock said “Nice chair” as he loaded into the back of my minivan. I said “Thanks! I’m usually not this lucky but I think I found a good one!” And I headed to work from there with my new chair in the back. Not 2 minutes into my drive did I realize that I might have made a mistake.

deals 002

Now anyone who has shopped in a Goodwill will know what I mean when I say the Goodwill has a distinct smell. It is kind of a hybrid aroma….a musty smelling cross between the smell of the local dry cleaners, mildew, and Febreeze and another odor that I can’t quite put my finger on…that is until I got into my car. Since everything in the store smells anyway, I didn’t put my nose to the chair before I happily plopped down my $25.00. My new chair it seems came from the home of a smoker. I was driving down the road when it hit me. It was subtle at first, but after sitting in my van in the hot sun while I was working for a couple of hours there was no mistake. When I came out to my car to head home the odor of stale Marlboro’s or Camel’s hit me in the face when I opened the door. My new chair was starting to make my van smell like an ashtray!

As soon as I got home I put my new chair in the sun and gave it a heavy duty spray down of Febreeze. I let it bake in the sun for a couple of hours and then moved it into my husband’s office to surprise him! He was surprised alright! Let me just finish by saying that was two days ago. The chair is now out in the garage. We can’t take it anymore…the smell that is. The chair will be making a re-appearance on the sales floor at the Greensboro, NC Goodwill sometime this weekend and I have learned a $25.00 lesson. It is a good thing that I believe in what the Goodwill does and I look at my lesson learned as a donation to a worthy cause. :)

Tuesday, October 20, 2009

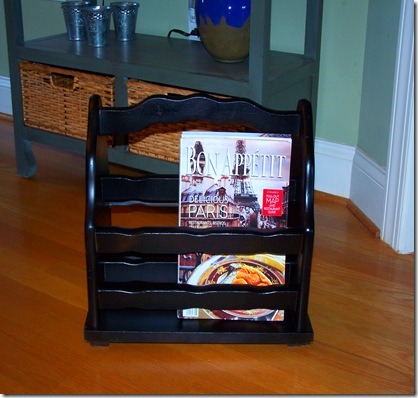
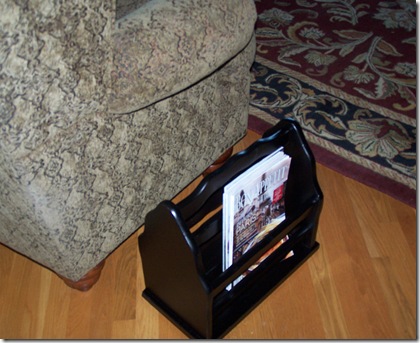
Procrastinator’s Party Magazine Rack Done!

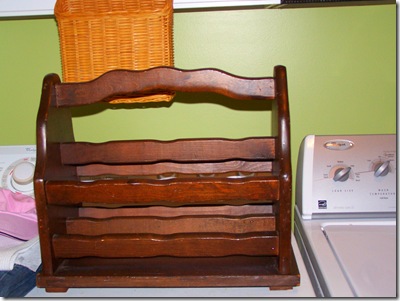
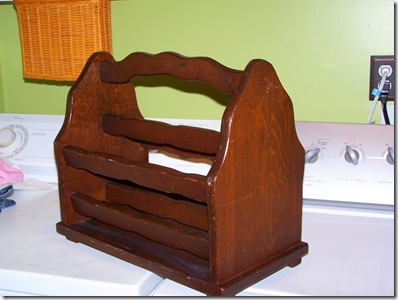
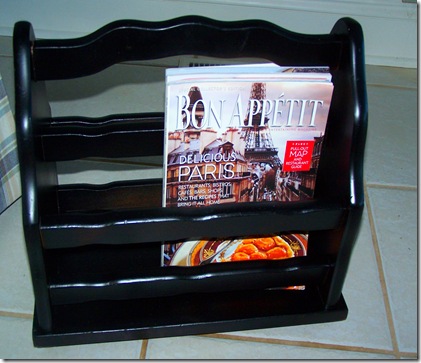
I finished it!  It wasn’t much work at all.  I just needed a good shove and a deadline to make it happen.  I found this magazine rack a the Goodwill a few weeks ago.   A bargain at $4.00.   Great condition.  Hard wood and no wobbles.  All it needed was a good scrubbing and a few coats of paint.  Black is my favorite right now.

Magazine rack 003


Here are the before photos:

magazine rack 012

magazine rack 014

A couple coats of Rust-oleum Satin Spray Paint in BLACK and project done!!


Magazine rack 002 


Magazine rack 001


Now I will just walk it all over the house to see where it looks the best. 

Magazine rack 007

Thank you Procrastinator’s Party for getting my you know what in gear!

Monday, October 19, 2009

A Walk In The Woods

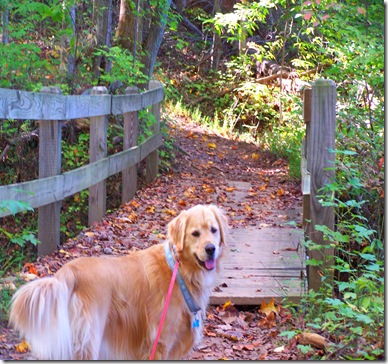
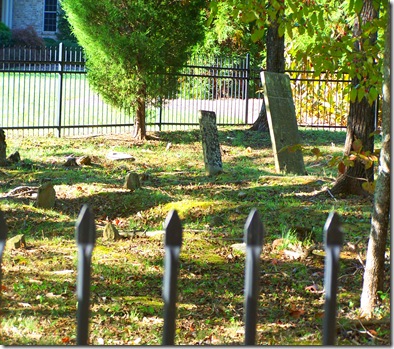
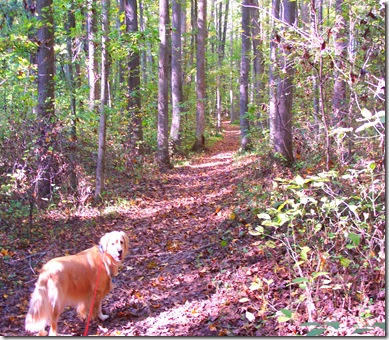
Me and Crazy Dog (her name is Oakley) took a walk in the woods today. At the end of our street is a mini grave yard. It has a pretty black iron fence around it and is not very scary. The first Sherriff of Guilford County and his family are buried there. It is a small family plot and the land that is our neighborhood used to be his family’s farm land.

Walk in the woods 006

Are you coming?

Walk in the woods 003

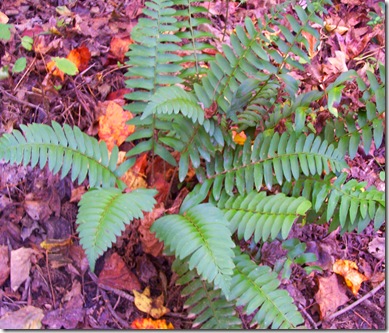
Behind it is a trail that takes you through the woods and this time of year it is beautiful and the dog loves it.

Walk in the woods 006

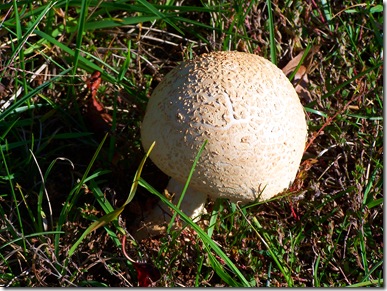
Last week when we were walking I saw all kinds of unusual mushrooms so today I grabbed my camera as we headed out the door. Did I see any mushrooms in the woods today? No…not a single one. But I did find this beauty in the my neighbors lawn. Does that count?

Walk in the woods 001

There were lots of Revolutionary War Battles fought near here. One of the most famous is the Battle of Guilford Courthouse and General Greene and Cornwallis fought near here. We’ve been told that soldiers are buried in these woods. Some of their graves are marked with stones.

Walk in the woods 013

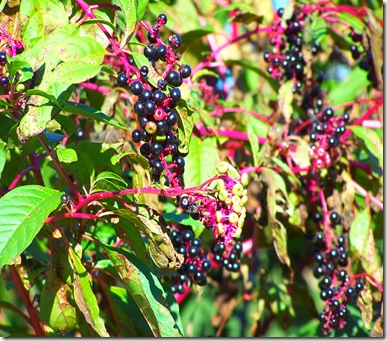
Does anyone know what this plant and these berries are?

Walk in the woods 009

Walk in the woods 008

It is a fun place to walk the dog and the leaves are only just now starting to change. I am still looking for the mushrooms.


I have linked this post up to Outdoor Wednesday over at A Southern Day Dreamer. Stop by to see some other Outdoor Scenes from around the country.

Saturday, October 17, 2009

I am sorry but I think this is funny!

http://www.facebook.com/photo.php?pid=

Okay, so I might have a twisted sense of humor BUT I think this is funny!! Come on. It made you smile just a little bit now didn’t it?

Happy Halloween!

Friday, October 16, 2009

Help! I can’t stop!

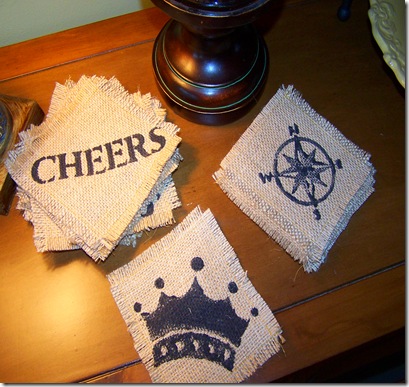
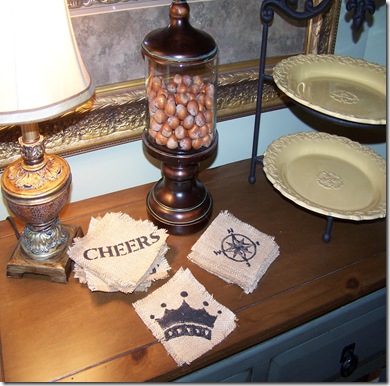
I can’t stop making coasters! I made some new ones. You will have to let me know which ones you like best. I added a set with the navigation compass and I made a crown in honor of my friend FGT (First Grade Teacher) who loves all things girly. :)

Coasters 2 004

But I have to say that my favorite of the three has to be the “CHEERS” coasters! I made two sets of them and will start production on more.

Coasters 2 003

This weekend is the BIG HALLOWEEN Party. This party is given by our good friends and neighbors who really know how to throw a party. They have a band that plays outside in the garage and a bartender in the house mixing up mysterious Halloween concoctions and lots of great food. And the costumes are HILLARIOUS!! I can’t tell you what we are going to be yet because it is a big secret and I can’t take any chances with it getting out. But I will fill you in later this weekend. All I can tell you is that there has been a lot of gluing going on in our house this week and I hope there is a prize this year!!

Wednesday, October 14, 2009

Peanut Butter Cookies

Peanut butter cookies 2 014

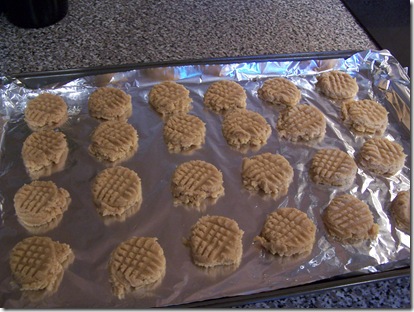
The only word to describe today is RAW! It is cold and raining and I broke down and turned on the furnace this afternoon when I got home from work. I decided to make the boys in my house very happy and made a batch of Peanut Butter Cookies. The house smells good. Give these a try if you haven’t had a good peanut butter cookie in a while. I can’t remember the last time I made these. It has been awhile….I don’t bake much in the summertime. The recipe says to chill for 3 hours after you make the dough (who wants to wait 3 hours???) but I skipped this step and they turned out fine. Anyway, here is the recipe:

Peanut Butter Cookies

1 cup butter, softened

1 cup creamy peanut butter

1 cup sugar

1 cup firmly packed brown sugar

2 large eggs

2 1/2 cups of all –purpose flour

2 tsp. baking soda

1/4 tsp. salt

1 tsp. vanilla extract

Beat butter and peanut butter at medium speed with an electric mixer until creamy. Gradually add sugars and beat well. Add eggs and beat well.

Combine flour soda, and salt in a medium bowl, add to butter mixture, beating well. Stir in vanilla. Cover and chill 3 hours

Peanut Butter Cookies 013

Shape into 1 1/4 inch balls; place 3 inches apart on ungreased cookie sheets. Flatten cookies with a fork in a criss-cross pattern. Bake at 375 degrees for 7 to 8 minutes. Remove to wire racks to cool. Yield: 6 dozen cookies.

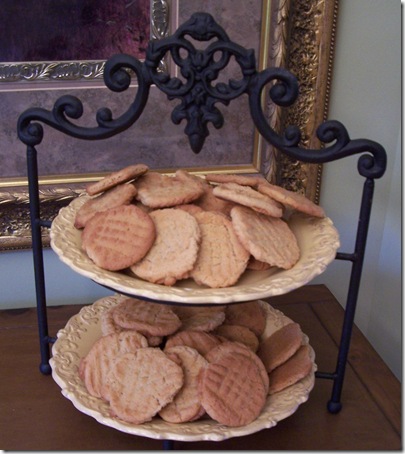
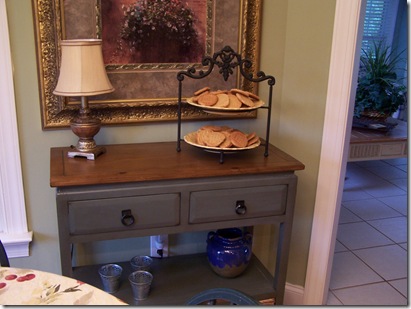
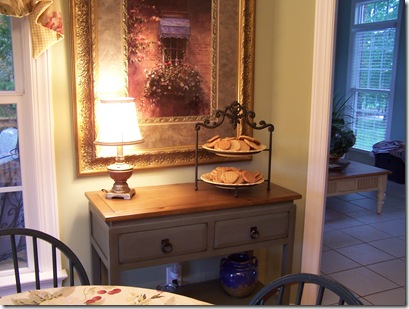
And here they are on my dessert stand. This gives me a chance to show you the little table I picked up yesterday at TJ Maxx. I still have the tag on it because I am still deciding if I am going to keep it. I do really like it and it and it is the perfect size for that small piece of wall. What do you think? I think I am going to keep it. And I have 30 days to think about it! :)

Peanut butter cookies 2 010

Peanut butter cookies 2 007

Tuesday, October 13, 2009

The Car Pool or Somebody Get Me a Gas Mask!

It seems I have found myself in a very un-organized car pool....thanks to my son. As anyone with teenagers can tell you the bus is very un-cool. They tolerate it their Freshman year because they are thinking....."I am riding the High School bus! I'm in High School! This is so cool!" But by the time their Sophomore year comes around the the bus has lost it's luster. This is where you find me. The 10th Grade Son doesn't want to ride the bus ever again. I started driving him each morning when the school year started a couple of months ago and it was really kind of nice. Just him and me and the dog driving to school. Me sipping on my coffee, the dog so excited to be riding in the car at such an early hour that she can barely stand it, and my son who is not a "morning person" answering my questions with as few words as possible.

Slowly that routine started to change when as we would be walking out the door 10th Grade Son's cell phone would start buzzing from his friends looking for a ride. Now, the question of who is driving doesn't get answered until about 5 minutes before it is time to go. That is because it is in the hands of 3 sometimes 4 teen age boys. None of the Moms have communicated with each other on this haphazard car pool. We are all taking our marching orders from our fifteen year old sons. So now each morning I dress and I am ready for anything. Some days I drive, some days I don't. Some days the dog gets to come and some days she doesn't. Today I drove. The dog stayed home.

So there I was with 3 teenage boys in my minivan with the air vents purposely aimed at my face and blasting air just so I can breathe. Whoever invented "Axe" Body Spray for "boys" (come on we all know this product was never intended for "Men").........should be forced to carpool with 3 teenage boys wearing their product. That is all I am going to say. Do you have any Advil? I still have a headache.

Axe Body Spray

Monday, October 12, 2009

I Went A Little Coaster Crazy

Coasters 053

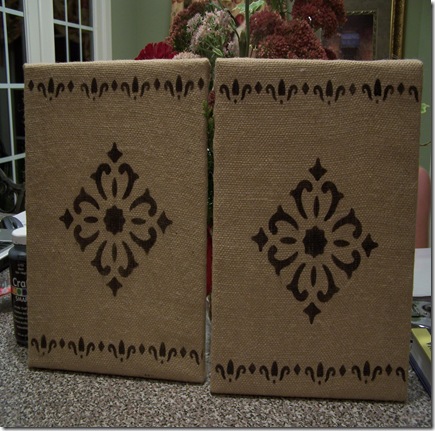
One of my last projects from a couple of weeks ago was a set of two pictures for my wall made out of stenciled burlap. I had some burlap left over and after seeing some of the ideas posted at The DIY Show Off on what to do with Burlap, Hemp, and Jute……I decided to make some coasters similar to the Stenciled Coasters I saw made by Hirondelle Rustique . Mine are only a little bit different and so here is my “tutorial” on how to make my Stamped Coasters.

Coasters 037

Coasters 034

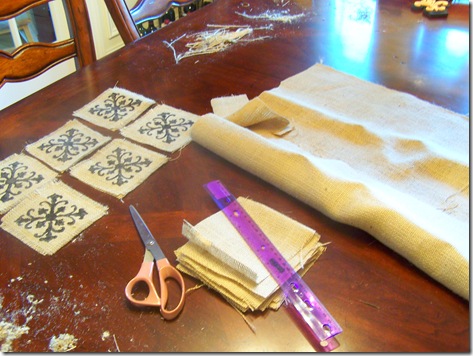
First thing I did was cut 5 X 5 inch squares out of the Burlap. To speed things up fold your Burlap over so that you are cutting them out 2 at a time. Cut out 3 of the sides and then cut down the fold line. I made a set of 6 so you will need 12 squares. (Also, FYI, Burlap is messy! It sheds fibers almost as bad as my dog sheds her hair. So be prepared for a bit of a mess….but so worth it!)

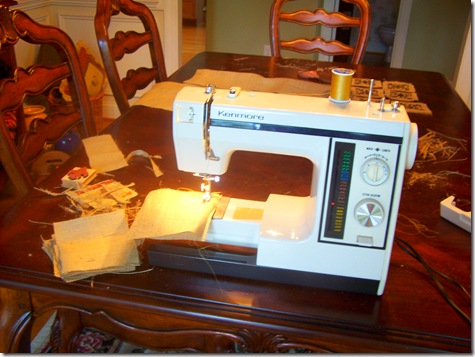
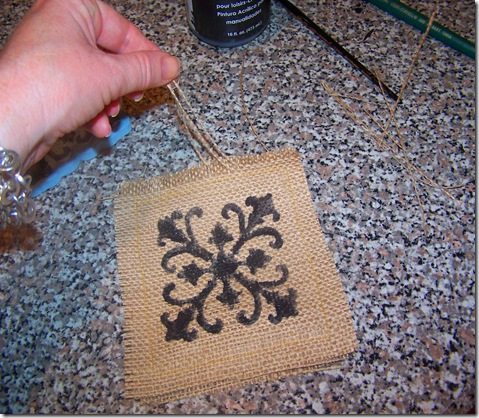
Augh!!! I know many of you did not want to see this but……sewing these little babies is not difficult! DO NOT BE AFRAID OF THE SEWING MACHINE! Four straight seems and you are done! Take two of your cut out 5 X 5 inch squares, place them on top of each other and sew them together on all 4 sides about 1/2 inch in.

Coasters 035

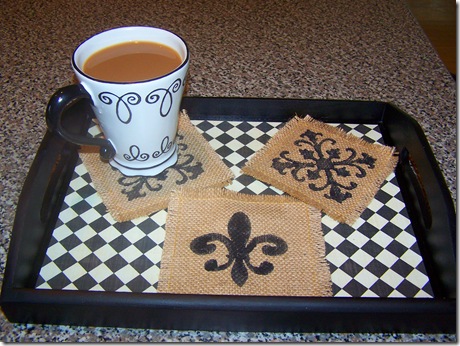
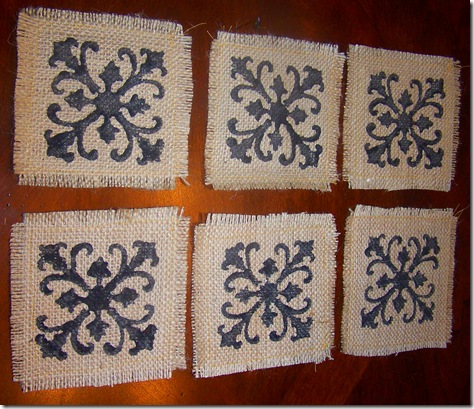
After you have your squares sewn together, it is time for the fun part…adding your design. You can stencil on a design, hand paint if you are really artistic or if you are like me… STAMP IT! I had some stamps on is the scroll design you see and I also thought I would try a Fleur de Lis.

Coasters 041

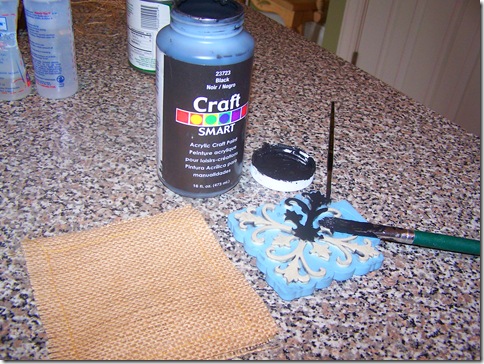
I used black acrylic craft paint and I carefully painted the black paint on to my stamp. I have heard that those little white wedge make up sponges are also good for adding paint to a stamp…..foam brushes work well too.

Coasters 044

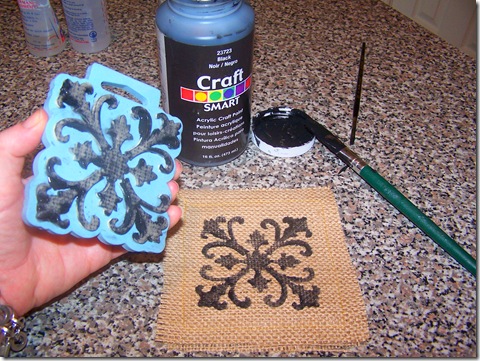
After I completely covered my stamp with black craft paint I carefully eyed the center of my coaster and pressed the stamp down on the Burlap. I carefully added pressure to make sure the paint transferred. Then very carefully, peel off your stamp. (If you have any spots where the paint isn’t dark or covers as mush as you wish you can touch up with a very fine brush with more black paint.)

Coasters 048

Another fun part is “fringing” the coaster. Simply start pulling out threads along the edges to create a fringe. If you squares seem uneven after you fringe the edges you can take a pair of scissors and evenly trim the edges.

Coasters 037

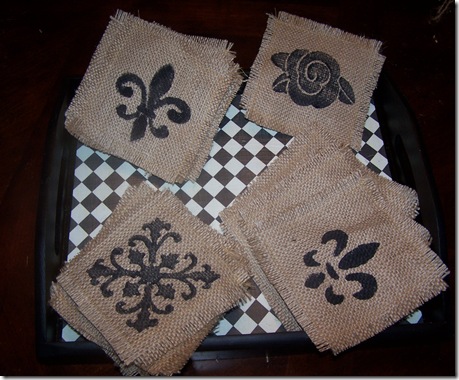
And VOILA! Here are six of my coasters. I actually got a little carried away and made two sets of four. Will give a set away as a gift. And then I also made a sample with a Fleur de Lis on it which I also really liked. I am going to make a set of them next.

More Coasters 017

Lots to choose from. Not sure which ones I like best.

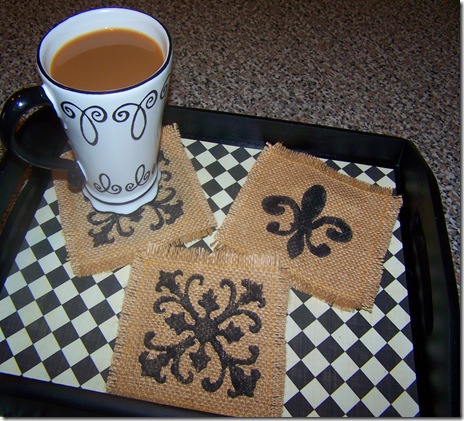
Coasters 055

And Here they are in action. Quick, cheap, and easy!! Love these!

Saturday, October 10, 2009

A Whole “Lotta” Burlap

A week or so ago I posted on my blog a project called “A Little Bit Of Burlap”. Well today, my “Little Bit of Burlap” post was featured on Roeshell’s The DIY Show Off blog and she posted a great compilation of projects with burlap and Jute! I love that she has so many projects all in one place. This is the place you want to go for ideas on what to do with Burlap, Hemp, and Jute. And she is going to update her blog post with more projects ideas throughout the weekend!

Remember these? You can click on the “A Little Bit of Burlap” link highlighted above in blue to see exactly how I did it.

[Burlap Art 020[4].jpg]

Burlap Art 018

My ”Little Bit of Burlap” Post was also mentioned on one of my favorite blogs by Leigh at Tales From Blogaritaville. Leigh was sent a gift of all kinds of bulap and burlap bags that were pre printed with names of coffee, rice, etc…What to do with all these bags??? My quick and easy wall art project was mentioned along with a few others at this site as well.

Here is just two of the projects at the DIY Show Off. How cute are these coasters?

Hirondelle Rustique

is the creator of these quick sew coasters.

This pillow is cute too…… See La *T* Da. for details on this pillow.

So hurry and check out the The DIY Show Off because there are lots more really cute and clever projects for you to look at there! Hurry! Go!