Saturday, August 25, 2012

Rustic Romance

IMG_1897

Greensboro, North Carolina has a delightful new shop that just opened up a few weeks ago called Rustic Romance.  I stopped in there a few days ago after a long day of slinging cheese.  :)  I was on my way home when I spotted that giant sunflower outside of a new shop that I had not seen before and I immediately turned in to see what it was all about.

IMG_1896    

I was greeted by Lynn Mackay the owner and knew that I immediately liked her and her wonderful shop.  I started looking around and was loving what I was seeing when suddenly I blurted out “ Hi, I’m Lisa, and I write a blog called Pickles and Cheese and I would love to feature you!” I felt like George Costanza when he blurted out “Hi, I’m George, I’m unemployed and I live with my parents.”  Any Seinfeld fans out there? :)

Anyway, Lynn quickly said “I would love that!”  So, I went back with my camera the next day.

IMG_1949    

There were lots of these fun and funky owls tucked into shelves all around the store.


IMG_1928

I especially loved this set of chairs.  And that glass topped table.

IMG_1941    

I always love to see an old painted shutter.  Lot’s of Shabby Chic style going on here. 

IMG_1947

Pretty yellow painted mirror.  Even the price tags are cute. 

IMG_1923

These lamps caught my eye with the frame lampshades.  Very cute.

IMG_1943    

Storage cubes with white chippy paint.  Love.

IMG_2010 

I loved this photo of the yellow duck sitting in one of the white chippy cubes. 

I had a lot of fun with my camera that day.  I took 131 photos!   

IMG_1925 IMG_1942 IMG_1937

More unique shelving, old garden tools, and I loved this yellow nightstand. 

Lynn told me that she is going to offer a furniture painting class in September. Date yet to be determined.  I plan on attending.  I have two wood chairs that I picked up at the Goodwill not too long ago that have been sitting in my garage just waiting for me to figure out what to do with them.  If you are interested in attending the class, check out the Rustic Romance website or call Lynn for more details. 

IMG_1945     IMG_1946    

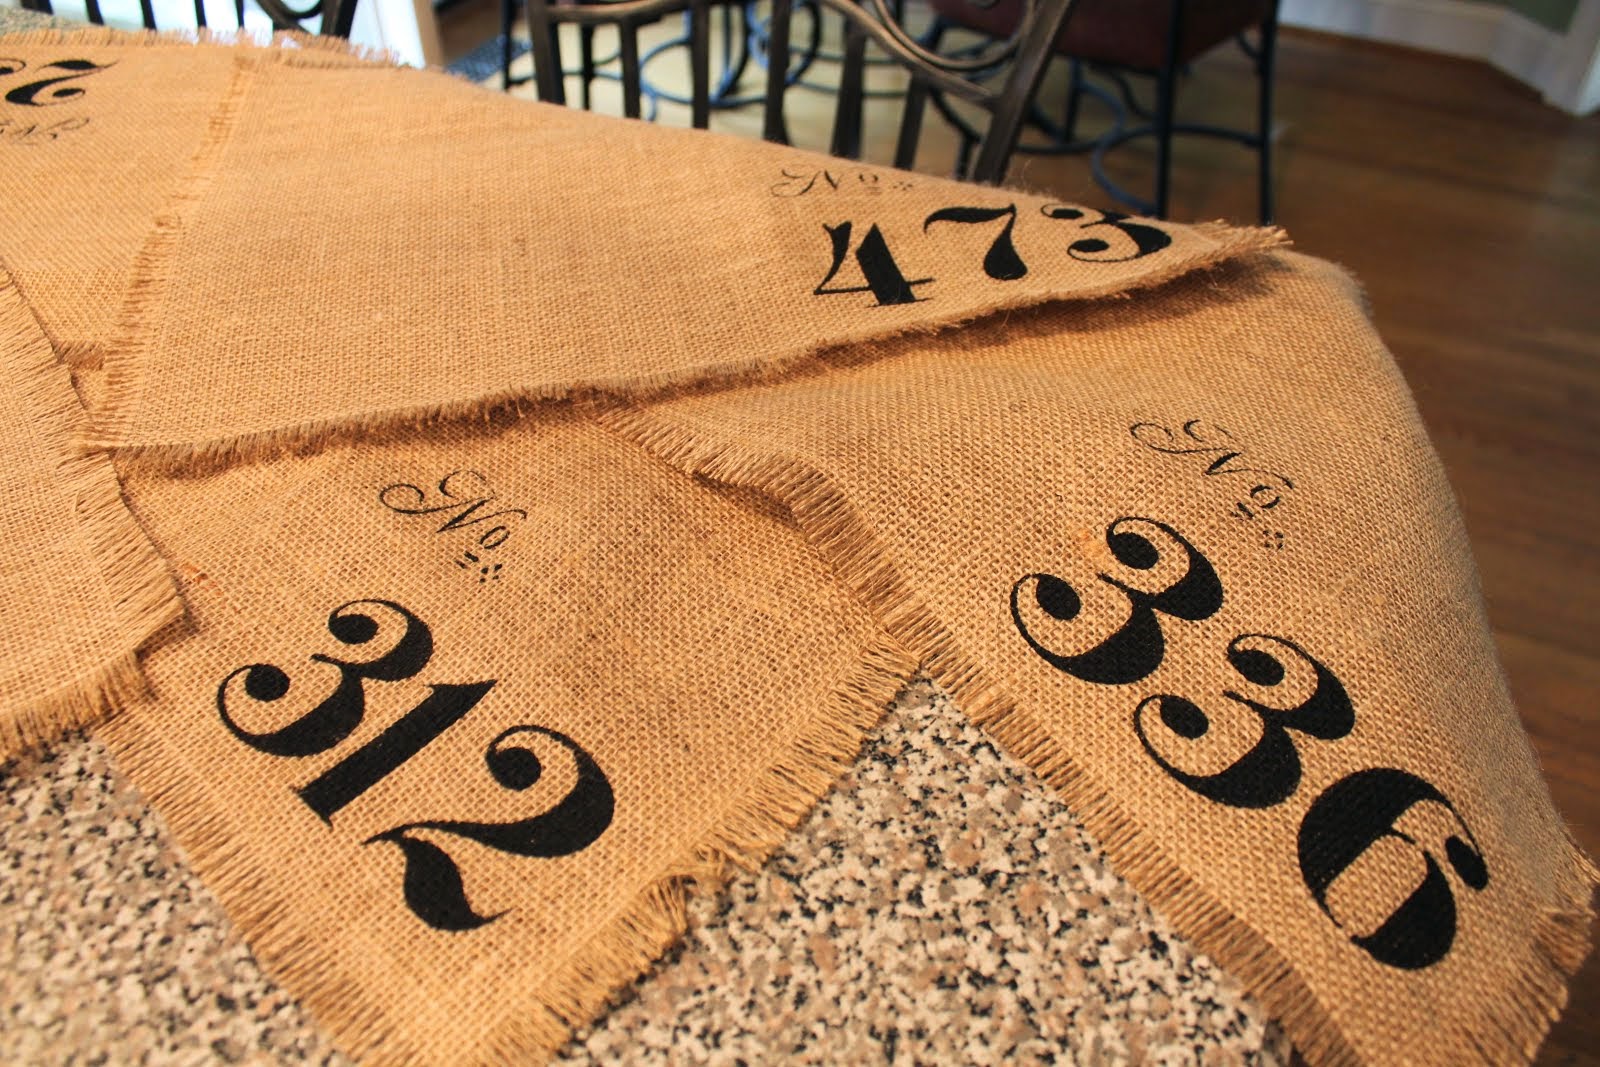
Now you know I just loved the stenciled seats on these chairs.

IMG_1968

Isn’t that blue paint finish on that mini table a pretty color? 


IMG_1988    

And I loved these old pained glass windows with the original latches.  Can you see the hair studio through that beautiful door in the back of this photo?  More about that in a minute.

IMG_1977

Cute idea with the lacy skirt for these little night stand tables.

IMG_1998     IMG_1963

I am still admiring that stone garden owl.  Might just have to go back and get him. 

     IMG_1974

There was something about these baby shoes that I just loved.  How sweet.

Makes you wonder whose tiny little feet were ever in them.


IMG_1985    

And this hutch/buffet/dresser?  The paint finish on it was lovely. 


IMG_1932    

And Jane Rudd a local artist has some of her paintings here.   Loved the Roosters painting and Lynn told me that she does pet portraits.  That is Lynn’s dog Lilly on the top right.  Stop by the shop for more details on the pet portraits by Jane Rudd.

IMG_1954J

Handbags and jewelry in the back just outside of the Hair Salon.  Yes, I did say Hair Studio.

IMG_2005

And in addition,  Lynn and her associates do hair!  She told me they just got back from a training seminar with Vidal Sassoon in London.  Looking for a new hair stylist?  You can get superior color and styling here.  Just give Lynn a call at 336-508-5209 or stop by in person at 1860 Pembroke, Greensboro, NC. 

The sign says:

Rustic Romance

Home. Garden. Soul.

Yes, I would say that is the perfect description!

Thursday, August 23, 2012

Queen Bee Watering Can

IMG_1892

LOVE my newest stencil!  It arrived last week from Maison de Stencils which is my favorite source for unique stencils.  This stencil is definitely destined for a pillow as soon as I get around to making one but in the meantime I just love what it did to this great galvanized watering can that I bought today from a new shop that just opened up here in Greensboro, NC a few weeks ago.  I met the VERY nice and friendly Lynn at Rustic Romance and I am headed back there tomorrow with my camera in hand to take some photos of her shop and will be posting them to the blog in the next few days.  I just love finding new places to shop that are filled with fun things to keep my eyes entertained.  Stay tuned for more details on this fun new shop. 

IMG_1856

In the meantime, let me show you my new galvanized watering can that I purchased there today.  Something about old garden tools, don’t you agree?

They have personality.  Much more attractive than the plastic green cans of which I have four.

My goal is to slowly replace all of them with something like this one. 

     IMG_1876     IMG_1879

So, after I got home and I was admiring my new watering can, the idea hit me to see if I could fit my stencil on to the can.  With some very strong tape and some outdoor craft paint, I was ready to roll.  Or should I say pounce?

IMG_1883

I am delighted with the way it turned out!  Très joli n'est-ce pas?

I am linking up to Common Ground’s Vintage Inspiration party along with Potpourri Friday over at 2805, Friday’s Unfolded at Stuff & Nonsense, and Home Sweet Home at The Charm of Home

Sunday, August 19, 2012

Aqua and Pink Rag Quilt

IMG_1814

After a long hot summer, the rain today that brought in some cooler temperatures was rather welcome.  It’s amazing what you can get done on a gloomy rainy day isn’t it?  Why not put all those quilt squares together I asked myself?  Yes, why not?!

I finished my latest rag quilt.  It’s a bit wilder than I anticipated.  I was going to make two baby quilts out of this set of fabric but once I started laying the squares out, it was anything but soothing.  And soothing is what you want with a baby I believe!  It’s more on the funky side and so instead of two small baby sized quilts, I made it into one larger lap sized quilt.  It’s fits perfectly over the end of my daughter’s full sized bed.  She’s already back to school for her last year of college and so I think I’ll be delivering this funky creation next time I go for a visit.  

IMG_1802

I started out with only three prints and then went back to the store for one more print to add to the mix.  I also wanted to do a single solid color for the back side of this quilt and decided to go with white. I found all the fabrics at Hobby Lobby and all of the prints were on sale and I got them each for around $5.00 a yard each.  The broad cloth on the back side was only $2.99 a yard .  

Here is what I used to make this:

1 yard each of 4 different print fabrics

4 yards of white broad cloth

1 spool of white thread

1 small bag of polyester batting.  I like  “Mountain Mist” brand. 

My finished quit was made up of 8” x 8” inch squares.  It measured 7 squares across and 11 squares down.   

It measures approximately 45 x 70 inches total. 


Rag Quilt Aqua and Pink 007     IMG_1807

Here is a link to my tutorial and there are some other wonderful links in that post that I used to teach myself how to make a rag quilt.

IMG_1825

Time to start shopping for some new fabric for my next quilt!

Tuesday, August 14, 2012

It’s Time For Pickles!

IMG_1781

I am running a little bit late this summer for my pickles but here they are!  My first batch of the season.

And it only made 6 jars.  And all 6 jars already have homes.

My kitchen and fingertips smell like fresh sliced cucumbers. 

Looks like I’ll be heading back to the Farmer’s Market for more cucumbers later this week to start another batch. 

Want to make a batch for yourself?  It’s easy and fun and you’ll make a lot of people smile.  Here’s the link to my Dill Pickle Chips Tutorial.  Good Luck!

Sunday, August 12, 2012

Eye Chart Stencil

Eye Chart Stencil 001

I received some new stencils this week that I ordered from my favorite source for stencils Maison de Stencils.  They have added so many new, fun, and unique stencils to their website that it was difficult to pick out just a few new ones to order.  Here is the first of the three that arrived this week.  Something about this eye chart caught my eye.  Pun intended.   :)

IMG_1743

I decided to hang it in our office along with a couple of my other stenciling projects that I made a couple of years ago.  Here is a link to my Typewriter Keys Tutorial if you are interested in seeing how I did that project.    You can also catch a glimpse of my subway art poster showing all of the addresses we have lived at over the years.  It was a fun project and easy to do with my set of letter and number stencils. 

Here’s how I made the Eye Chart.

IMG_1738     IMG_1739

For my Eye Chart I used a pre-made canvas that I found at Michael’s craft store.   I taped the stencil down with painter’s tape to keep it from shifting while I pounced my brush to add the paint to the stencil.  There is a product that you can get that is a spray adhesive that you can spray the back of your stencil with to help secure it.  Usually the painter’s tape does the job for me but because the canvas I was working with had a bit of texture to it,  I found some of my edges to be not as crisp as when I stencil on other surfaces like cloth.  I would recommend trying to find the spray adhesive if you want to try this project out on canvas like I did.  Without it, I had to go back with a paint brush and straighten out and fill in some of my edges.

I used a black acrylic craft paint and with my stencil brush I pounced up and down to fill in the stencil areas.  I always pounce.  Some people like to use a circular rubbing motion with the stencil brush but I have not been successful with that technique. I usually end up with paint collecting up under the edges when I do that and that causes major smearing.  Pouncing works best my friends. And not too much paint on your brush.  You can always add more and you don’t want glops!

 IMG_1741     IMG_1745

Then I took some wood stain that I had and rubbed it on with a cloth to give it an aged look.  That’s it.  After it was dry I hung it up in the office.

Eye Chart Stencil 011

I think this would make a cute pillow too.  I will have to keep my eyes out for an oblong pillow that I can recover with Painter’s Cloth and then add this Eye Chart Stencil to it.

One down and two more stencils to go!

I am adding this post to the Creative Creations Link Party over at Kristen’s Creations.


Tuesday, August 7, 2012

Paris Burlap Placemats

IMG_1684
Burlap , stenciling, and anything French are some of my favorite things and in just one afternoon I was able to put together a set of six new placemats.  They couldn’t be easier to make and I didn’t have to break out my brushes, paints, or stencils!

IMG_1722
I found some burlap fabric that already had the type of stenciling that I love already printed on it.

  IMG_1656     IMG_1666
Joann Fabric’s sells a pre-stamped burlap with this French script, stamp, and postmark design on it for $9.99 per yard.  I quickly snatched up 2 yards of it  and an additional 2 yards of regular burlap for the back side (saves money because the regular burlap usually costs between two and five dollars per yard) and I grabbed a spool of matching thread and headed home and got busy.  These are so easy to make and they look so great on a table!  I used an existing placemat that I already had as a pattern and I used it to cut out 6 pieces of the printed burlap and 6  pieces of the regular burlap.  I laid them on top of each other and ran a stitch about 5/8 of an inch around the edges to attach them to each other.  Use your iron to make sure your placemats are nice and smooth. 
Then it is just a matter of pulling the threads around the out side edges to get that fringed look.  Don’t pull too hard and if a thread resists, carefully snip it off as close as you can without cutting the seam of the placemat. 
   IMG_1662     IMG_1665 to
I think that sewing the two burlaps together gives the placemats a nice weight to them. 

IMG_1670
I love them!
IMG_1669
These make such a quick and easy project.   Makes a great gift too!
IMG_1707


I didn’t include a shot of the back side of these placemats but don’t worry.  You will be seeing that back side soon.  It’s a blank canvas for stenciling and I am planning to to turn this set of placemats into a set of REVERSABLE placemats.  :)  Can’t wait to get started.

I have linked up to "Share Your Creations #49" over at Kristen's Creations. More creative projects to be found there!

I am also linking up to "Transformation Thursday #164" over at The Shabby Creek Cottage. Lot's of great transformation there too! 

And I am linking up to Fabulously Creative Friday over at Inspired Living with Jennifer Rizzo.