Sunday, February 28, 2010

Welcome To Our Home

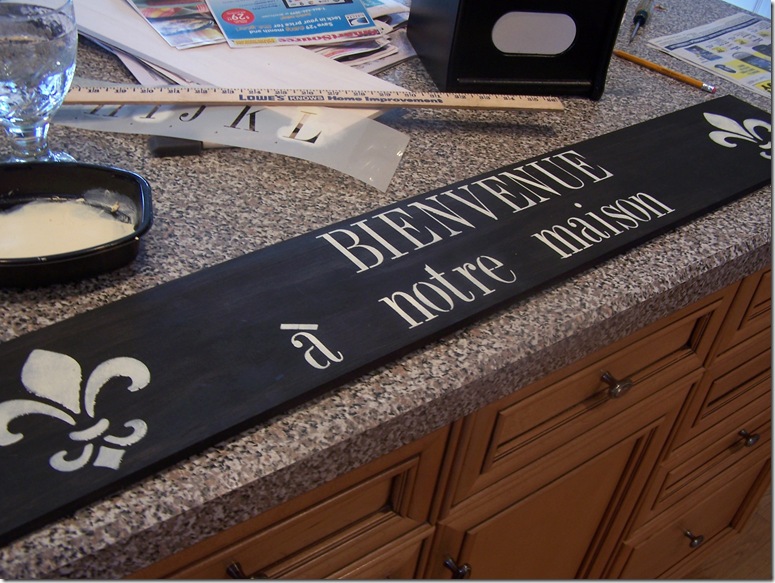
Bienvenue Sign 013

I did a quick project today since going outside was not part of my plans today.  The wind and cold are getting old so I decided to stay inside, catch up on some of the blogs I like to read, watch the Olympics, enjoy the aroma of the pot roast I have cooking in the Crock Pot, and do a little painting and stenciling. 

    Bienvenue Sign 003

I was at Lowe’s last week and found some pre-cut pieces of wood for less than $3.00 a piece so I brought a couple home with me.

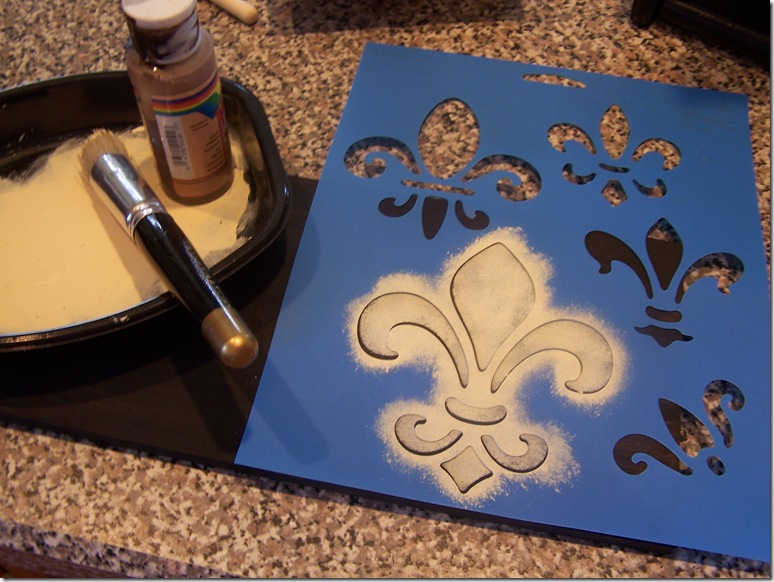
I painted one of them black and then took out some stencils and some cream colored craft paint.

Bienvenue Sign 006

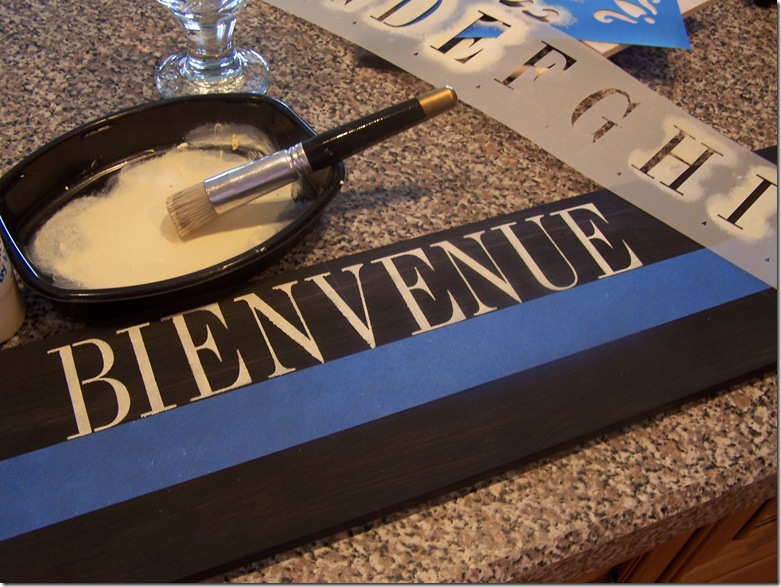
I used a yard stick and a pencil to mark the center of my sign and then the first letter I stenciled on was the letter “V” which was the center letter in the French work “Bienvenue”.  Then I added the rest of the letters to finish spelling the word.  I also use a piece of blue painter’s tape to help me keep the letters straight.

Bienvenue Sign 017

When it was done, I tacked a saw tooth picture hanger on the back and it is now hanging above one of the doors in my kitchen.

Bienvenue Sign 013

This really was a quick and easy project.  Cheap too!  Welcome to our home!

Saturday, February 27, 2010

And the Winner Is…

image

Thanks to all who entered my Giveaway!  I am happy to announce that the Random Number Generator at www.Random.org picked  number 19 and that number belonged to Penny at The Comforts of Home/Lavender Hill!  Congratulations Penny!

image image

Here are just a couple of samples of her work.  How cute is that bread box and that chair??!!

I took a peek at Penny’s blog and learned that she is an accomplished Mosaic Artist.  She actually has two blogs.   The first is Lavender Hill Studio, which features her mosaic art and one called The Comforts of Home, where she shares her home, gardening, cooking and inspiration for a comfortable life.  Stop by and visit with Penny and take a peek at her beautiful mosaic pieces. 

image

Congratulations again to Penny who won this set of 3 Hand Stenciled Gift Bags with matching tags.  Penny, please send me your info and I will pop these into the mail pronto!!

Thursday, February 25, 2010

Don’t Forget!


image

Today, Friday, February 26, 2010 is the last day to enter my Giveaway!  Leave a comment here and let me know if you are a follower for an extra chance and that’s it.  Consider yourself entered!  I will announce the winner late Friday evening.  Good Luck!

Wednesday, February 24, 2010

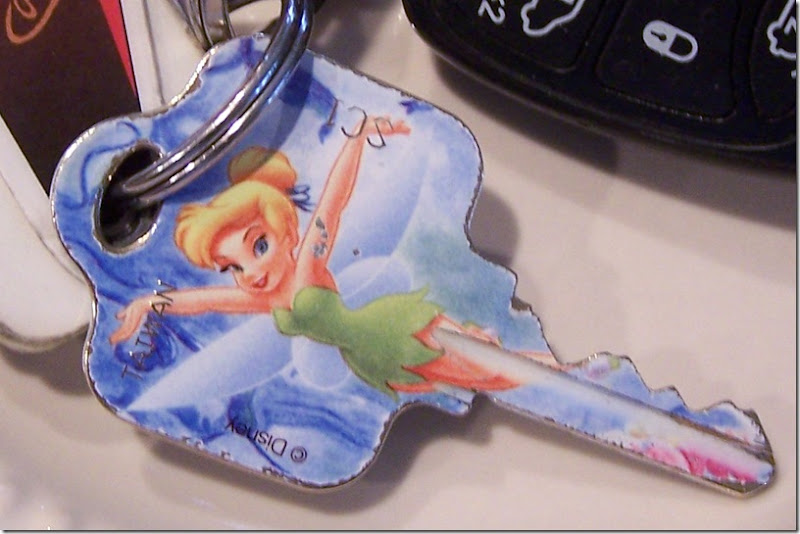
The Tinker Bell Key

Tinker Bell Key 007  

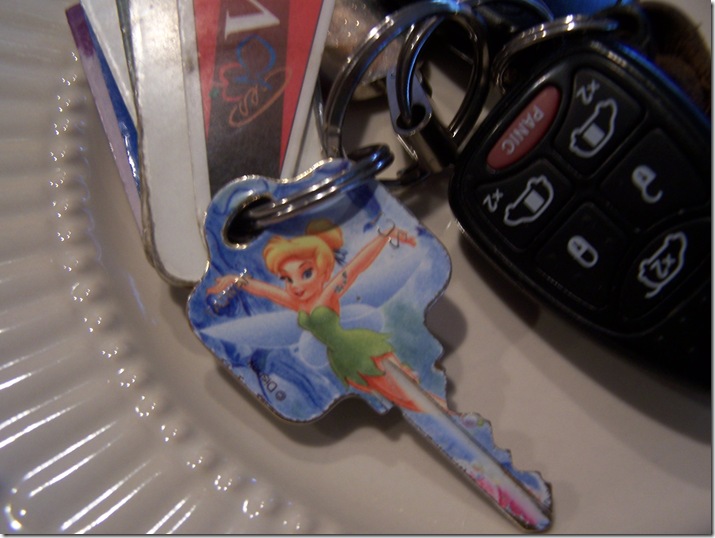
Everyone should have one!  She is a little beat up but that is only because she is a couple of years old now and I have to say she is doing her job.

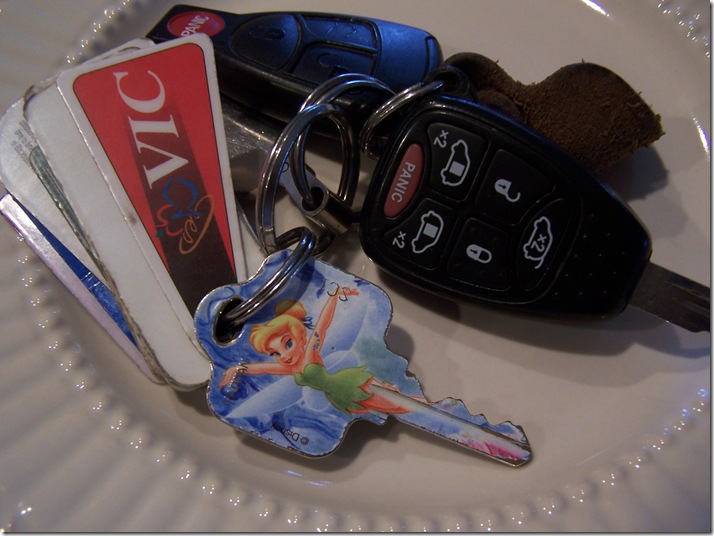
Tinker Bell Key 003 

My daughter gets credit for this one.  A couple of years ago, she and a friend went out to get matching house keys made because that is the sort of thing girls in high school like to do.   After complaining one too many times and fumbling over my keys trying to find my house key to unlock the door as I am doing a “pee pee” dance on the front porch trying to get into the house after a long day of shopping and drinking one too many iced teas and dying to use the bathroom but I can’t get in the house because I keep trying the wrong key and the door won’t open…(big sigh), my daughter said “Mom!  Just get a Tinker Bell key made and you will always know which one is the house key!”

Tinker Bell Key 006

So I did.  Problem solved.  And no more “pee pee dances” on the front porch.  :)

There is still time to enter my giveaway!  Click on the icon on my side bar for more details and it will take you to the post so that you can enter.

Good Luck!

Tuesday, February 23, 2010

Mah Jong

So last night was my fourth time playing Maj Jong and I can still say with a high degree of certainty that I still don’t know what I am doing!    But everyone has been very nice to me.  I am beginning to think that new recruits are not easy to come by and so they are being extra nice so that they don’t scare me off.  They are all oozing with patience.    Right now the group plays every other week.  That is a big commitment but so far,  come the 2nd week when it’s time to play, I am usually ready to try again.  The food is always good.  And of course wine is always served.  And the stakes are low in that we are only playing for quarters…and of course bragging rights. 

image

The Maj Jong women are slowing sucking me in to their circle.  They are plying me with their wine and kindness.  I’ve been talked into ordering a new playing card for the 2010 Maj Jong season.  I’ll bet you didn’t even know that Maj Jong  had a “season”.  Everyone plays from the same card which is a sheet that lists all the possible tile combinations you need for a winning hand.  New cards are issued to start on the first of April and then everyone in the country starts playing the hands off of the the new card.  Kind of like a Bingo card only with Chinese characters. Yeah, and really easy to read and comprehend. Not!  I have been asked to host the group at my home on May 10th.  Now hold your horses…I mean your bamboo.  I haven’t even decided yet if I am going to officially join!  They all just smile at me when I say that.  It’s like they know something I don’t.   (I think I might be joining a cult…If I disappear…send in a de-programmer.)  Thanks. ;)

And don’t forget!  I am having a Giveaway this week.  Be sure to enter by Friday, February 26, 2010.  Click on the icon on my side bar near the top of my page for more details!!  Good Luck!

Monday, February 22, 2010

I Am An Adult Brace Face

Hi Everyone!  
It's been a few years since my braces have been off and I have noticed that this post sometimes gets looked at every now and then.  I know that if I was considering getting braces as an adult I would be all over the internet and blogs looking for some inside information!   

I kept what you might call an Adult Braces Diary and that is what you will find here.  It's a record for me and I hope for you a realistic account of what I went through.  For me, it was absolutely one of the best decisions of my life.  I mean really.  It has opened up the way I live, love, and interact with the world.  I hope the same happens for you and if you are on the fence like I was for WAY too many years....just DO IT!!!

How old was I when I had them put on?
50 years old.  Yes 50!  Don't wait as long as I did.
I recently met a woman who was 70 and had them on.  She was almost finished and she looked fantastic.

How long did it take?
3 years.  But most can get it done in 2  

What did it cost?  
$6,000. 
And worth every penny I might add!!

And let me add something else here.  The investment is well worth it.  Somehow when you have children you always end up putting yourself last.   It's just what Moms do.   Both my kids needed braces and got them.   Not me.   I just never seriously considered such a large expense for myself when in hindsight, I wish I had.  There will always be reasons to not get something like this done.    It's a huge financial and and time investment.  And let's face it...some times emotional and embarassing.   I never thought my smile/teeth were preventing me from living my life but now I realize that they stopped me from living it like I wanted to.  Things are very different for me now.  A smile is a terrible thing to waste.  : )
 

So finally, 5 years later after my original diary that follows the photos below,  I am going to add some photos to this post.   I just couldn't do it when I was living it.  I  have hated my smile and my teeth my whole life so to photograph the process just wasn't something I could do at the time.  So here I am a few years later editing this post and I hope those of you who find it find it helpful and maybe even a little bit inspiring.  

I would love to hear from you and I am happy to answer any questions you might have!

BEFORE:  

 
This is a hard first photo for me to post.  It's me in high school and the only photo i could find showing you my teeth and how my front two teeth overlapped.  My mouth is small and my teeth were very crowded.  Most of the photos I have show me with my mouth closed.  High school graduation photo....mouth closed.  No smile.  I absolutely hated my teeth.  


 This is another hard one for me to post.  It was taken on a Girl's trip to Canada back in 2009.  It was soon after that trip and really looking and cringing at the photos when I got home  that I seriously began thinking about making an appointment with the Orthodontist. 


This was taken about two years in to the process.  I of course do not have any photos showing you the actual braces on my teeth but they are in that tight lipped face of mine!  :)  Not only did my teeth move and straighten but the shape of my mouth started to change for the better too.


AFTER:

And her I am today.  I cannot tell you how much happier I am with my smile.  I still even a few years later have a hard time giving a big toothy grin but I am making progress.  : )


 Original Post:

Yes, it’s not easy being an adult with braces. Some days I can’t believe that I actually have them. Some days I hardly know they are there. And other days, I am reminded by every thing I chew.
When I am asked if I would do it again…the answer is absolutely YES! The progress I have made and the time has flown by I might add, is amazing.

I'm An Adult Brace Face
February 12, 2010 - Consultation with the Orthodontist.
Am I good candidate? Absolutely!
Will it cost Big $??? Absolutely!
Is it NOW or NEVER??? Absolutely!
Am I your oldest patient?
"Hmmm....Maybe". :)
Estimated time of treatment: 24 months.


March 11, 2010 - Clear braces placed on my upper teeth. I am using the "Damon System". Do they hurt? Yes they do!
Motrin IB is my new best friend and I discovered Arctic Orange Smoothies. Feels like all my upper teeth are loose. Seems like each day a different tooth is sensitive. Very difficult to chew anything because my teeth are so tender.


May 4, 2010 - Check up appointment to see if upper teeth have moved enough to add braces to the lower teeth. No, not yet. Come back in 8 more weeks. My bite is still off and shifting. Next appointment in July.

May 18, 2010 - I can see a difference in my top teeth already! Very exciting!!

July 1, 2010 - Big day. The lower brackets were placed on my teeth. I discovered they don't make clear brackets for the bottom teeth so I have metal on the bottom. My top teeth are hitting the bottom brackets and I have rubber bumpers. No new wire on the top today. The Orthodontist told me that I am two wires behind on the bottom to catch up with top. Next appointment in 8 weeks. Where's my Motrin IB ???
July 4, 2010 - This is going to be harder than I thought! None of my teeth come together except the two in front that come down on the rubber bumpers. It is impossible to chew! It could be months before I can chew again. So, right now I have to either drink smoothies or eat things I can move around in my mouth with my tongue and mush down. I think this is going to be the hardest time for me.
Oh, and now I'm lisping. :)


July 30, 2010 - Finally, my bite is coming back together. Not completely but it is getting easier to chew. And yes, I am still lisping.

August 17, 2010 - Had my teeth cleaned today by my regular Dentist's office. That was fun. :( That poor Hygienist had her work cut out for her cleaning around all those brackets and along my gum line. I survived.

August 26, 2010 - Had a new wire put in on the bottom. The two rubber bumpers on my lower teeth were removed. They wanted to put in a thicker wire and got most of it in with great difficulty :(.... and then decided to change me to a thinner one. I am sure this will slow down my progress but the Ortho said I would be more comfortable. I am all for "comfortable". Two Motrin and a slight headache. Next appointment 10 weeks.

September 9, 2010
The wire on the bottom of left side of my mouth slipped out of the last bracket on Labor Day. No big deal. The Ortho Assistant snipped both wires to the last brackets on the bottom and said that because I am still on the thinner wire they were not supposed to be connected there in the first place. The thicker wire I'll be getting at the next appointment will be connected to the those back brackets. My bite is shifting again.


November 4, 2010
Oh the indignities of having braces as an adult!
I am now sporting a sassy pair of rubber bands. :) This will definitely curb my food intake which I guess is a good thing! I also had the bottom wire replaced with a thicker wire. The wire on top stayed the same to allow the bottom to catch up. The rubber bands are to help move pull my eye teeth down further and close some gaps where my top teeth meet the bottom.
Now I am really talking funny. Next appointment in 10 weeks. I'll be ringing in the new year with these rubber bands.


November 14, 2010
Actually, I am doing much better than I expected with the rubber bands. And they must be working because I can actually chew with my back teeth much better than I could. They are still awkward but not as bad as I thought they were going to be. The lisp is going away too.


December 20, 2010
The wire on the left bottom side slipped out of it's bracket over the weekend. I wasn't even eating anything bad like the nuts that I really miss or popcorn. They locked it back down with a quick visit.


January 13, 2011
Both wires on top and bottom were replaced with a rectangular shaped wire today. Definitely tighter than the round shape I had before. I have a huge gap on the bottom where the wires I had before left space where a tooth needed to be turned. It worked and now a "chain" was also added in that area behind the wire to help close that gap. I am still wearing rubber bands. I took 3 Motrin IB before this appointment and I am glad I did. My teeth are very tender right now. Looks like I'll be drinking a lot of Smoothies in the next couple of weeks. Next appointment in 8 weeks.


January 23, 2011
Shopping for a Waterpik today. Food is getting stuck behind the "chain" and the wire on my bottom teeth. This should help and I read that the water can massage my gums which will help keep them healthy. Also, my teeth were only really sore the first week after getting the new rectangular wires. Much better now and I am chewing again. :)


January 25, 2011
I LOVE my new Waterpik! And my gap is already closing! Amazing!


February 21, 2011
Had my teeth cleaned at my regular Dentist's office. Went pretty well. Just seems like it takes longer to get it all done. Coffee is not my friend. But they they look and feel great. Next cleaning in 6 months. Earlier than that would be better if I want to pay out of pocket since regular insurance doesn't pay for cleanings until 6 months have gone by.


March 10, 2011
Had my 1 year check up today! One Year Already!!They took x-rays and I got to smile pretty for some new photos. Today they replaced the chain (which looks like a coil or a tightly wound spring) with a tighter one on my bottom front teeth. This will finish closing the gap where they turned a tooth around. I still have the same wires on top and bottom. The new chain is definitely tighter. I also got two new clear hooks on the top for the rubber bands that I am still wearing. Next appointment in 6 weeks.


March 11, 2011
My bottom teeth are very tender today. That chain has almost closed that gap and it's only been 1 day.

March 12, 2011
My teeth don’t hurt as much as they did yesterday. In the begining my teeth would hurt for a good two weeks after a visit to the Ortho…now I seem to be okay in just a few days.
March 20, 2011
Fixed steak and baked potatoes tonight for dinner. As long as I have a knife, I can cut anything small enough to eat and enjoy. Chewing is fairly easy right now. Although, I am popping a lot of rubber bands lately.
April 20, 2011
I had both the top and bottom wires replaced today and a new "chain" was put in. The technician missed replacing one of the hooks on my bottom right side for where the rubber bands attach and I had to go back later that afternoon to have that added. No big deal. The gap is almost totally closed and my Ortho told me today things were looking good! My teeth are VERY tender tonight. Taking Motrin and as long as I don't try to chew anything I am good. Next appointment in 8 weeks. (Same day and 10 minutes after my son's next appointment. Mother and son day at the Ortho! I am sure he is looking forward to that as much as I am. :)
June 15, 2011
It was Mother and Son Day at the Orthodontist today. :) My son got a new wire today and he's already in rubber bands! My teeth did not move as much as the Ortho wanted so he postpone my getting the stainless steel wire until next visit in 6 week from now. Both my wires were replaced and they took out the "chain" but there is still a small spring in place. I also still have rubber bands pulling on my I-teeth. I really think it's the rubber bands that have been keeping my bite on track. Hardly any discomfort at all today! I am told the next visit I won't be so lucky. :)
July 2, 2011
The Orthodontist told me we are now moving into the final "detailing" phase! Yes! They removed my wires and the mini spring that I had on the bottom and replaced them with stainless steel wires. These are have more structure and are not as flexible as the alloy wires that I have been in up to this point. I was nervous about this appointment anticipating that the wire would be difficult to get on but really it was not too bad. Throughout the day my teeth were tender but the Motrin IB helped that. I am writing this a day later and my teeth are even more tender than yesterday but nothing I can't handle. I'll be drinking a smoothie today and taking my Motrin. Expecting to be uncomfortable for a few days. Was told that I will be wearing rubber bands until the end. Not sure how much longer I have to go. I was afraid to ask! Another year is possible but I think it'll be much less than that. I can see my new smile underneath the hardware!
August 31, 2011
I had my teeth cleaned by the Dental Hygienist at my regular Dentist's office today. Not fun but not horrible. They use something called a "profee jet" (I have no idea how that is spelled) and it is like high powered water pik that has something gritty in the water. Anyway, it's like getting your teeth power washed and it helps to clean around the brackets. The Dentist found a small cavity at the edge of my onlay filling on one of my top molars. I have to go back to get it filled later this month. The dentist doesn't think I have to have my wires removed to have this done. She thinks she should be able to repair it with my braces intact. I go back to the Orthodontist next week. Hopefully I'll be getting a new set of stainless steel wires. My next appointment with the Dental Hygienist in 6 months is next March 14th, 2012. I wonder if I'll still have my braces for that appointment. March will be my two year mark. Only 6 more months to go!!

September 8, 2011
Saw the Orthodontist today and he seemed very pleased with my progress but I am still afraid to ask him how much longer! I don't want to be disappointed! The technician took out both wires and let me brush my teeth. It felt so good to really brush them without the wires and rinse really well with mouthwash. Also, its fun to see myself in the mirror without the wires. The change is amazing! I have two gaps on the top next to my my eye teeth. The Ortho had the technician add a "chain" before putting the wires back in and the "chain" stretches across my front teeth to both incisors to help close both gaps. You can hardly see the "chain" under the wires. A chain was added to the bottom as well to help keep my bite on track. I was told when we started that I would have gaps on the top and would probably need some bonding after I was finished. The Ortho is try to reduce the size of the two gaps to help minimize any bonding I might have to have done. My mouth actually feels pretty good after this visit. Next visit in 6 weeks.
September 27, 2011
Had one of my fillings "repaired" on the top right side of my mouth at my regular dentist. She was able to numb me up and fix the cavity with my braces on. I never really thought about what would happen if I needed major dental work. If that was ever needed my Ortho said they would just temporarily remove the wires and then put them back in after the Dentist was finished. Glad I didn't have to do that.


October 26, 2011
On the top there were two gaps created on each side of my front four front teeth. Last visit put in a "chain" to help pull the gaps closed and it worked. Almost closed but not totally. New top wire wires put on top and bottom and new chain to help move my left eye tooth a bit more. We are in the "tweaking" phase. Next visit my Ortho will focus on a small overlap of my top front two teeth. These visits do not leave me as uncomfortable as the ones in the beginning did. I am loving the tweaking phase! Next visit in 6 weeks.


December 7, 2011
New wires top and bottom and new clear "chain" under them. The assistant told me I was in the final phases!! The "chain" is to help shift one of my top front teeth over a little bit. It was one of the most turned teeth that I had because of how crowded my teeth were. It looks great now but we want it to be perfect!! I can't believe I am getting so close to the end. This adjustment did not leave my mouth very sore at all. I was pretty much able to eat all my usual foods. Did I mention that it's been over 2 months since I've had a smoothie?! Still wearing rubberbands and I actually feel "naked" when I don't have them on. Still breaking a lot of rubber bands throughout the day but I am taking that as a good sign. Next visit in 4 weeks!

December 26, 2011
Something has been causing me some pain/discomfort only when I am eating on the bottom left side. I brushed, flossed, water picked, rinsed and swished and nothing would fix it. But the weird thing is it didn't hurt at any other time and my gum was not swollen or tender. It had been happening for about two weeks when it started to hurt more and I could feel something sharp and pointy with my tongue. I called the Ortho but they were off until after New Years! I can't wait that long! I had the emergency back up paged and they met me at the office today. No wires were loose and it turned out to be something and we aren't sure what was embedded behind the wire and the chain in my gum! It's a miracle my gum was not infected. The technician removed it...smelled horrendous! The only thing I can think of is that it might have been part of a stalk of broccoli that didn't get chewed up enough? Weird. But my mouth feels so much better now.

January 12, 2012
Happy New Year! Both the top and bottom wires and the top and bottom chains were replaced today. The technician told me the new wires would be stiffer than the last set. But I am in the final stages!! Still afraid to ask how much longer I have to wear them. Can you believe that I have never asked the Ortho the question "How much longer to do I have to go?" Nope not once. Mostly because I didn't want to be disappointed. But, if I was a betting "man", I would guess just another 2 to 3 months. That's nothing!! Anyway, my mouth is more tender than it has been in the last few visit. Also, my rubber band placement has been moved for the first time. They are now harder to see because they are further back in my mouth on both sides. Also, the rubber bands formed a triangle before and now they are just a tight band running from the top of my back teeth to the lower front on the bottom. They are rubbing slightly on my top right gum. I hope I don't get a sore spot. And while I am here, I have to say that I am amazed that over the last two years I think I have only had two sore spots and they only last a couple days till my gums and cheeks toughened up. Anyway, I am excited. And the best part of this visit was being able to floss after she took off the old wires. I was amazed how easily the floss moved in and out between each tooth. It felt wonderful! To all you without braces....don't take flossing for granted!! Next appointment in 4 weeks.

January 19, 2012
Called the Ortho because I could feel a wire poking me on the top right side in the very back. I also had a sore spot on top in the front. They said to come right in. Turned out that the small hook on the top right side that I was no longer using for my rubber bands was bent and had a rough edge. They removed the top wire and found out that the plastic "chain" underneath it in the same spot was broken too. So, I got a new chain, they removed the hook, and they clipped the back wire. Feels much better now. Smooth sailing!

February 9, 2012
They are still trying to tweak my top front tooth. It's tucked behind the other front tooth just enough for me to notice. But I have to say, it's light years better than when I first started. New wires and chains on top and bottom today. I got to brush and floss after they took off the wires so I got another glimpse at just how much my teeth have moved and they look great! You have no idea how wonderful it feels to really floss your teeth until you have braces! The top wire is thicker and I could feel the tension immediately. Very sore and tender today on the top. Bottom feels good. I'm very close to the end now! Next appointment in 6 weeks.

Friday, April 23, 2012
So close! They took the chains off and also did a small amount of filing across the bottom of my two front teeth before putting wires back on. My Ortho said that even though my two front teeth come out of my gum at different heights a long as the bottom of them were even it would not be noticeable. Such a small adjustment but visually it makes a big difference. I also got to floss while the wires were out. Amazing...no resistance anywhere in my mouth. Next appointment in 3 weeks.


Wednesday, March 18, 2012
Major disappointment. My front tooth has not moved and the gap on the left side next to my incisor tooth opened back up. A new "chain" was placed on the top. This one didn't require them to remove my top wire. The chain fit over top the wire. I could feel the tension right away and in just one day I could tell that the gap was closing. My Ortho said that I might have to see a Periodontist to snip some connective fibers on the top front tooth that won't completely turn. It's just a possibility at this point, we will discuss further at my next appointment in 3 weeks. 

Wednesday, May 9, 2012
Almost there.  While disappointed that I am still in my braces I realize that my Ortho is seeking as close to perfection as he can and I can appreciate that!  This visit I got two new wires, top and bottom.  The put a "bend" in the top wire to  try and force my front tooth to move a bit more.  A new chain was place on the top and bottom.  These chains are see-through and just add a bit more tension and help close gaps.  The focus this visit is to move my front tooth and close the top side gap.  Very uncomfortable the first 3 days which means they are moving. Back to drinking Smoothies.  Next appointment in 3 weeks. 

Wednesday, June 6, 2012
The race between my son and me and who gets their braces off first is now neck and neck!  My Ortho told me today he still wants to tweek my front tooth and so today I got a new chain, new wires, and he put a torque or a bend in the front wire for that extra pull on my rebel front tooth.  My teeth look so good but I too can see my front tooth is off by just a hair and so I have to be positive and hang in there. My teeth don't hurt as much as they did last time. Next appointment in 4 weeks.  

Wednesday, July 11, 2012
Today they filed down my top front right tooth.  It's a little bit longer than the left one and the ortho also rounded off the edges of it.  I have to say such a small change and it makes a huge difference.  I know I keep saying I am getting close but I really am!  A new wire and chain on top with a bend to try and pull my top left canine forward just a hair more.  Next appointment is in 4 weeks and I fully expect to be told then that I can get them off the following week.  Keep your fingers crossed for me! 
 
August 9, 2012I
I lost the race.  My son beat me and got his braces off today.  His teeth are gorgeous!  I hope I don't have to wait much longer. 

November 10, 2012
I have been awol.  I realize this.  The braces are still on my teeth and although I am disappointed I want perfection!  My top teeth on the left side are not completely closing over the bottom.  So I have my third torque wire over my top left incisor trying to pull it forward enough to let the top close over the bottom.  Last month my favorite technician told me that I would be eating my turkey dinner with out my braces.  Well...that's not going to be the case.  My next appointment is on December 5th.  Maybe no braces by Christmas?  

December 26, 2012
It's the day after Christmas and I still have them. :( BUT, last visit I was told that they would be coming off on January 24th!!  Only 1 more month left to go. I have an appointment on January 3rd because my torque wire is loose.  But, the technician on the phone thinks it's just because that wire is done doing it's job but the Orthodontist will look at it to be sure.  They have become such a part of me that what's one more month...really?! 

January 3, 2013
My teeth moved like I knew they did.  That incisor of mine is stubborn.  My Ortho put a small knob of the BACK side of my incisor and now I have to wear a rubber band again for the last few weeks.  Fine by me.  What ever it takes!

January 24, 2013
And they're off!!!  I can hardly believe it.  Just shy of 3 years.  That third year was an unexpected bonus!  My teeth are so smooth and I am shocked that they are not nearly as yellow as I thought they would be.  The procedure getting they off is not fun but it's tempered with the fact that they are coming off!  The ortho used a tool to snap off all the brackets after he took the wires off.  Then the fun of having your teeth "power buffed" to get all the glue off of each and every tooth was the hardest part.  I got to brush and floss and haven't stopped smiling yet!!  
 

Sunday, February 21, 2010

I Am Having a Give Away!

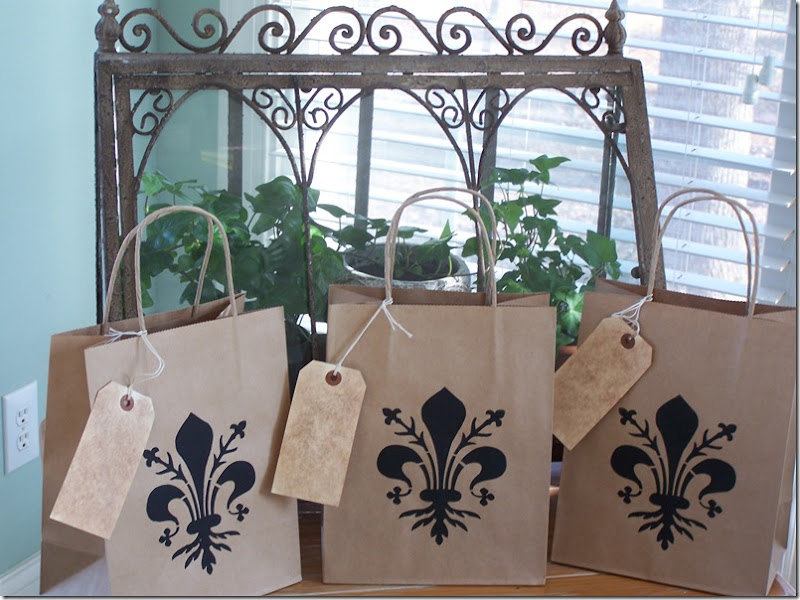
Gift Bags 012

I am having a Give Away!  I am giving away a set of 3 gift bags with tags.  Each bag is hand stenciled with a look that is oh so French.  I am getting ready to open an Etsy Shop on line and these will be one of the items I am planning to sell there.  I’ll keep you posted as to when I am going to open up shop!

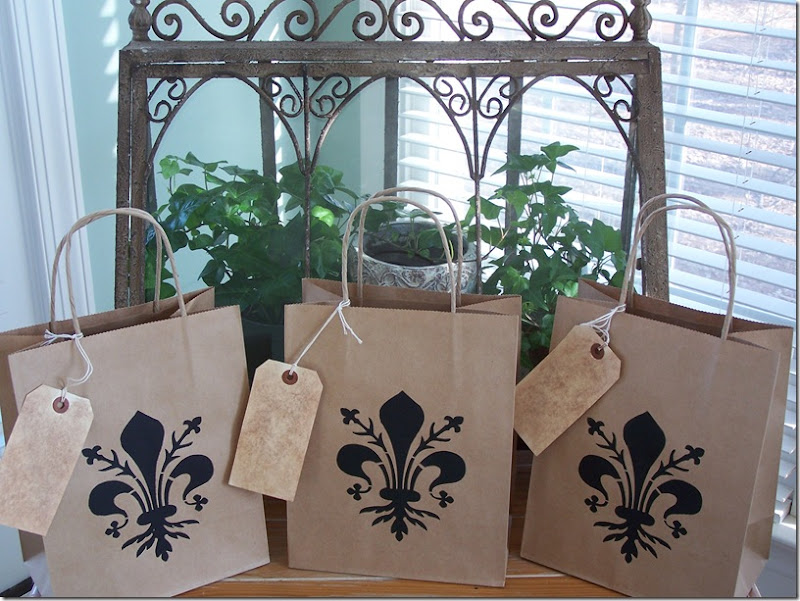
Gift Bags 015

To win this set of 3 gift bags, simply leave me a comment.   You do not have to have a blog of your own to win.  Just leave me a comment.   And if you are a follower or become a follower, let me know in your comment and you will be entered twice.  I will announce the winner on Friday, February 26, 2010.

That is it!  C’est tout!

Good Luck!  Bon Chance!

Friday, February 19, 2010

A New Plant Terrarium

 Gift Bags 007 

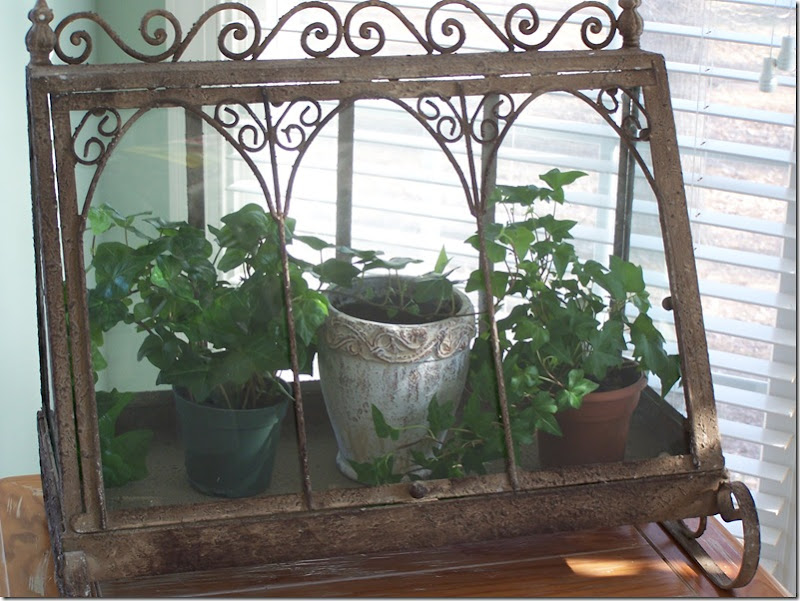
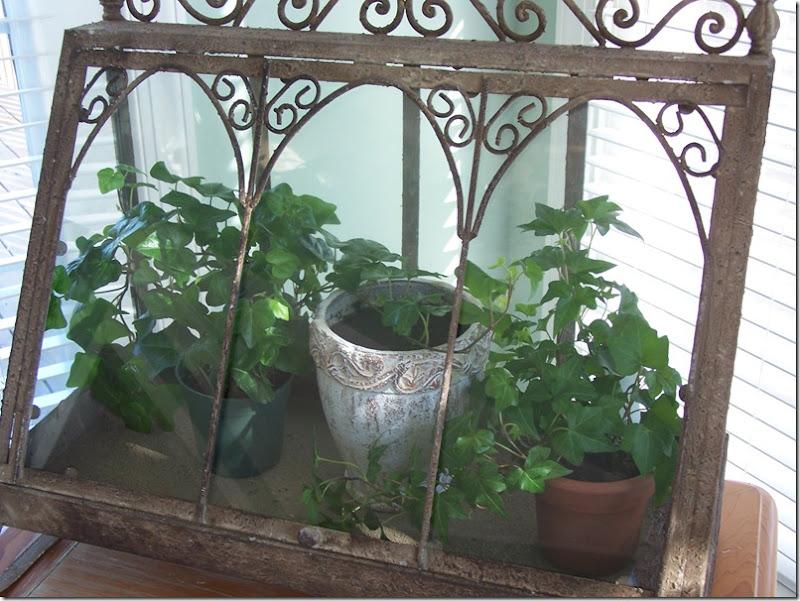
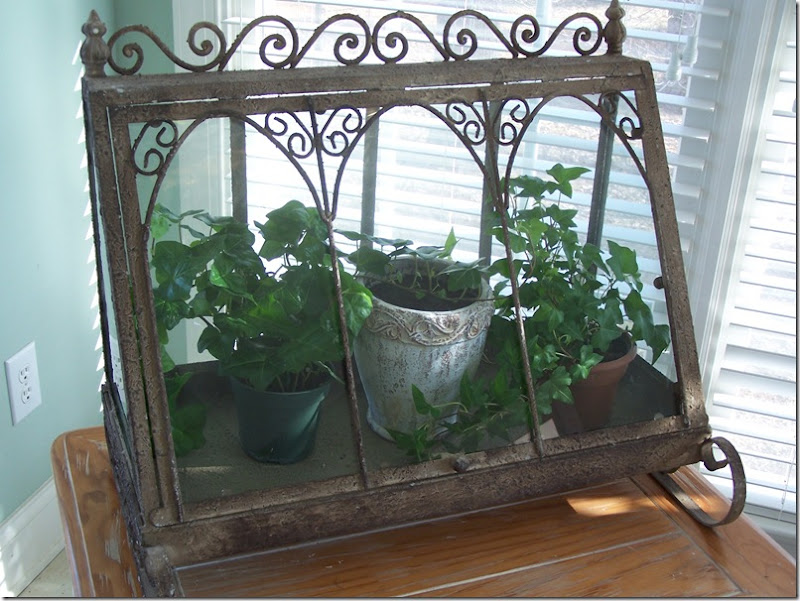
If you were shopping in the TJ Maxx in Burlington, NC earlier today, that was me you heard squealing with delight when I came across this gorgeous plant terrarium!  It is just perfect and looks about 100 years old.  I planted my lavender seeds in the stone pot today (the same set I blogged about earlier this week that was free from American Greetings Cards with any 4 card purchase) and added it to the terrarium along with a couple of ivy plants.  It should help keep the plants warm and moist…just the way they like it. :)

Gift Bags 004

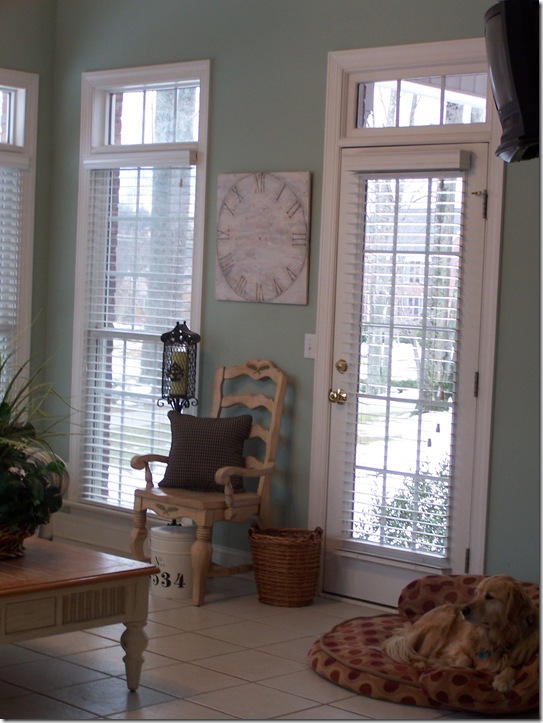
Our sunroom is finally starting to look like a sunroom.  At least more like I have always wanted to to look.  I am getting ready for a paint change in there though.  Right now it is a color called “light sage” but it’s looking more like “seafoam” to me lately.  I am paranoid about it looking “seafoam” since it was my favorite color, once upon a time…along with “peach” back in the 1980’s from when we were first married.  Am I alone?  Any other former “seafoam and peach” addicts out there???   Now, I am just not sure what color to paint it.   I want something up to date and I want it bright and cheerful.  It’s a great room.  One of our favorites.  The name “Sunroom” really applies.  It is a bright and sunny room and we spend a lot of time in there.

Gift Bags 002

So bit by bit, I’ll keep working on the sunroom and start looking at paint chips.  I am all ears when it comes to color suggestions!

Wednesday, February 17, 2010

Stencil Madness

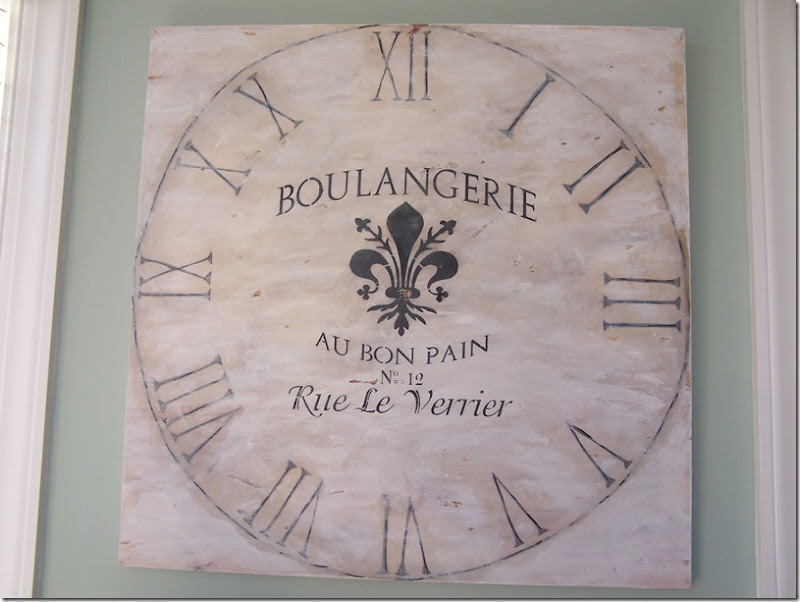
2010-02-16 clock in sun room

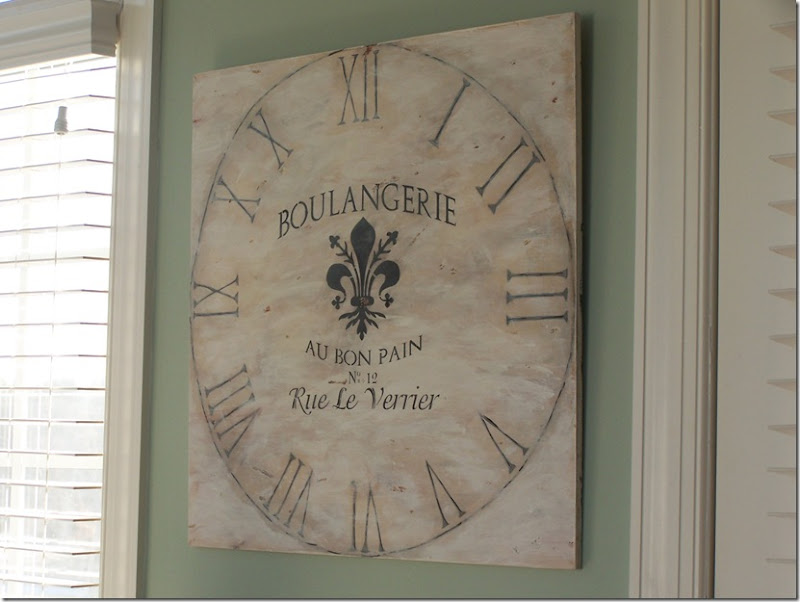
My new stencil continues to delight me!  I stenciled out a couple of prints, the face of my clock and a pillow.  And I did all this in just the last two days. 

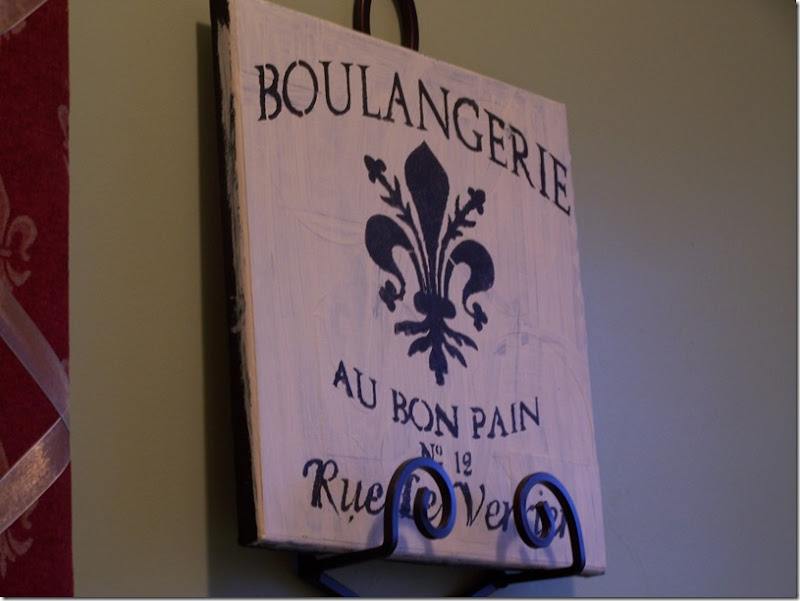
Boulangerie Stencil 006

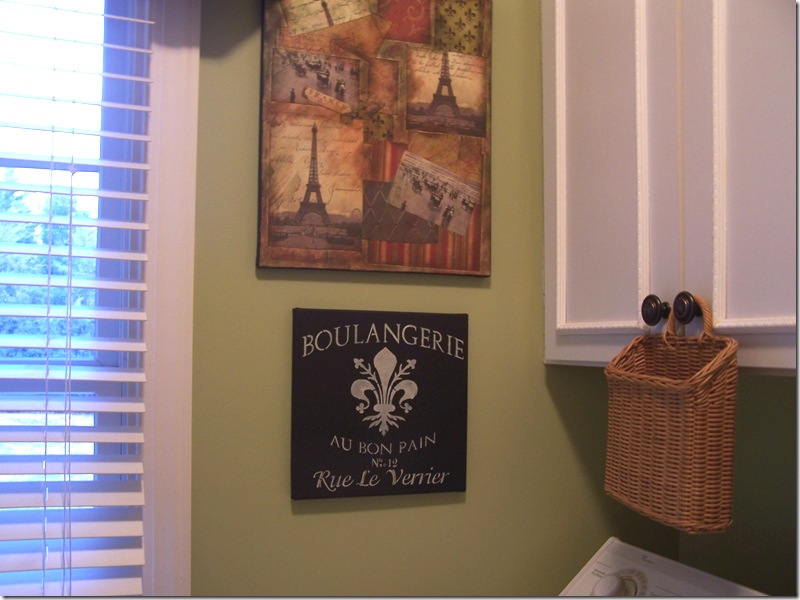
I am very happy with the black background on this print.  It’s a new addition to my Laundry Room which has definitely taken on a French flavor. :)

Boulangerie Stencil 010

I like the cream colored background on this second print too.   I covered over a print I had done a while ago that I was not happy with.  I was messy with the cream colored paint on purpose.  I wanted it to look old.

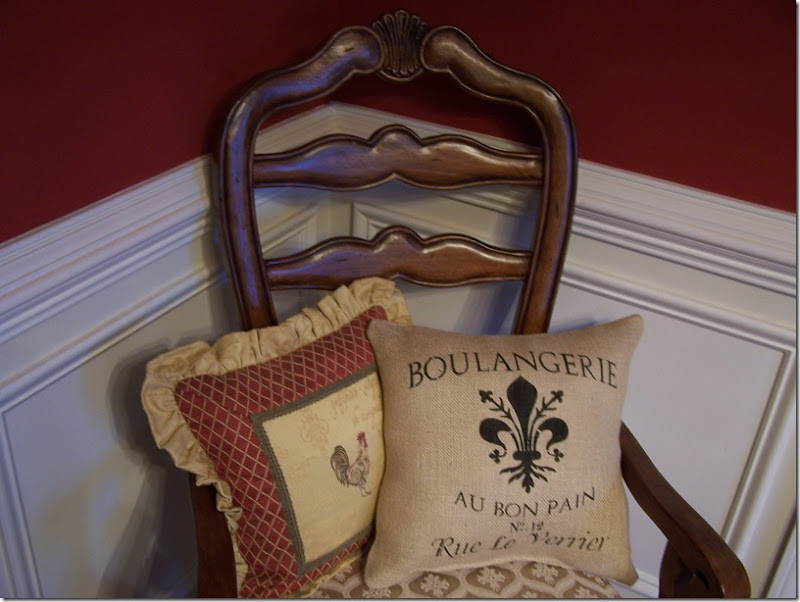
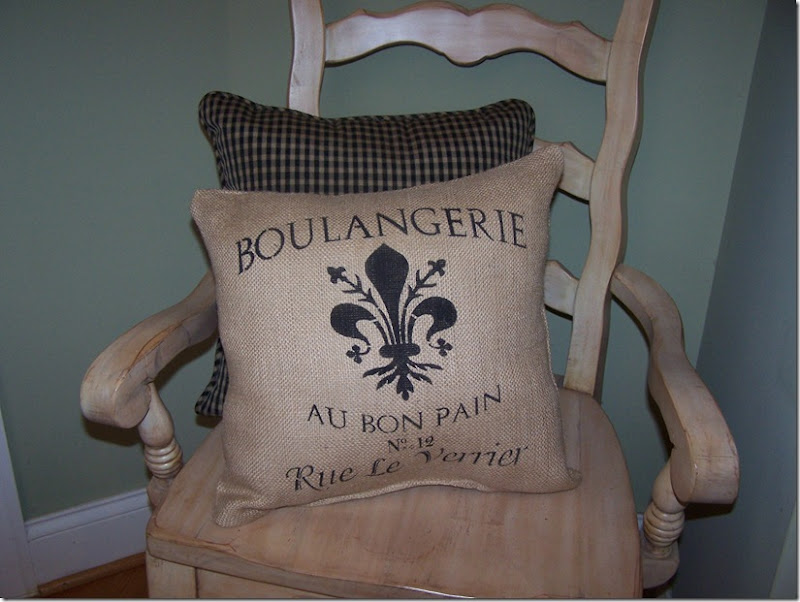
The pillow was fun to make.  Stenciling on Burlap is so easy and I am amazed at how crisp the paint stays.

Boulangerie Stencil 012

Not sure where I’ll keep the pillow.  Here it is on a dining room chair.

Boulangerie Stencil 001

And here it is on the French wood chair that I moved back into the kitchen.  I had this chair in the sun room under the clock but decided to start looking for a table to go there instead.  Anyway, I’ll keep moving the pillow around till I make up my mind. 

Hmm…I need another project.  :)

Tuesday, February 16, 2010

It Has Become A Work in Progress

clock in sun room 010

One of my new stencils arrived today.  I have lots of plans for this stencil but adding it to my clock was not one of them when I ordered it.

I finished making this clock just a little over a week ago.  For a tutorial on how I did it you can click here:  Vintage Clock Tutorial

What do you think???

Here is before…

   Clock in sunroom 007

And here it is after.  I think I like it.  I think it was a little too plain before don’t you? 

clock in sun room 012

Now while I am at it……I guess I’ll start shopping for a clock kit to make it tick!

I’ll be sure to post when I get that done as well. Is anything ever really finished?

Monday, February 15, 2010

10 Things I Have Learned About Thrifting at the Goodwill.

10 Things I have learned about thrifting at the Goodwill.

Shopping at the Goodwill is not for everybody.  It wasn’t for me until this past year.  I can blame it on blogging.   The truth is Goodwill helps keep me entertained. :) Where else can you go and find so much junk in one place for next to nothing?  I am not much of a garage sale shopper.  I don’t really like to do all that driving around and getting up at the crack of dawn on the weekend to hit a garage sale.  That is not how I want to start or spend my weekend.  I like the convenience of Goodwill.  I can pop in whenever the mood strikes or whenever I happen to be driving by. 

I also have to say that I shop the Goodwill mostly for their home goods.  I love seeing what I can find and what I can make pretty.  I have never shopped for clothing there except for pieces to help assemble a Halloween costume or two.  I remember a few years ago my daughter had a school assignment to dress as a character from one of the books on her reading assignment sheet and we laughed ourselves silly looking for the pieces she needed so she could dress up as Muriel Pritchett from the book The Accidental Tourist.  Muriel was a very eclectic  dresser to say the least.   Every colorful piece of clothing that we needed for her ensemble, we were able to find a the GW.  With that being said, I am sure there are great clothing finds to be had there as well.  I am just not experienced in that department.  I simply stick to what I know and what I know is the House Wares Department.

Okay, so here we go with my list of the 10 Things I Have Learned About Thrifting at the Goodwill.

1.  Beware of upholstered furniture.  I hate to say it but if you fall in love with the price of an upholstered piece and you want to take it home with you….you have no choice but to stick your nose in it, on it, and around it.  Did this piece come from the home of a SMOKER?   It is IMPOSSIBLE to get the smoke smell out of a piece of upholstered furniture.  Now I know there are lots of other disgusting and gross smells out there but I really don’t want to get that gagging feeling in my throat by discussing them.  So, just remember this:  Upholstered furniture from the Goodwill is risky!

2.  If you see it, and think you might want it, I say buy it.  Because when you go back tomorrow to get it after getting a good night’s sleep and thinking it over…It will be gone.  Someone else posted on their blog that “the best time to buy an antique is when you see it.”  Good advice for the Goodwill too.

3.  Goodwill doesn’t seem to ever reduce it’s prices. They don’t really do “sales”.   So if you think you will wait to see if they will lower their price they almost never do.  I think if something doesn’t sell…they simply transfer it to another store to see if if moves there.

4.  Don’t put anything back on the shelf unless you are sure you do not want it.  I can’t tell you how many times I have set something down and someone immediately snatched it up.  There are people who are always checking out what items you are carrying or have in your cart and they watch to see what you are looking at.  Kind of creepy I know!

5.  Beware of lamps with old plugs and wiring.  Buy the lamp if you like it and if you think it has potential but if you have any qualms about the safety of a piece…take it to a lamp shop and have it re-wired.  Not very expensive to do and hey….you get brownie points for recycling!  (also keep your receipt because if you get an electronic item home and it doesn’t work you need the receipt to return it and they only give you a store credit.)

6.  Shop after the weekend rush.   I like popping into GW on a Tuesday and Wednesday morning when it is quiet and the trucks from the weekend have been unloaded.  Bigger selection.  Sometimes on Monday mornings the shelves are still picked over from the weekend. 

7.  Most areas have several Goodwill stores and some are very tiny and some are big.  Check each one out to see which one you have the most success at.

8.  Be careful and aware of your surroundings.  Some of the stores are not in the nicest parts of town.  I am lucky in that there is a Distribution Center not too far from me and it is big and gets a lot of great things donated from all the suburbanites cleaning out their attics.  Try to find “That” store in your area.

9.  Goodwill stores smell.  I think the smell is cross between the dry cleaners and somebody’s attic or basement.  A wee bit musty.   But if you can get past the odor and I know you can, there are great treasures to be found.

10.   Frequent shoppers cards are available and I think you can get a 10% discount each time you shop.  I think they might even give Senior Citizen discounts.  I don’t take advantage either because Number 1: I am not old (yet), and Number 2: I think that what Goodwill does as an organization is wonderful.  They take people’s unwanted clothing and household discards and they turn around and sell it to fund programs that really help, educate, and train all kinds of people who really need the help.  Their prices are so ridiculously low already that I don’t mind paying what they consider full price. 

So there you have it.  My list of 10 things I have learned about the Goodwill. I hope you find this information helpful and may the Goodwill Fairy bless you with unbelievable luck and great deals the next time you cross their threshold.  :)

Sunday, February 14, 2010

Happy Valentine’s Day

Chair and flowers 006

Hope your Valentine’s Day was special!  Mine was. :)

Saturday, February 13, 2010

Lemon Meringue Tart

Lemon Meringue Tart 014

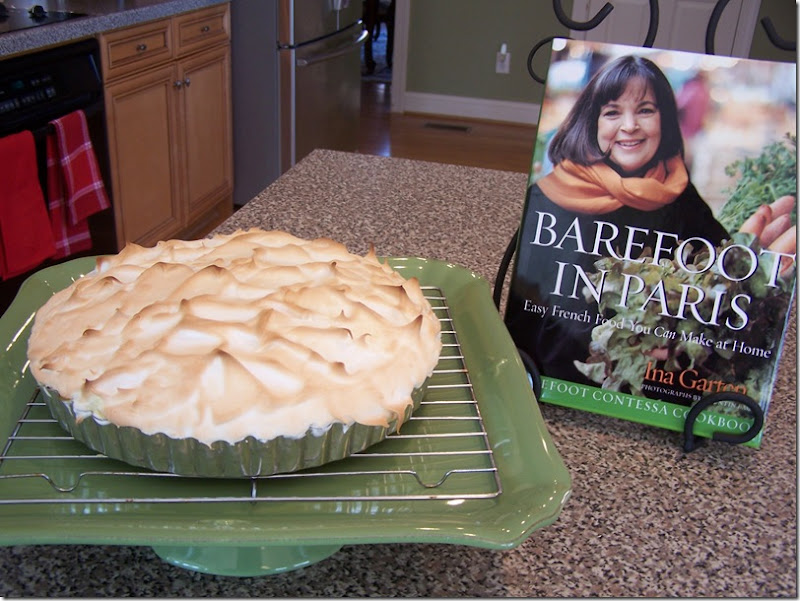
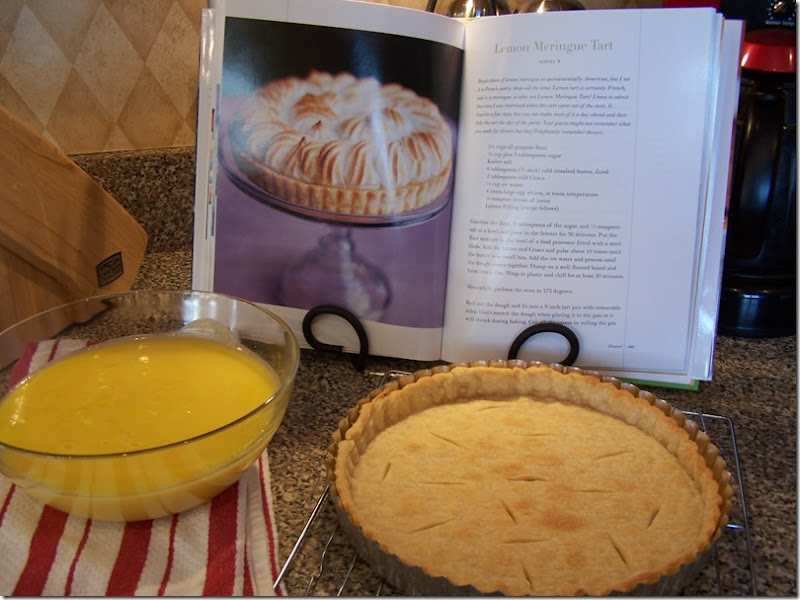
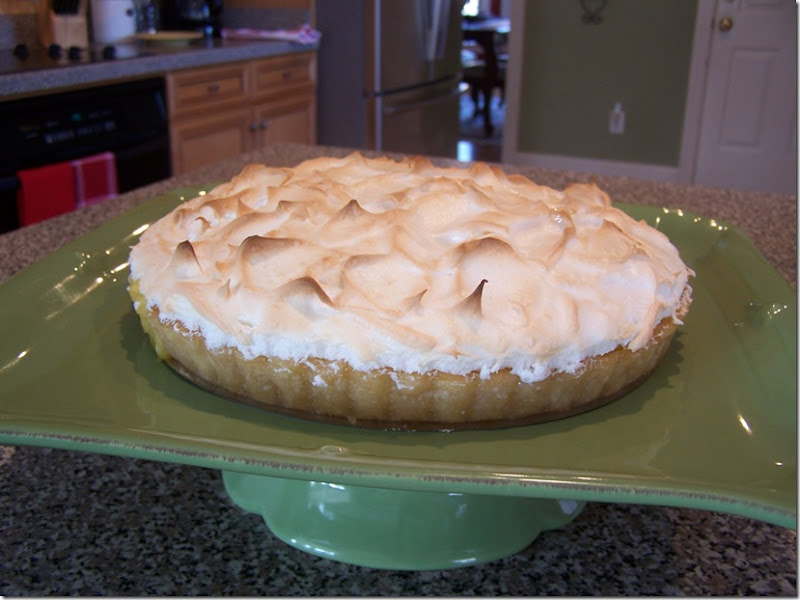
I made a Lemon Meringue Tart this morning while I was waiting for everyone else in my house to wake up.  The dog and I seem to be on the same schedule lately and so up I was a little before 7 AM on this fine Saturday morning.  The recipe is from one of my favorite cookbooks, Barefoot In Paris, by the Barefoot Contessa Ina Garten.  The recipe can be found on page 183 of this great cookbook.

Ina’s recipe does everything from scratch including the crust.  I skipped that part as I always have much better results when I use a Pillsbury pre-made refrigerated crust.  This is a major short cut.  I LOVE short cuts!

Lemon Meringue Tart 012

Don’t forget to put some slashes in the crust before you bake it so that it doesn’t bubble up in the oven.  After baking off the crust, I made the lemon curd filling while the crust cooled.  When the lemon curd cools to room temperature, you can make the meringue.  Spread the lemon curd into the crust and cover with the meringue making sure to seal all the edges around the top so that it doesn’t shrink when you bake it.  Then it is just a matter of baking in the oven for a few minutes to color the meringue a beautiful brown color.

Lemon Meringue Tart 028

Here it is cooling down outside on my deck!  It’s colder than my refrigerator out there.

Lemon Meringue Tart 027

Look how pretty and brown the peaks are on that meringue after it comes out of the oven.

Lemon Meringue Tart 030

Okay, here she is back in the house.  I wouldn’t want a bird to come along and get the first taste!

So here is how I made this “Masterpiece of Lemon-ness”.

Lemon Meringue Tart

Prepare your favorite pie and tart crust or do what I did and use a pre-made refrigerated crust and bake it off in a pie tart pan.

Lemon Curd Filling

1 stick of butter

1 1/2 cups of sugar

4 extra large eggs

3  extra large egg yolks (save the whites for the meringue)

Zest of one lemon (I used a Micoplane Grater to get all of the zest really fine)  (Ina’s recipe calls for the zest of 6 to 8 lemons.  I only had one and believe me one made it plenty lemony)

1/2 cup lemon juice.  ( I juiced the lemon after I zested it and it was a little less than the whole 1/2 cup called for in the recipe.  So, I just added some Real Lemon Juice from the bottle till I had my 1/2 cup.) 

1/8 tsp Kosher salt

Cream the butter and sugar.  On low speed, add the eggs and egg yolks one at a time, and then add the lemon zest, lemon juice, and salt.  (Ina tells us that it will look curdled and it does so don’t worry.)

Pour the mixture into a small sauce pan and cook over medium low heat for 8 to 10 minutes, until thick, stirring constantly with a wooden spoon.  Whisk briskly when it starts to thicken and cook over low heat for a minute or two, whisking constantly.  Do not allow it to boil.  (It will be 175 degrees on an instant read thermometer. )  Pour into a bowl and let cool to room temperature.

Meringue

Pre-heat the oven to 425 degrees.

Whip the egg whites, cream of tartar, and 1/4 tsp of salt in the bowl of an electric mixer fitted with the whisk attachment on high speed until frothy.  With the mixer running slowly add 1/2 cup of sugar and beat the meringue until it is thick and shiny, about 2 minutes.   Fill your baked tart shell with the cooled lemon filling and then gently spread the meringue over top of the lemon filling and be sure to seal all the edges with the meringue so that it does not shrink and pull away from the sides when you bake it off. (Ina piped her meringue on to her tart but I am a novice so that is a lesson for another day. :)  But feel free to pipe away!)   Bake the tart in oven to brown the meringue for about 3 to 5 minutes and check on it at 3 minutes to make sure it doesn’t over brown. 

Bon Appetit!

Friday, February 12, 2010

White Dishes

White Dishes 005

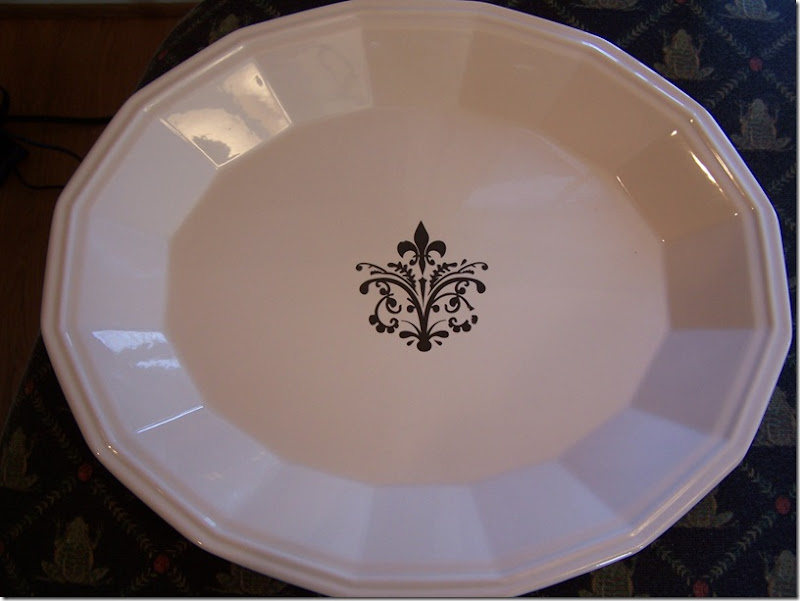
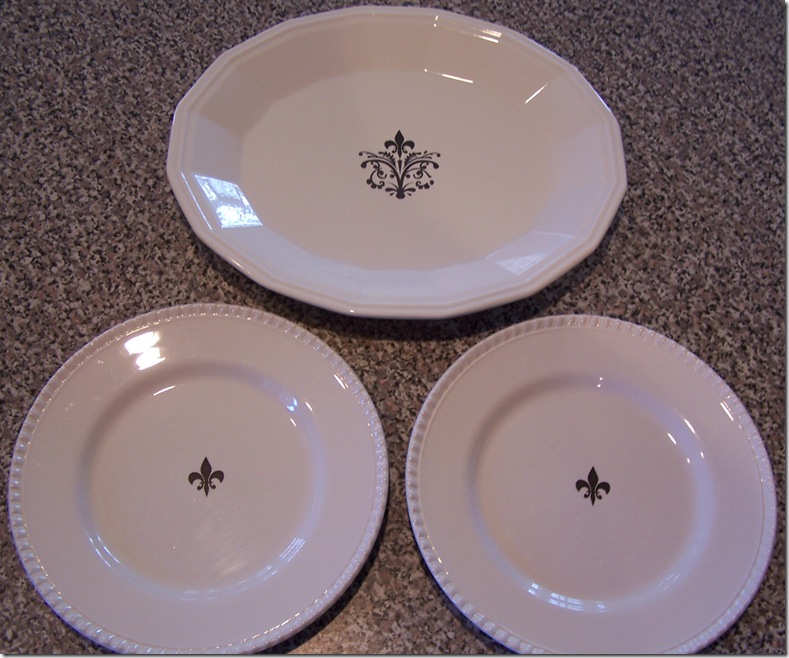
I only made it to Goodwill once this week.  Can you believe it???!!  And I found this lovely white platter.  I have never really owned dishes that are pure white with no decoration or color on them and I hear all the time how food looks best on a white plate.  Okay, I am willing to give it a try.  So I paid the cashier $1.99 for this great white platter and had her ring up a couple more white plates at .99 cents each.   I figure that I have lots of time to collect white plates and I can slowly put together a set….especially at these prices.

Once I got them home, however, I decided to add these French Rub-ons.  They are the same ones that I have been seeing Sissie use on her blog called Sissie’s Shabby Cottage.  I asked her not too long ago where she found them and she kindly told me Walmart!   I have to say I have never used a Rub-on before and I also have to say that it does not get much easier than that…that is literally all you do, cut it out, and rub it on!  

White Dishes 001

For the plates I decided to only rub on the top part of the design so that I only had a small Fleur de Lis in the middle of each plate.  Too cute! So much for plain white plates.  I gave it my best shot.

Thursday, February 11, 2010

Ivy

Ivy 005

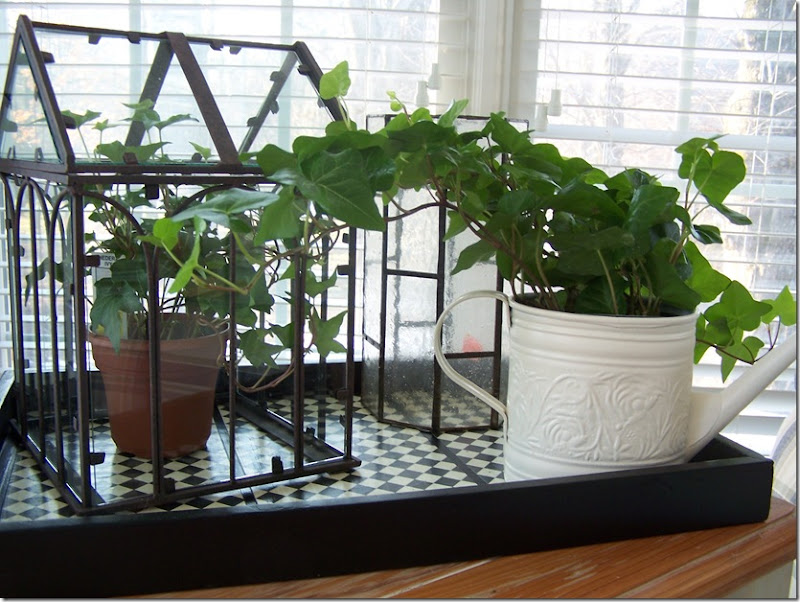
Just picked up these mini pots of ivy today and tucked one into my mini watering can and the other inside my mini solarium!   Both pieces were found at the Goodwill a while ago.  That geometric glass piece in the back is new and also from Goodwill.  It is a hurricane for a candle.  You can still see the orange Goodwill price tag peeking out from the back of it.  I need to remember to pick up a pillar candle for it.  Just thought I would post a photo of some greenery as we look forward to Spring.   The wind yesterday was unbelievable!  I was getting my hair cut and the wind knocked out the power to the hair salon.  So I was unable to have my usual blow dry and had to leave the salon with a wet head and walk to my car with 50 MPH winds and a chill factor of 6 degrees.  It wasn’t pretty.  And I’m talking about my head.  “What happened to you???” was the first thing I heard when I walked in the door.  Hurry Spring.  I can’t take much more.  It’s been a long winter!

Wednesday, February 10, 2010

Pot of Lavender and It’s Free!

Lavender 003

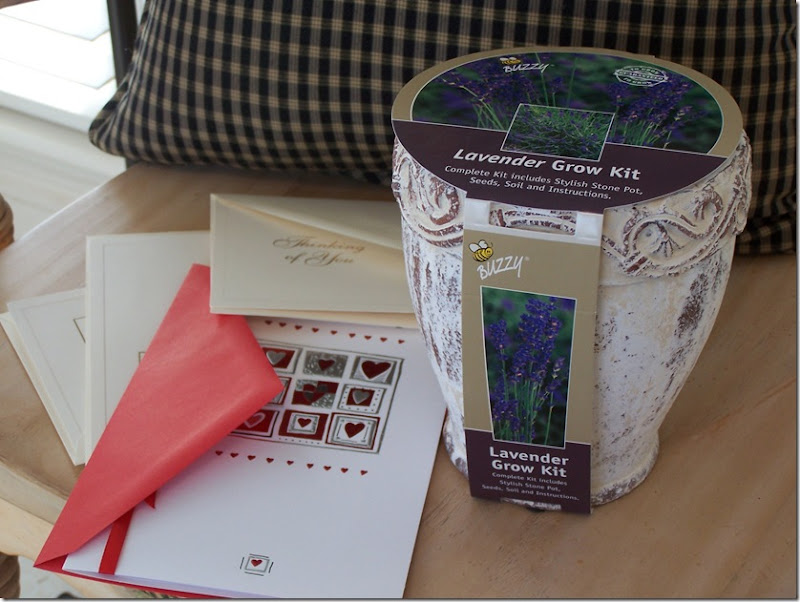
Keep yours eyes open for this freebie from American Greetings.   You can get this Lavender Grow Kit complete with this stone pot, the soil, and the Lavender seeds for free when you purchase 4 cards with a price of at least $2.99.  No problem!  I picked up my set today.  If you live in the North Carolina area, I found mine at Harris Teeter.  A little bit of Spring…a little bit early.

Tuesday, February 9, 2010

Soap

Soap 009

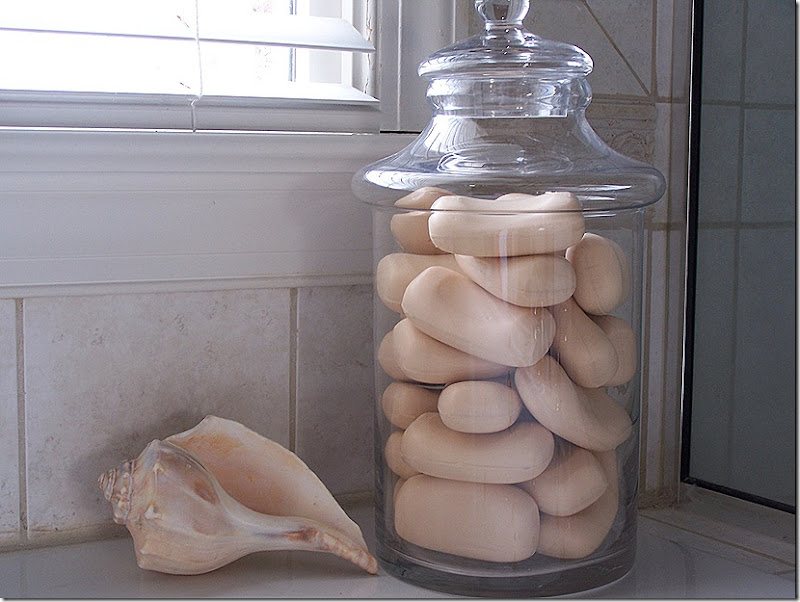
I have been on the hunt for soap.  Safegard.  It’s the only soap my husband likes to use and so we have been buying and using Safegard soap since the day we were married.  And now after all these years, for some unknown reason, it’s getting hard to find.  Costco no longer carries it.  I can’t find it in my regular grocery store and and it vanished from the local Target.  Today I stopped on the way home from work and found an 8 pack of Safegard at the Food Lion.  I bought three of them for a total of 24 bars of soap.  I have to resort to hoarding I guess. 

I also stopped at TJ Maxx and found this great oversized Apothecary Jar for $9.99.  I brought it home and unwrapped each bar of soap and placed them in the jar. Smells fresh and clean.  I saw someone else do this somewhere once upon a time either in a catalog or on a blog.  So thank you to whomever for the idea.  It suits the bathroom just fine. 

Monday, February 8, 2010

Pottery Barn Inspired Roman Numeral Clock

image 

Yes, the new Pottery Barn Catalog has some beautiful things in it this month.  See that Roman Numeral Clock Piece hanging on the wall?

I have been plotting and planning how I was going to make it for my own.  It’s not for sale in the catalog. (But even if it was, I am sure the price tag on it would be $249.00 like all of the other pieces in their catalog that I love.)

I was happy to see that I am not the only one who was coveting that piece.  As I was browsing blogs just the other day I came across Alchemy Junk and there it was…..Stephanie’s version of the Pottery Barn Roman Numeral Clock! If you want to see how she made her version, pop on over to her blog where she gives some great tips on how she was able to get such a vintage look.  I love her blog.  Lot’s of other projects can be found there.  I can tell that the wheels are always turning as she figures out how to make just about anything!  

image 

Here is Stephanie’s clock.  It is aged to perfection!  Check out her blog post for tips on how she made her piece look old as dirt!!
Clock and Soup 003

So here is how I made mine.  The first thing I did was find myself  a piece of wood.  I found a 24 inch X 24 inch piece of pre-cut wood board at Home Depot for $5.84. If you decide to make this project….your wood needs to be a square with equal sized sides.  That way your clock circle with fit perfectly in the square.  Rectangles will not work! I was lucky and found a piece that was already a square.  If you want something larger or smaller have them cut you a piece right there in the store. 

I followed Stephanie’s directions and I drew out my circle using a pencil tied to a string.  After marking the center point on the wood, secure the string in the middle and run you pencil in a circle outlining the perimeter and coming as close to the edges as you can and keeping the string taught for a perfect circle.  See…you really are using something you learned in Geometry class all those years ago!

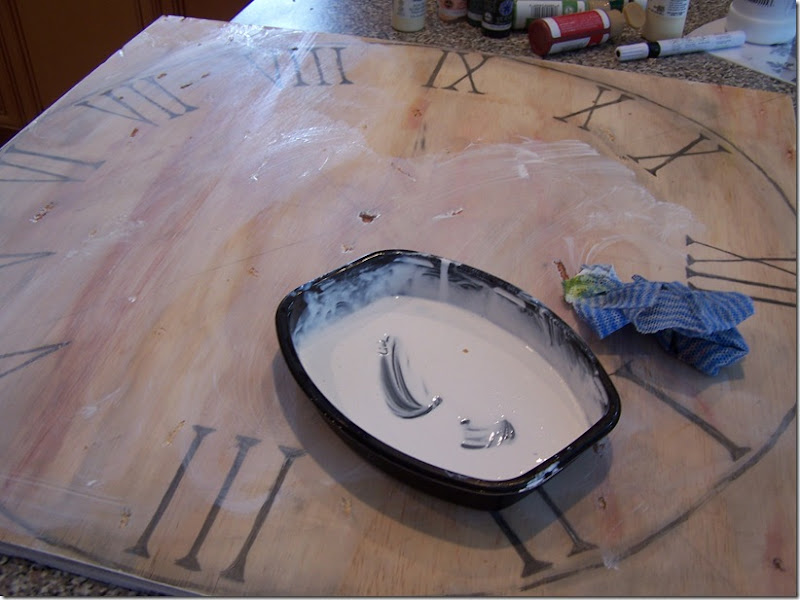
I also used some white paint and some glaze. Mixing the glaze with the white paint lets you white wash the board for that aged look.  You can also dilute your white paint with some water.  I did all kinds of things trying to make my piece of wood look old and distressed.  Stephanie offered up the great tip to rub some barn red paint with some yellow on a rag and dab on some of the holes to make them look like rusty nail marks.  I also smeared some black paint with some glaze and very carefully “smudged” up parts of the surface and quickly wiped off to give it an old look.  (Glaze helps dilute your paint…make it thinner…and keep it wet longer so that you are able to move it around and wipe off most of it with a rag when you want to.)  Stephanie at Alchemy Junk used black paint mixed with glaze for her numbers.  I simply used pencil lead.
clock and soup 002

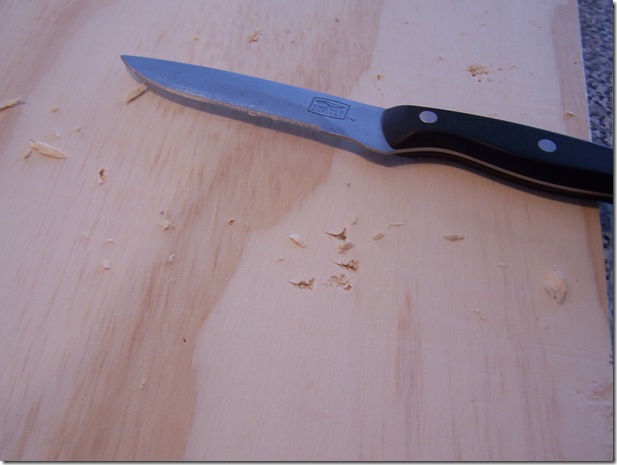
I used a knife and a pair if scissors to gouge up and distress the wood to make it look old.  Have at it!  Get your frustrations out and beat up your piece of wood as best you can!   Sandpaper can help here too.  And don’t forget to gouge out a center hole where the hands of the clock once lived. :)

First, I tried stamping my Roman Numerals on the board which was easy but the numbers were too chunky for the look I wanted so I ended up flipping the board over and re-doing it. 
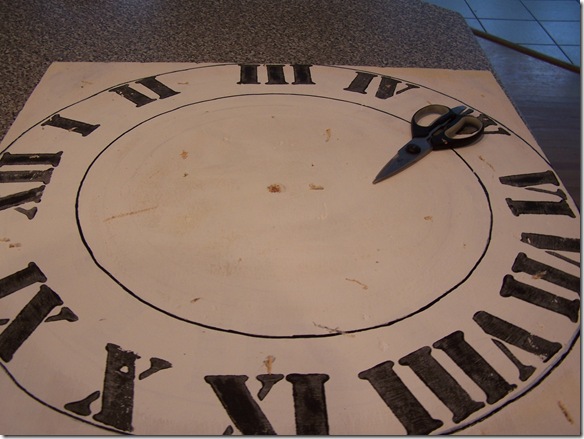
Clock and Soup 011

This is a photo of my first attempt.

This is sooooo not the look that I was going for.  The stamps that I used were way too big and chunky.  Learn from my mistakes people!!!

After I flipped the board over and re-outlined my circle and gouged up the wood again……I looked on line for some “thin” Roman Numerals that I liked and found them at Martha Stewart where I was able to print them out.   Remember, you only need the letters “V”, “I”, and “X” and you will have what you need to make all of the numbers.  I had to play with the size of the letter/numbers till I got the size that looked right on my clock.   There are a couple of ways to go with transferring the printouts of the numbers to your board.  You can use an “Exacto”  knife and cut out your own stencils or your can do what I did.
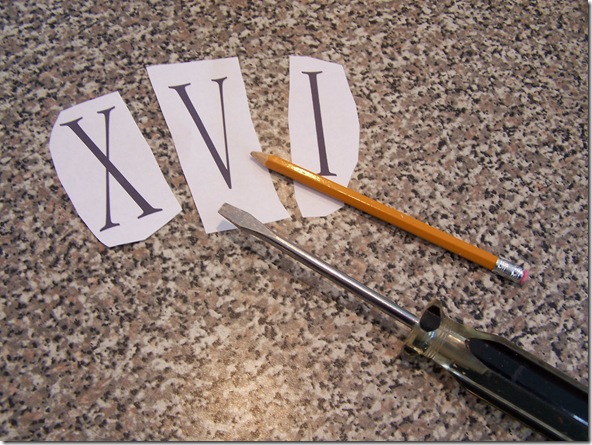
clock and soup 010

I used a lead pencil to color in the number printout that I was using.  After I completely filled it in with pencil lead, I placed it on my clock board upside down and used a flat nosed screw driver and rubbed the back to transfer the pencil lead to my clock face.  Then I was able to fill in my number with the pencil instead of paining them on.  I had a steadier hand using the pencil which was the faded black color I wanted and I knew I was going to white wash over it anyhow.  So feel free to simply color them in with your pencil like I did.  Looks just like I painted them on. 

clock and soup 002

To help in placing the numbers, I used a yard stick to divide the board in half vertically and horizontally and make marks with my pencil and that is where I place the numbers 12, 6, 3 and 9 on the clock.  Then I use the yard stick and mark a line diagonally from corner to corner to help me with my placement of the numbers 1 and 2, 4 and 5, 7 and 8, and 10 and 11.   After all the numbers were done, then I white washed it and “smushed” on smears of white paint with my fingers and a paint brush till it looked the way I wanted. 
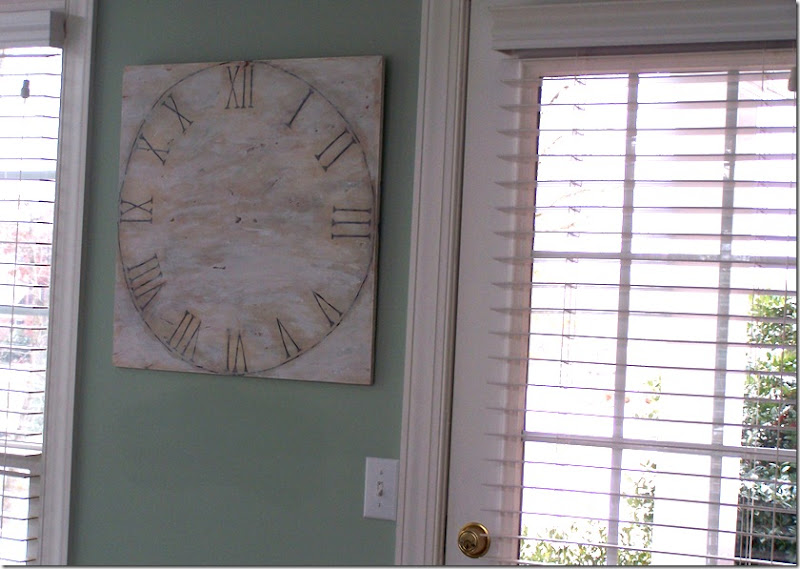
clock and soup 004

And here she is!  I have it hanging on the wall in our sunroom.

I screwed a couple of eye hooks to the back with some picture hanging wire to hang it securely on the wall. 
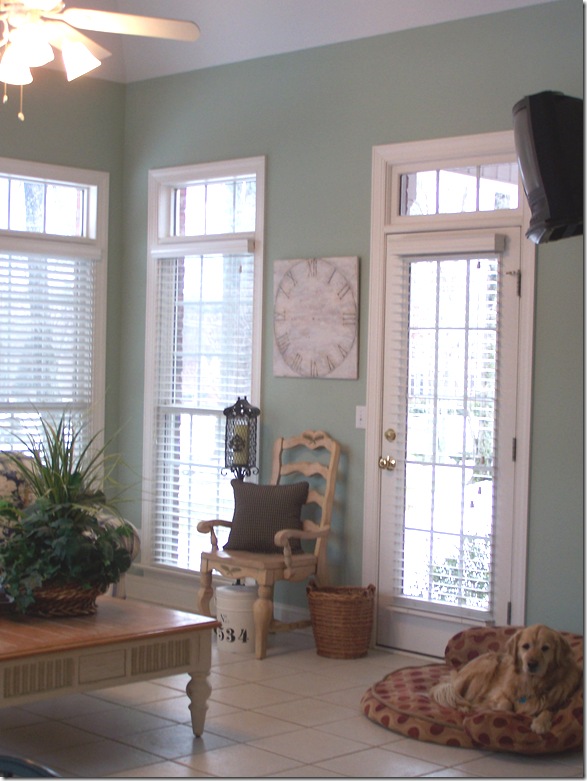
Clock in sunroom 006

My son thinks it need hands.  I will consider turning it into a real clock but for right now I am going to enjoy it’s Vintage-Broken Clock look.

Oakley likes it.  And really, that is all that matters! :)

 image image

I am linking this post up to MAKE YOUR MONDAY over at the Twice Remembered Cottage. And I am linking up to Metamorphosis Monday over at Between Naps on the Porch.  Lot’s of projects to investigate this week!!